
User`s guide

180 Localizing the SmartServer Web Interface
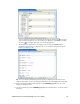
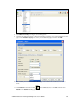
2. Connect i.LON Vision 2.0 to your SmartServer. To do this, click Manage Connections in the
Sites pane on the left side, or click File and then click Site Manager. The Site Manager dialog
opens. Click New Site, the Edit Site dialog opens. Enter your SmartServer’s information, and
then click OK twice. A link with the IP address of your SmartServer is added to the Sites pane.
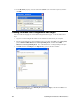
3. Create a new custom SmartServer Web page. To do this, click the New button on the Editor
toolbar (
), or click File and then click New Page. The Select Folder dialog opens.
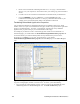
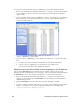
4. Expand the SmartServer icon, expand and click the user folder (you must create the new folder in
the root/web/user directory on the SmartServer flash disk), and then click the New Folder icon to
create the directory for your custom SmartServer 2.0 Web page.
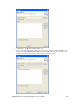
5. The New Folder dialog opens. Enter the name for the folder where all the custom SmartServer
2.0 Web pages for a given Web design will be stored. Click OK.
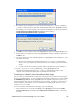
6. Click the custom SmartServer 2.0 Web page folder you created in step 5, and then click OK.
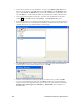
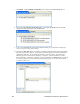
7. In your new custom SmartServer Web page, click Insert, and then select one of the following
objects that represent the application objects you can add to your custom SmartServer Web page:
Data Point View, Data Logger View, Scheduler, or Alarm Notifier. This example uses a
Scheduler object.