
Owner`s manual


4
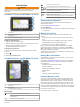
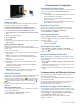
Close the door.
Software Update
You may need to update the device software when you install
the device or add an accessory to the device.
Loading the New Software on a Memory Card
1
Insert a memory card into the card slot on the computer.
2
Go to www.garmin.com/support/software/marine.html.
3
Select Download next to Garmin Marine Network with SD
card.
4
Read and agree to the terms.
5
Select Download.
6
Select Run.
7
Select the drive associated with the memory card, and select
Next > Finish.
Updating the Device Software
Before you can update the software, you must obtain a
software-update memory card or load the latest software onto a
memory card.
1
Turn on the chartplotter.
2
After the home screen appears, insert the memory card into
the card slot.
NOTE: In order for the software update instructions to
appear, the device must be fully booted before the card is
inserted.
3
Follow the on-screen instructions.
4
Wait several minutes while the software update process
completes.
The device returns to normal operation after the software
update process is complete.
5
Remove the memory card.
NOTE: If the memory card is removed before the device
restarts fully, the software update is not complete.
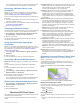
GPS Satellite Signals
When you turn on the chartplotter, the GPS receiver must collect
satellite data and establish the current location. When the
chartplotter acquires satellite signals, appears at the top of
the Home screen. When the chartplotter loses satellite signals,
disappears and a flashing question mark appears over on
the chart.
For more information about GPS, go to www.garmin.com
/aboutGPS.
Selecting the GPS Source
You can select your preferred source for GPS data, if you have
more than one GPS source.
1
Select Settings > System > GPS > Source.
2
Select the source for GPS data.
Customizing the Chartplotter
Customizing the Home Screen
You can add items to and rearrange items on the Home screen.
1
From the Home screen, select Customize Home.
2
Select an option:
• To rearrange an item, select Rearrange, select the item to
move, and select the new location.
• To add an item to the Home screen, select Add, and
select the new item.
• To remove an item you have added to the Home screen,
select Remove, and select the item.
Setting the Vessel Type
You can select your boat type to configure the chartplotter
settings and to use features customized for your boat type.
1
Select Settings > My Vessel > Vessel Type.
2
Select Powerboat or Sailboat.
Adjusting the Backlight
1
Select Settings > System > Display > Backlight.
TIP: Press from any screen to open the backlight settings.
2
Select an option:
• Adjust the backlight level.
• Select Auto Backlight.
Adjusting the Color Mode
1
Select Settings > System > Display > Color Mode.
TIP: Press from any screen to access the color settings.
2
Select an option.
Hiding and Showing the Menu Bar
NOTE: This feature is not available on all chartplotter models.
You can hide the menu bar automatically to make more screen
space available.
1
Select Settings > System > Display > Menu Bar Display >
Auto Hide.
After a short period of time on a main page, such as a chart,
the menu bar collapses down.
2
Swipe the screen from the bottom up to show the menu bar
again.
Communication with Wireless Devices
The chartplotters can create a wireless network to which you
can connect wireless devices.
Some models also can connect to Bluetooth
®
wireless devices
using the AVRCP profile.
Connecting wireless devices allows you to use Garmin apps,
including BlueChart
®
Mobile and Garmin Helm
™
. See
www.garmin.com for more information.
Setting Up the Wi‑Fi
®
Wireless Network
The chartplotters can create a Wi‑Fi network to which you can
connect wireless devices. The first time you access the wireless
network settings, you are prompted to set up the network.
1
Select Settings > Communications > Wireless Devices >
Wi-Fi® Network > Wi-Fi® > On > OK.
2
If necessary, enter a name for this wireless network.
3
Enter a password.
2 Customizing the Chartplotter