USER MANUAL MANUAL DE INSTRUCCIONES NOTICE D'UTILISATION BEDIENUNGSANLEITUNG NXA series
Graphic Symbol Explanation The lightning flash with arrowhead symbol, within an equilateral triangle, is intended to alert the user to the presence of uninsulated “dangerous voltage” within the product’s enclosure that may be of sufficient magnitude to constitute a risk of electric shock to persons. The exclamation point within an equilateral triangle is intended to alert the user to the presence of important operating and maintenance (servicing) instructions in the literature accompanying the appliance.
LIST OF CONTENTS 1. IMPORTANT NOTE 1.1. Precautions 04 04 2. INTRODUCTION 04 3. INSTALLATION 06 3.1. Location, assembly, ventilation 3.2. Mains connection 3.3. Signal input connections 3.4. Output connections 3.5. Ethernet port 3.6. GPI remote control ports 3.7. Connecting the GPI remote control ports 3.8. FAULT port (equipment self-diagnosis) 4. OPERATION AND USAGE 4.1. Start up 4.2. Front panel LED indicators 4.3. Front panel controls 06 06 06 07 07 07 07 08 09 09 09 10 5. CLEANING 10 6.
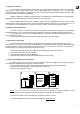
1. IMPORTANT NOTE Congratulations! You're the owner of a carefully designed and manufactured product. Thank you for your confidence and your choice of our NXA series multi-channel digital processing amplifier, with Ethernet and RS-232 remote control. In order to obtain maximum operativity and perfect functioning order, it is most important to carefully read all considerations taken into account in this manual before connecting this amplifier.
TP-NET external remote control protocol, via Ethernet and RS-232 (compatible with Crestron®, AMX®, RTI®, VITY®, etc..
3. INSTALLATION 3.1. Location, assembly, ventilation NXA series products have a 19" rack format (2RU). It is very important not to enclose the amplifier or expose it to extreme temperatures as it generates heat. It’s also necessary to promote the passage of fresh air through the ventilation holes of the chassis, leaving at least one rack unit off between each device and installed above and below it in the rack frame.
3.4. Output connections The rear panel OUTPUTS section is fitted with two position screw terminal block (9) for each amplifier channel (4 or 6, depending on model). Always respect the relative polarity for outputs (+ and - on each output connector), wiring and speakers. In bridge mode, follow the wiring and polarity standard indicated near the output screw terminal block and labeled as "BRIDGE". SINGLE / PARALLEL / BRIDGE operating modes are selected from EclerNet Manager control application.
3.8. FAULT port (equipment self-diagnosis) The rear panel FAULT connector (10) is a NO / NC dry contact linked to the self-diagnosis function of the unit. This function measures from time to time if each amplifier channel is indeed working properly and delivering the correct amplified program to its output terminals. If the test result is correct, i.e. if the amplifier is perfectly operating, the FAULT contact remains at its default position, adopted immediately after the boot sequence.
4. OPERATION AND USAGE 4.1. Start up When the rear panel POWER switch (14) is pressed, the amplifier is powered by the network and can be switched on, briefly holding the front POWER button (6) or remotely from the EclerNet Manager application or with the TP-NET protocol. In a complete audio installation, it is important to start up the equipment in the following sequence: sound sources, mixer, equalizers, active filters, processors and finally power amplifiers.
4.3. Front panel controls The front panel includes a series of knobs and a on/off button. The equipment can be locally switched on by holding down the POWER key until the startup sequence begins. Shutdown also requires holding down the same key during a brief period. The POWER key has an integrated LED that lights up in orange when the amplifier is in standby mode (STANDBY), in green during operation (ON), and in red during the startup sequence or when the amplifier is in protection mode.
6. FUNCTION LIST 7. FUNCTION DIAGRAM 1. Input attenuator 2. Signal present indicator, SP 3. Clip indicator, CLIP 4. Combined clip and protection indicator, CLIP/PROT 5. Data transfer indicator, DATA 6. On / Off key, POWER ON 7. Input terminal block 8. Terminal block to other amplifiers, STACK 9. Output terminal block 10. FAULT terminal block 11. RS-232 terminal block 12. Ethernet port 13. Terminal block for remote control device 14. Start-up switch 15.
Explicación de los Símbolos Gráficos El símbolo del relámpago con una flecha en la punta y dentro de un triangulo equilátero, tiene el propósito de alertar al usuario de la presencia de un voltaje peligroso y sin aislar dentro del aparato, y de una magnitud tal que puede constituir riesgo de descarga eléctrica para las personas.
ÍNDICE 1. NOTA IMPORTANTE 1.1. Precauciones 14 14 2. INTRODUCCIÓN 14 3. INSTALACIÓN 16 3.1. Ubicación, montaje, ventilación 3.2. Conexión a red eléctrica 3.3. Conexiones de entrada de señal 3.4. Conexiones de salida 3.5. Puertos Ethernet y RS-232 3.6. Puertos GPI de control remoto 3.7. Conexionado de los puertos GPI de control remoto 3.8. Puerto FAULT (autodiagnóstico del equipo) 4. FUNCIONAMIENTO 4.1. Puesta en marcha 4.2. Indicadores LED del panel frontal 4.3.
1. NOTA IMPORTANTE ¡Enhorabuena!. Vd. posee el resultado de un cuidadoso diseño y una esmerada fabricación. Agradecemos su confianza por haber elegido nuestro procesador digital multicanal y autoamplificado serie NXA, equipado con control remoto Ethernet y RS-232. Para que pueda conseguir la máxima operatividad y un funcionamiento perfecto, antes de su conexión es MUY IMPORTANTE que lea detenidamente las consideraciones que se detallan en éste manual.
Interfaz Ethernet, compatible con la plataforma software EclerNet Manager y con el sistema webserver-webclient de control remoto UCP (User Control Panels) Interfaz RS-232 Protocolo de control remoto externo TP-NET, via Ethernet y RS-232 (compatible con CRESTRON®, AMX®, RTI®, VITY®, etc.
3. INSTALACIÓN 3.1. Ubicación, montaje, ventilación Los equipos serie NXA se presentan en formato de módulo rack de 19" y dos unidades de altura. Es muy importante que, como elemento generador de calor que es, el amplificador no esté completamente encerrado ni expuesto a temperaturas extremas. Debe favorecerse el paso de aire fresco a través de los orificios de ventilación del chasis, dejando al menos una unidad de rack libre entre cada equipo y los instalados encima y debajo de él en el bastidor de rack.
3.4. Conexiones de salida La sección OUTPUTS del panel posterior está provista de regletas de tornillos de dos contactos (9) por cada canal del amplificador (4 ó 6, dependiendo del modelo). Respete siempre la polaridad relativa de las salidas (marcas + y – de cada conector de salida), cableado y altavoces. En caso de trabajar en modo puente, siga las indicaciones de conexionado y polaridad ubicadas bajo las regletas de salida y rotuladas como “BRIDGE”.
Consulte a su distribuidor ECLER o bien en www.ecler.com acerca de los accesorios disponibles para la conexión a puertos remotos. 3.8. Puerto FAULT (autodiagnóstico del equipo) El conector FAULT (10) del panel posterior es un contacto seco NO/NC que se encuentra enlazado a la función de autodiagnóstico de la unidad. Dicha función mide cada cierto tiempo si, efectivamente, cada canal de amplificación está trabajando correctamente, y entregando el programa amplificado que debería en sus bornes de salida.
4. FUNCIONAMIENTO 4.1. Puesta en marcha Accionando el interruptor de puesta en marcha POWER (14), en el panel posterior, el amplificador recibe suministro eléctrico de la red y queda en condiciones de ser encendido, manteniendo pulsada unos instantes la tecla frontal POWER (6) o remotamente (desde la aplicación EclerNet Manager o protocolo TP-NET).
4.3. Controles del panel frontal El panel frontal integra una serie de controles rotativos y una tecla de encendido / apagado. El encendido local del equipo se realiza manteniendo pulsada la tecla POWER hasta que se inicia la secuencia de arranque. El apagado también requiere de un breve tiempo de mantenimiento en la pulsación de la misma tecla.
6. LISTA DE FUNCIONES 7. DIAGRAMA DE FUNCIONES 1. Atenuador de entrada 2. Indicador de presencia de señal en la entrada, SP 3. Indicador de recorte, CLIP 4. Indicador combinado de recorte y funcionamiento de las protecciones CLIP/PROT 5. Indicador de transferencia de datos, DATA 6. Tecla de encendido / apagado, POWER ON 7. Regleta atornillable para la entrada 8. Regleta atornillable para la conexión en cadena, STACK 9. Regleta atornillable para la salida 10. Regleta atornillable puerto FAULT 11.
Explication des symboles graphiques Le symbole d'éclair avec une flèche, à l'intérieur d'un triangle équilatéral, avertit l'utilisateur de la présence de « tension dangereuse », non isolée, à l'intérieur de l'enceinte du produit, assez importante pour constituer un risque d'électrocution des personnes.
TABLE DES MATIERES 1. NOTE IMPORTANTE 24 1.1. Précautions 24 2. INTRODUCTION 24 3. INSTALLATION 26 3.1. Localisation, montage, ventilation 3.2. Branchement 3.3. Branchement de l'entrée du signal 3.4. Branchement de sortie. 3.5. Ports Ethernet et RS-232 3.6. Ports GPI de télécommande 3.7. Connexion des ports GPI de télécommande 3.8. Port FAULT (auto-diagnostic de l'appareil) 26 26 26 27 27 27 27 28 4. MISE EN MARCHE ET UTILISATION. FONCTIONNEMENT 29 4.1. Mise en marche. 4.2.
1. NOTE IMPORTANTE Félicitations ! Votre achat est le résultat d'une conception rigoureuse et d'une fabrication soignée. Nous vous remercions de la confiance que vous nous témoignez en choisissant notre amplificateur multicanal à processeur numérique de la série NXA, équipé pour la commande par Ethernet et RS-232. Pour obtenir le meilleur résultat de cet appareil, il est important de lire attentivement les instructions cidessous avant de le brancher.
Codecs audio numériques de première catégorie, avec un excellent rapport signal/bruit Interface Ethernet, compatible avec la plate-forme logicielle EclerNet Manager et avec le système client/serveur web de télécommande UCP (User Control Panels) Interface RS-232 Protocole de télécommande externe TP-NET, via Ethernet et RS-232 (compatible CRESTRON®, AMX®, RTI®, VITY®, etc.
3. INSTALLATION 3.1. Localisation, montage, ventilation Les appareils de la série NXA se présentent sous forme de modules pour rack 19" de deux unités de hauteur. Il est très important que, produisant de la chaleur, l’amplificateur ne soit pas complètement enfermé ni exposé à des températures extrêmes.
3.4. Branchement de sortie La section OUTPUTS de la face arrière est pourvue de borniers vissables à deux contacts (9) pour chaque canal d'amplification (4 ou 6, selon le modèle). Respectez toujours la polarité relative des sorties (marquages + et sur chaque connecteur de sortie), du câblage et des enceintes. Lorsque vous travaillez en mode ponté (« bridgé »), suivez les indications de connexion et de polarité données sous les borniers de sortie marquées « BRIDGE ».
NOTE : vous pouvez connecter un maximum de 16 ports de télécommande en parallèle à un même potentiomètre physique de contrôle. Il est impératif que les masses de tous les appareils auxquels appartiennent ces ports soient réunies. Les câbles de connexion peuvent aller jusqu'à 500m avec une section de 0,5 mm2. Consultez votre distributeur ECLER ou bien www.ecler.com pour connaître les accessoires disponibles. 3.8.
4. MISE EN MARCHE ET UTILISATION. FONCTIONNEMENT 4.1. Mise en marche Quand on actionne l'interrupteur d'alimentation POWER (14) en face arrière, l'amplificateur reçoit l'électricité du secteur et est en mesure d'être allumé, en maintenant quelques instants la touche POWER (6) de la face avant ou à distance (au moyen de l'application EclerNet Manager ou du protocole TP-NET).
4.3. Commandes de la face avant La face avant comporte une série de boutons et une touche d’allumage/extinction. La mise sous tension de l’appareil se fait localement en maintenant enfoncée la touche POWER jusqu'à ce que la séquence de démarrage commence. L'arrêt exige également une brève période de maintien de la même touche.
6. LISTE DE FONCTIONS 7. SCHEMA DE FONCTIONNEMENT 1. Atténuateurs d’entrée 2. Indicateur de présence du signal, SP 3. Voyant d'écrêtage, CLIP 4. Indicateur à la fois de clip et de protection, CLIP/PROT 5. Témoin de transfert de données, DATA 6. Touche d'allumage/extinction, POWER ON 7. Borniers vissables d'entrée 8. Borniers vissables pour autres amplis, STACK 9. Borniers vissables de sortie 10. Bornies vissables port FAULT 11. Bornies vissables RS-232 12. Port Ethernet 13.
Erklärung der grafischen Darstellungen Das Blitzsymbol mit dem Pfeil innerhalb eines gleichseitigen Dreiecks soll den Benutzer vor nicht isolierter „gefährlicher Spannung” innerhalb des Produktgehäuses warnen, die hoch genug ist, um einem Menschen einen elektrischen Schlag zu versetzen. Das Ausrufezeichen innerhalb eines gleichseitigen Dreiecks soll den Benutzer darauf hinweisen, dass mit dem Gerät wichtige Gebrauchs- und Wartungs-(Service-)anleitungen in dieser Gebrauchsanweisung geliefert wurden.
INHALTSVERZEICHNIS 1. WICHTIGE VORBEMERKUNG 34 1.1. Vorsichtsmaßnahmen 34 2. EINFÜHRUNG 34 3. INSTALLATION 36 3.1. Plazierung, Montage und Lüftung 3.2. Netzanschluß 3.3. Anschluß der Signaleingänge 3.4. Anschluß der Ausgänge 3.5. Ethernet- und RS-232-Anschlüsse 3.6. GPI-Ports für Fernsteuerung 3.7. Anschluss der GPI-Fernsteuerungs-Ports 3.8. FAULT-Anschluss (Selbstdiagnose des Geräts) 4. BEDIENUNG 4.1. Inbetriebnahme 4.2. LED-Anzeigen an der Vorderseite 4.3.
1. WICHTIGE VORBEMERKUNG Herzlichen Glückwunsch! Sie haben ein Produkt erworben, welches das Ergebnis eines wohldurchdachten Designs und einer sorgfältigen Herstellung ist. Wir bedanken uns für das Vertrauen, das Sie mit der Auswahl unseres digitalen, selbstverstärkenden Mehrkanalprozessors der NXA-Reihe, ausgestattet mit EthernetFernsteuerung und RS-232, in uns gesetzt haben.
Auto-Stand-by-Funktion (optimaler Energieverbrauch) Vollkommen geräuschlos dank seiner passiven Konvektionskühlung (ohne Lüfter) Erstklassige digitale Audio-Codecs mit ausgezeichnetem Signal-to-Noise-Verhältnis Ethernet-Schnittstelle kompatibel mit der Softwareplattform EclerNet Manager und mit dem Webserver-Webclient-Fernbedienungssystem UCP (User Control Panels) RS-232-Schnittstelle Externes Fernbedienungsprotokoll TP-NET über Ethernet und RS-232 (kompatibel mit CRESTRON®, AMX®, R
3. INSTALLATION 3.1. Plazierung, Montage und Lüftung Die Geräte der NXA-Reihe werden im 19"-Rack-Modul-Format mit 2 HE ausgeliefert. Da der Verstärker Hitze erzeugt, ist es sehr wichtig, dass er freistehend aufgestellt und keinen extremen Temperaturen ausgesetzt wird. Es muss für freien Abzug der Luft aus den Lüftungsöffnungen des Gehäuses gesorgt werden, das heisst, unterhalb und oberhalb eines installierten Geräts muss jeweils eine HE des Racks freigelassen werden.
3.4. Anschluß der Ausgänge Der Abschnitt OUTPUTS an der Rückseite des Geräts ist mit Schraubleisten mit zwei Kontakten (9) für jeden Kanal des Verstärkers versehen (4 oder 6, je nach Modell). Berücksichtigen Sie bitte immer die relative Polarität der Signale (Zeichen + und – an jedem Ausgangsstecker), Verkabelungen und Lautsprecher. Arbeitet das Gerät im Bridgemode, so beachten Sie bitte die Angaben zu Anschluss und Polarität, die sich unter den Ausgangsleisten befinden und mit "BRIDGE" beschriftet sind.
ANMERKUNG: Es können bis zu maximal 16 Fernbedienungs-Eingänge parallel an jeweils einen physikalischen Lautstärkeregler angeschlossen werden. Es ist unbedingt erforderlich, dass die Erdkontakte der Geräte, zu denen diese Eingänge gehören, miteinander verbunden sind. Die Anschlusskabel können bis zu 500m lang sein, wenn man einen Durchschnitt von 0,5mm2 verwendet. Erkundigen Sie sich bei Ihrem ECLER Händler oder unter www.ecler.com nach der zu Verfügung stehenden Zubehör. 3.8.
4. BEDIENUNG 4.1. Inbetriebnahme Durch Betätigen des Hauptschalters POWER (14) an der Rückseite des Geräts wird der Verstärker mit Strom versorgt und ist dann zum Einschalten bereit. Hierzu muss die POWER-Taste (6) auf der Vorderseite einige Zeit gedrückt gehalten werden oder aber das Gerät wir über Fernsteuerung (über die Anwendung EclerNetManager oder TP-NET-Protokoll) eingeschaltet.
4.3. Bedienelemente an der Vorderseite An der Vorderseite des Geräts befinden sich eine Reihe von Drehreglern und eine Ein-/Ausschalttaste. Zum lokalen Einschalten des Geräts muss die POWER-Taste bis zum Beginn der Hochfahr-Sequenz gedrückt gehalten werden. Auch zum Ausschalten des Geräts ist diese Taste kurz gedrückt zu halten. Die Taste POWER verfügt über eine integrierte LED-Anzeige, die orangefarben aufleuchtet, wenn sich der Verstärker im Wartebetrieb (STANDBY) befindet.
6. FUNKTIONSLISTE 7. FUNKTIONSDIAGRAMM 1. Eingangsregler 2. Signalanzeige, SP 3. Clip Anzeige, CLIP 4. Kombinierte Clip und Überlastungsschutz Anzeige, CLIP/PROT 5. Datentransfer-Anzeige DATA 6. Ein-/Aus-Taste (POWER ON) 7. Schraubklemmen für Eingang 8. Ausgang zu anderen Verstärkern, STACK 9. Schraubklemmen für Ausgang 10. Schraubklemmen für VAULT port 11. Schraubklemmen für RS-232 12. Ethernet-Port 13. Schraubklemmen für FernbedienungsVorrichtung 14. Netzschalter 15.
8. TECHNICAL CHARACTERISTICS 8. CARACTERISTIQUES TECHNIQUES 8. CARACTERÍSTICAS TÉCNICAS 8. TECHNISCHE DATEN POWER AUDIO POWER 20Hz-20kHz 1% THD 1 Channel @ 4 (RMS) 1 Channel @ 8 (RMS) All Channels @ 4 (RMS) All Channels @ 8 (RMS) 1 Bridge channel @ 8 (RMS) NXA4-80 NXA6-80 NXA4-200 85 W 51 W 66 W 43 W 160 W 84 W 49 W 65 W 42 W 158 W 202 W 121 W 168 W 107 W 383 W Overall Voltage Gain +26 / +32 dB Frequency response (-1dB, -3dB) 10Hz – 25kHz THD + Noise @ 1kHz Full power <0.
DIGITAL Processing: A/D & D/A DSP Latency 24 bit, 48kHz. 115dB AKM Codec 32/64 bits 2ms Analog Input headroom: Digital Input attenuator: Input Impedance: Maximum Delay: Delay resolution: +18 dBV = +21dBu Stepless from – to +0dB Balanced, 22k 1s (343.4m) for each channel 20.8µs (6mm) Compressor / Limiter: Threshold Ratio Attack time Release time from -36dBV to +18dBV 1:1 to :1 (limiter) Auto or from 0.1ms to 500ms. Auto or from 1ms to 5s.
SOFTWARE EclerNet Software - Realtime full GUI of all functions and controls thru Ethernet with interactive graphical display - Grouping mode channels or devices - Automated report generation - Remote power on with programmable delay. - Up to 256 devices on same net. - Autodiscovery devices feature - Routing capability through NAT gateways.
9. BLOCK DIAGRAM 9. DIAGRAMME DE BLOCS 9. DIAGRAMA DE BLOQUES 9.
ECLER Laboratorio de electro-acústica S.A. Motors 166-168, 08038 Barcelona, Spain INTERNET http://www.ecler.com E-mail: info@ecler.es 50.0257.01.