Warnings and caution signs, illustrated below, are posted throughout this manual as well as on the AVN51D. They show safe and correct ways to handle the product to prevent personal injury to you and others and avoid damage to property.Before reading through the manual, take time to read through and learn the important information listed in this section. Cautions for use * The illustrations of screens shown in this manual may differ from the actual screens of this product.
Table of Contents Introduction How to use this manual . . . . . . . . . . . . . . . . . . . . . . . . . . . . 10 Features . . . . . . . . . . . . . . . . . . . . . . . . . . . . . . . . . . . . . . . . . 12 Before using the main unit. . . . . . . . . . . . . . . . . . . . . . . . . . 15 About discs. . . . . . . . . . . . . . . . . . . . . . . . . . . . . . . . . . . . . . . . . . . . . . 17 About playable discs . . . . . . . . . . . . . . . . . . . . . . . . . . . . . . . . . About handling discs . . . . .
Muting sound . . . . . . . . . . . . . . . . . . . . . . . . . . . . . . . . . . . . . . . . . . . . 30 Setting LOUDNESS . . . . . . . . . . . . . . . . . . . . . . . . . . . . . . . . . . . . . . . 31 Setting subwoofer level . . . . . . . . . . . . . . . . . . . . . . . . . . . . . . . . . . . . 31 Setting the background screen . . . . . . . . . . . . . . . . . . . . . . 32 Setting the wallpaper . . . . . . . . . . . . . . . . . . . . . . . . . . . . . . . . . . . . . . 32 Changing the wallpaper . . . . .
Saving radio stations . . . . . . . . . . . . . . . . . . . . . . . . . . . . . . . . . . . . . . 44 Saving manually. . . . . . . . . . . . . . . . . . . . . . . . . . . . . . . . . . . . . Saving with AUTO.P . . . . . . . . . . . . . . . . . . . . . . . . . . . . . . . . . Changing stations saved by AUTO.P . . . . . . . . . . . . . . . . . . . . Displaying information about the current broadcast. . . . . . . . . . . . . . . 44 45 45 45 Turning off the radio . . . . . . . . . . . . . . . . . . . . . . . .
Searching for a music file. . . . . . . . . . . . . . . . . . . . . . . . . . . . . . . . . . . 54 Repeating the same music file . . . . . . . . . . . . . . . . . . . . . . . . . . . . . . . 55 Playing songs in random order . . . . . . . . . . . . . . . . . . . . . . . . . . . . . . 55 About display of file information . . . . . . . . . . . . . . . . . . . . . . . . . . . . . . 56 Displaying folder/file names . . . . . . . . . . . . . . . . . . . . . . . . . . . . 56 Displaying file information . . . . . .
How to operate the DVD player Before using the DVD player . . . . . . . . . . . . . . . . . . . . . . . . 66 DVD video characteristics . . . . . . . . . . . . . . . . . . . . . . . . . . . . . . . . . . 66 About Multiple Languages . . . . . . . . . . . . . . . . . . . . . . . . . . . . . About Multiple Angles . . . . . . . . . . . . . . . . . . . . . . . . . . . . . . . . About Subtitles. . . . . . . . . . . . . . . . . . . . . . . . . . . . . . . . . . . . . . About discs. . . . . . . . . . . . . . . . . .
Table of language codes . . . . . . . . . . . . . . . . . . . . . . . . . . . . . . . . . . . 89 How to operate the VTR How to use the VTR . . . . . . . . . . . . . . . . . . . . . . . . . . . . . . . 90 Viewing the VTR . . . . . . . . . . . . . . . . . . . . . . . . . . . . . . . . . . . . . . . . . 90 Turning off the VTR mode . . . . . . . . . . . . . . . . . . . . . . . . . . . . . . . . . . 90 How to use the steering wheel switch About the steering wheel switches . . . . . . . . . . . . . . . . . . .
For reference Information you should know . . . . . . . . . . . . . . . . . . . . . . 102 If one of these messages appears . . . . . . . . . . . . . . . . . . . . . . . . . . . 102 Before asking for repairs . . . . . . . . . . . . . . . . . . . . . . . . . . . . . . . . . . 104 Others . . . . . . . . . . . . . . . . . . . . . . . . . . . . . . . . . . . . . . . . . 105 Products equipped with Dolby Digital. . . . . . . . . . . . . . . . . . . . . . . . . 105 Products equipped with Macrovision . . . . . . .
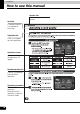
Introduction How to use this manual Section title A title is assigned for each section. Item title A number and title is assigned for each item. Operation title A title is assigned for each operation. Operation screen A screen showing the operation will appear. Detailed operation title A title is assigned for each detailed operation. Operation procedure Describes the operation. Proceed with the operation as per the numerical order.
Introduction Section heading Only the section heading will appear. Attention Additional points regarding the operations are given here.
Introduction Features DVD player with sharp video and dynamic sound (Page 66) Plays DVD Video recorded with high quality images and sound. (DVD media is able to record a movie with high quality video and digital sound that exceeds the quality of CD media.) MP3 player for music discs having 1/10 compression (Page 52) Plays CD-R (recordable) discs that have been compiled in MP3 format. (MP3 is a format that enables recording of the songs of several albums onto a single CD-R.
Introduction Selection and display of favorite wallpaper (screen backgrounds) (Page 32) Wallpaper of your choice can be switched and displayed for use as the background of the information screen and audio playback screens. The screen from a navigation unit can also be linked and selected. ● Setting wallpaper for the information screen and audio operations screen Radio tuner for receiving various broadcasts • AM/FM tuner (Page 38) Enables reception of analog AM/FM radio broadcasts.
Introduction Features • SIRIUS tuner (Page 46) SIRIUS is a satellite broadcasting service offering music, news, sports and other programming with CD-quality sound; This is a paid subscription service. ● SIRIUS operation screen System additions • CD changer (Page 62) A CD changer enables non-stop playing of multiple discs, for convenience at times such as taking a long drive. It is easy to search for and play a song from among the discs on a changer.
Introduction • Be very careful and pay full attention to safety when operating the audio controls while driving, otherwise accidents may occur. Also be sure to set volume so that you can still adequately hear sounds outside the vehicle. Improper use can contribute to a traffic accident. Introduction Before using the main unit • Never continue to use the system if it is malfunctioning in any way. If smoke, abnormal noises or abnormal odors are noticed, turn off the power immediately.
Introduction Before using the main unit • Do not apply excessive force to the monitor. Damage could result. • Do not place items such as cups or cans on top of the monitor, and do not leave the monitor tilted down when not in use. Damage could result. • Do not insert any objects other than discs into the disc slot. Damage could result. • Be careful not to get fingers or other objects behind monitor when it is being retracted into place. Interference can cause an injury or damage the main unit.
• Water droplets can form on the inside of the main unit during cold or rainy weather in the same way car windows can fog up. (This is condensation.) When this happens, the audio can jump and playback can stop, so ventilate or dehumidify the vehicle for a short time before operating the equipment. • To safeguard the components of the player, the unit will automatically stop when a malfunction occurs.
Introduction Before using the main unit About handling discs • Be sure to store discs in their cases and keep them out of direct sunlight. Discs can warp and become unusable. • Do not apply paper-based tape to either the recording side or label side of a disc. Damage could result. • Do not use discs on which there are cracks or large warps. Damage could result. • Do not touch the recorded side of a disc when handling it. (This is the side with the rainbow-colored reflection.
Cellophane tape Recorded surface • Do not use CD discs with attached cellophane tape, rental CD discs with glue protruding from labels or discs with the residue of peeled adhesives. Using discs with those conditions can prevent the player from properly opening and closing as well as cause other damage. Introduction About rental discs About specially shaped discs • Specially-shaped or octagonal CDs, like heart-shaped cannot be played.
Basic operation Switching mode The main unit can be used when the vehicle's ignition switch is on or in the ACC position. • The main unit supports use of a remote control. The optional remote control is sold separately and can be purchased at your local retailer. Refer to page 96 for instructions on operation of the remote control. Switching the mode Press (SOURCE) MENU . • The AUDIO MENU screen will be displayed. Touch FM .
Basic operation Operation screen of each mode The operation screen for each mode will appear as shown below.
Basic operation Adjusting the volume Adjusting main volume Press the VOLUME switch. Pressing will increase volume. Pressing will decrease volume. • Each press of the switch will change the volume by two steps. When the volume reaches 50 or higher, the switch will change the volume by one step. Holding the switch will continue to change the volume.
Basic operation Adjusting sound quality DSP EQ Basic operation To adjust sound quality, touch the DSP, EQ or POS switch while the operation screen for a mode is displayed. Adjustments made in any mode will be saved and applied to all modes. POS In the DVD mode, display the sound quality adjustment switches by pressing from the operation modes, and then SET . In the VTR mode display them either by pressing CONT or by touching the screen.
Basic operation Adjusting sound quality Setting DSP (acoustics) The DSP function reproduces the sensation of various factory set performance environments by adding reverberation to the music being played. DSP mode setting Touching the DSP touch switch brings up the acoustics mode screen as shown. • After making settings, touch BACK . The acoustics mode adjustments will be saved and the system will return to the previous operation screen.
Resetting DSP (acoustics) levels Touch OFF until a beep is heard. • The accoustic level will be returned to default value (the default value is "0"). Basic operation Default settings for the currently adjusted and saved DSP (acoustics) level can be reset. When adjusting the level for the currently selected DSP (acoustics) mode, the level will not be saved for other acoustics modes.
Basic operation Adjusting sound quality Adjusting EQ (equalizer) Adjusts sound quality to preferred characteristics according to the music genre and audio source. Setting sound quality Each factory set equalizer pattern can be selected and adjusted to preference. Touching the touch switch brings up the equalizer mode screen as shown in the table. • After making settings, touch BACK . The equalizer mode adjustments will be saved and the system will return to the previous operation screen.
Adjusting and saving equalizer (EQ) patterns Touch the screen and slowly draw the image of the preferred equalizer curve with your finger. Basic operation Apart from these preset equalizer patterns, you can adjust and record other equalizer patterns to suit your own sound preferences. To make fine adjustments, touch the switch for the frequency to be adjusted. Touch or at the right of the screen to adjust.
Basic operation Adjusting sound quality Setting POS (position selector) The stereophonic position for obtaining optimum acoustic effects can be adjusted to match the number and position of passengers. In addition, front-to-back, right-to-left volume balance can be adjusted for the selected position. Touching the image of a seat shown on the POS setting screen will change the position. • The selected position will change its color to orange. Touching the seat again will cancel the selection.
Adjusting volume balance The set position for front-to-back, right-to-left volume balance can be adjusted. BAL FAD on the Basic operation Touch POSITION setting screen to display the volume balance adjustment screen. Touch the screen at the preferred balance point. • To make fine adjustments, touch , , , . • Touching CENTER will set the volume balance to the center position. • After making settings, touch BACK .
Basic operation Adjusting sound quality Setting the BEEP tone The guide tone that is emitted when touching a panel switch or touch switch can be set to on or off. Touch Touch SETTING on the INFORMATION screen. ON or OFF of GUIDE TONE. • The pressed touch switch will become green. • Touching OFF will cancel (turn off) the guide tone. Touch ENTER . Muting sound Sound from the audio system can be temporarily muted. Press MUTE . • Volume will become zero.
Audio can be modulated to correct for insufficient low and high sounds when listening at low volume. Touch SETTING on the Basic operation Setting LOUDNESS INFORMATION screen. Touch ON or OFF of LOUDNESS. • The pressed touch switch will become green. Touch ENTER . Setting subwoofer level When a woofer is connected, the preferred output level for audio can be set. To connect a woofer, an optional cable is required. Touch SETTING on the INFORMATION screen. Touch or of WOOFER CONT.
Basic operation Setting the background screen The background for the audio screen, information screen and navigation screen can be changed to a preferred wallpaper. Setting the wallpaper Changing the wallpaper Touch SETTING on the INFORMATION screen. Touch 1 , 2 or 3 of WALL PAPER. • The pressed touch switch will become green and the wallpaper (background) will change. Touch 32 ENTER .
Basic operation Adjusting the background screen Setting the opening screen Changing the image on the opening screen Insert a CD-R/RW disc that includes your favorite image. Basic operation The image displayed on the opening screen (which is displayed when the power is turned on) can be changed to your favorite one stored in a CD-R/RW. • It would take approximately 30 seconds to read the image data. While the image data is being read, do not operate the main unit and the ignition key.
Basic operation Adjusting/setting the screen Quality adjustments can be made for the images such as the audio operation screen, navigation screen and DVD or VTR (optional). Displaying the image adjustment screen Contrast, brightness and other picture settings can be adjusted to match preferences for viewing DVD video or the audio operation screen.
DISP on the audio mode screen or DVD/VTR screen. ENTER after making any adjustments. • If no adjustments are made after 20 or more seconds, the image quality adjustment screen will be canceled. ● When adjusting audio operation screen Basic operation Press Touch ● When adjusting DVD/VTR screen How to switch to daytime display when the lights are ON The day screen and night screen will be switched each time DAY is pressed.
Basic operation Adjusting/setting the screen Adjusting image quality The day screen and night screen can be separately adjusted (on the audio operation screen, the navigation screen, and the DVD/VTR screen). ● When adjusting audio operation screen or navigation screen ● When adjusting DVD/VTR screen ■ CONTRAST Touch to strengthen contrast, to weaken contrast. ■ BRIGHT Touch to make lighter, to make darker.
Basic operation ■ NORMAL mode ■ WIDE 1 mode The screen is shown with vertical to horizontal ratio of 3 to 4 (normal TV screen size) and side edges are black. The screen for vertical to horizontal ratio of 3 to 4 (normal TV screen size) is uniformly expanded in the left and right directions. ■ WIDE 2 mode ■ WIDE 3 mode The screen for vertical to horizontal ratio of 3 to 4 (normal TV screen size) is uniformly expanded in the left and right directions (except for the central section of the screen).
How to operate the tuner How to use the AM / FM radio PWR Button (SOURCE) MENU Button Preset Switches TUNE TRACK Button AUTO.P Switch Listening to the AM/FM radio Press (SOURCE) MENU . Touch AM to receive AM radio, or FM to receive FM radio. When an HD radio tuner is connected, the standard radio (analog radio) is also controlled through the HD radio tuner. Note that this means the antenna should be connected to the HD radio tuner.
Selecting radio stations Manual selection Press or . (up switch): Raises frequency (down switch): Lowers frequency RADIO • Each pressing of the switch moves the frequency one step up or down. (One step on the AM band is 10kHz. One step on the FM band is 0.2MHz.) Automatic selection Press and hold the or switch until a beep is heard.
How to operate the tuner How to use the AM / FM radio Saving radio stations There are two modes for saving radio stations, manual and AUTO.P, and these modes operate independently. Saving manually Confirm that "AUTO.P" is not displayed in the upper part of the screen. • If "AUTO.P" is displayed, touching AUTO.P will switch the screen to manual. Use manual tuning or automatic tuning to select the station to be saved. Choose a preset switch and touch it until a beep is heard.
About AUTO.P Touching AUTO.P while AUTO.P is being used or after AUTO.P has been used will return the preset memories back to the condition they had before AUTO.P was used. (Doing so will delete the stations saved with AUTO.P.) The flow for switching from AUTO.P to manual is shown below. Touch AUTO.P beep is heard. Automatically saves stations to preset switches until a Manual Touch AUTO.P (Stations saved by AUTO.P are deleted) RADIO Because AUTO.
How to operate the tuner How to use the AM / FM radio Turning off the radio Press PWR . • Pressing PWR again will turn on the radio and resume reception of the radio station (frequency) received before power was turned off.
How to operate the tuner How to use HD Radio When an optional HD RADIO (High Definition Radio) tuner is connected, HD RADIO (High Definition Radio) broadcasts can be received. PWR Button MODE Switch (SOURCE) MENU Button Preset Switches AUTO.P Switch Title Switch RADIO TUNE TRACK Button Listening to HD RADIO When receiving HD Radio (High Definition Radio) broadcasts, FM reception has the same quality as a CD, and AM reception has the same quality as conventional FM sound.
How to operate the tuner How to use HD Radio Selecting radio stations Manual selection Press or . • Each pressing of the switch moves the frequency one step up or down. (One step on the AM band is 10kHz. One step on the FM band is 0.2MHz. (up switch): Raises frequency (down switch): Lowers frequency Automatic selection Press and hold the or switch until a beep is heard.
Saving with AUTO.P Touch AUTO.P until a beep is heard. Changing stations saved by AUTO.P Refer to "How to use the AM / FM radio" on page 40. RADIO • The AUTO.P function will be activated and start automatically selecting stations. A beep will be heard when automatic selection of stations is completed. • When a radio station found by AUTO.P function is stored into the preset switch, the station already stored in the preset switch will be overwritten.
How to operate the tuner How to use the SIRIUS satellite radio When an optional SIRIUS satellite radio tuner is connected, SIRIUS satellite radio broadcasts can be received. PWR Button (SOURCE) MENU Button Preset Switches TUNE TRACK UP/DOWN Button DIRECT Switch CATEGORY Switch BAND Switch TITLE Switch Listening to SIRIUS satellite radio With SIRIUS satellite radio, over 100 channels are available including music, news, and entertainment programs.
Changing the SIRIUS band Touch BAND on the SIRIUS operation screen. • The BAND changes. [SIRIUS 1] → [SIRIUS 2] → [SIRIUS 3] ... → return to [SIRIUS 1] Selecting from the available categories RADIO Selecting the channel you want to listen to Touch CATEGORY . Select the category that you want. • Touch or to switch categories. If the selected category is unobtainable, the blank category button appears. Selecting a channel by direct input Touch DIRECT . Input a channel. Touch ENTER .
How to operate the tuner How to use the SIRIUS satellite radio Displaying information about the current broadcast During SIRIUS broadcasts, information including the channel name, the album name, the title, and the artist can be displayed for the current track. Touch TITLE . • Touch TITLE OFF to return to the operation screen. Turning off the SIRIUS Press 48 PWR .
RADIO
How to operate the CD player How to use the CD player PWR Button (SOURCE) MENU Button Track selection (track start point)/ Fast-forward (rewind) Button Fast-forward (rewind) switches Repeat Switch Random Switch Scan Switch Listening to a CD When a CD is inserted into the disc slot, it automatically starts playing. Press (SOURCE) MENU Touch CD . while a CD is inserted. • Playback will begin. Selecting a song You can select a song you want to hear. Press • or .
Fast-forwarding/rewinding It is possible to fast-forward/rewind the song played currently. Press or until a beep is heard, or touch and hold or . (up): Fast-forwards (down): Rewinds Searching for a song Touch CD The main unit switches to the fast-forward (rewind) mode when the beep is heard and will continue fast-forwarding (rewinding) until your finger is removed from the switch. SCAN . • The main unit will play the first 10 seconds of each song.
How to operate the MP3 player How to use the MP3 player For safety considerations, some functions are disabled while the vehicle is in motion. PWR Button (SOURCE) MENU Button File changing Switches Track selection (track start point)/ Fast-forward (rewind) Button Repeat Switch Random Switch Scan Switch The following operating procedures are based on this example of MP3 file structure below.
Playing MP3 When a CD is inserted into the disc slot, it automatically starts playing. Press (SOURCE) MENU Touch MP3 . while a disc is inserted. • Playback will begin. • The CD player screen will be shown for about 2 seconds as the system checks whether the inserted CD is a music CD or an MP3 disc. • Normally, tracks are played back in the order → → → → → → Selecting a music file MP3 .
How to operate the MP3 player How to use the MP3 player • If sound data and MP3 data are mixed on the same disc, only the data recorded in the first session can be played. • When MP3 is being played, navigation operation will become slower. This is not a malfunction of the system. Fast-forwarding/rewinding It is possible to fast-forward/rewind in the song being played. Press and hold the • or switch until a beep is heard.
Refer to page 52 for an example of MP3 file structure. When the display shows the folder and files of the second level ( as , and ) of the third level is being played, touching HOME will show the folder and files of the third level ( and ). Repeating the same music file Touch RPT . • The file currently being played will be repeated. • Setting RPT will cause repeating of the song until the function is canceled. Touching RPT again will cancel repeating of the song. Touch RAND .
How to operate the MP3 player How to use the MP3 player About display of file information Folder names and file information (album name and song titles) recorded on the disc can be displayed. The number of characters that can be displayed is as shown below. Screen Display Folder/file names Music file information 8 characters max. 30 characters max. Displaying folder/file names Press CONT to display the operation screen. Displaying file information Touch TITLE .
About MP3 MP3 (MPEG-1 Audio Layer III) is a standard format for audio compression technology. By using MP3, a file can be compressed to one-tenth the size of the original. This unit has limitations on MP3 file standards and recorded media and formats that can be used. Be aware of the following points when recording MP3 files. Playable MP3 file standards • Supported standards : MPEG-1 Audio Layer III • Supported sampling frequencies : 32, 44.
How to operate the MP3 player How to use the MP3 player Format of discs The format of discs to be used must be as following: • Disc format : CD-ROM (MODE 1) • File format : ISO9660 Level 1 or Level 2 ROMEO system, JOLIET system MP3 files recorded in a format other than the one explained above may result in files that cannot be played normally and in file names and folder names that do not display properly. Limitations in addition to standards are as follows.
File names Only files with the MP3 file extension ".mp3" can be recognized as MP3 and played. Be sure to save MP3 files with the ".mp3" file extension. Use half-width English capital letters to write "MP" of the extension. Multi-sessions Multisessions are supported and CD-R/RW with recorded MP3 files can be played. When written with "Track at once", however, finalize the disc with session close or write protect.
How to operate the MP3 player How to use the MP3 player Making and playing MP3 files MP3 files created by recording broadcasts, records, audio recordings, video recordings or live performances cannot be used for purposes other than personal entertainment without permission of the copyright holder as set forth in copyright law.
MP3
How to operate the CD changer How to use the CD changer An optional CD changer can be connected and used. PWR Button Disc changing switches Track selection (track start point) Fast-forward (rewind) Button Fast-forward (rewind) switches (SOURCE) MENU Button Disc repeat switch Disc random switch Disc scan switch Listening to a CD Press (SOURCE) MENU . When only one CD changer is connected, touch CDCH1 . When two CD changers are connected, touch CDCH1 or CDCH2 .
Selecting a CD A CD can be selected from among all the discs on a changer. Touch one of the disc changing switches. • The number for the selected CD will change color. Searching for a song or CD from all CDs in changer Searching for a song Refer to "How to use the CD player" (Page 51). Searching for a CD Touch DISC SCAN . • The system will play the first 10 seconds of the first song on each CD in the changer.
How to operate the CD changer How to use the CD changer Playing songs in random order Playing songs on current CD in random order Refer to "How to use the CD player" (Page 51). Playing songs on all CDs in random order Touch DISC RAND . • Touching DISC RAND will play songs in random order until the function is canceled. Touching DISC RAND again will cancel random playing of songs.
CD changer
How to operate the DVD player Before using the DVD player This equipment can play high quality images and high quality digital sound of DVD videos. It is also possible to switch between different languages recorded on the DVD video (dubbing, subtitles, etc.), and with videos having several angles of the same scene recorded, the preferred angle can be selected and played.
About Subtitles Some DVD discs have subtitles recorded in several different languages, and the subtitles can be switched during playback. The video can also be played without any subtitles displayed. About discs About playable discs This equipment conforms to NTSC color television methods, so please use discs that display "NTSC" on the disc or package. This equipment cannot play discs using color television methods other than NTSC (such as PAL, SECAN).
How to operate the DVD player Before using the DVD player About region codes of playable discs Some DVD discs display a 1 ("Region Code"). The mark (a number) shows the geographical region where the disc can be played. This equipment will not play discs that do not show "1" or "ALL" in this mark. Even if the disc does play, the message "Cannot play this disc" will be displayed on the screen.
About marks displayed on discs The following mark may be displayed on a DVD disc or its package. mark Meaning 3 Shows number of voice tracks. 2 Shows number of subtitle languages. 16:9 LB 4:3 Shows available aspect ratio (television screen horizontal to vertical ratio). • "16:9" is wide screen, "4:3" is standard screen. ALL 1 Shows playable region code. • ALL indicates worldwide. A number indicates a specific region code. "1" is the region number for North America.
How to operate the DVD player Before using the DVD player About DVD disc structure Videos and songs recorded on a DVD are divided into many segments. Large segments are called "titles", and each title has a number ("title number"). Title segments are further divided into smaller segments called "chapters", and each chapter has a number ("chapter number").
About flow of operations The section below describes the flow for items such as operation and search of images and default settings for the DVD player. • Touching a touch switch brings up the operation screen shown below.
How to operate the DVD player How to use the DVD player A DVD can be watched only if the vehicle is completely stopped in a safe location with the parking brake set and the ignition switch turned to ON or ACC. (Only sound can be heard if a DVD is played while the car is in motion.
Operating the video Playing the video Touch . Fast-forwarding/rewinding It is possible to fast-forward or rewind through the video being played. Using panel button Press and hold the switch until a beep is heard. (up): Advances the video (down): Rewinds the video • The main unit switches to the fast-forward (rewind) mode when the beep is heard and will continue fast-forwarding (rewinding) until your finger is removed from the switch.
How to operate the DVD player How to use the DVD player Pausing the video Touch . • While paused ( ), briefly touching will play in slow motion and touching frame. will play frame-by- Stopping the video Touch 74 .
Operating the disc menu It is possible to use the menu recorded on the disc. Touch Touch Touch Touch on the DVD operation screen. MENU or TOP MENU . . and select the video to play. Turning off the DVD Press PWR . DVD Touch ENTER . • Pressing PWR again will resume playback.
How to operate the DVD player How to use the DVD player Searching for a desired chapter It is possible to search for a particular video segment by title and chapter or by menu number (number for divided segments). Searching by chapter Press or • Chapter number . (up): Selects next chapter (down): Selects previous chapter Recorded menu items will differ by disc. Some functions may not perform during operation because playback is following disc content specifications.
Searching by menu number Touch Touch Touch on the DVD operation screen. . NUMBER . • The menu number input screen will be displayed. Input the menu number by touching , -10 , +10 . • Touching or changes the menu number by ones. • Touching -10 or +10 changes the menu number by tens. DVD , Touch ENTER on the DVD operation screen.
How to operate the DVD player How to use the DVD player Changing the touch switch display Display of the touch switches can be changed or turned off. Turning off the touch switches Touch OFF on the DVD operation screen. • Pressing CONT or the touching the screen will display the touch switches again. Changing the touch switch display locations Touch Touch Touch on the DVD operation screen. . POSITION . • The position of the touch switch will move up or down with each touch of the screen.
Switching between screen display and audio It is possible to change the language for subtitles, the language for audio and the display angle for the video being played. Switching the video angle When several angles of a scene are recorded on a disc, the angle can be switched. Touch Touch on the DVD operation screen. ANGLE when the multi- Multi-angle mark angle mark is displayed. • The angle number will be displayed. Touch ANGLE .
How to operate the DVD player How to use the DVD player Switching subtitle languages When subtitles in several languages are recorded on a disc, the subtitles can be switched. Touch Touch on the DVD operation screen. SUB TITLE . • The subtitle number and language will be displayed. Touch SUB TITLE . Subtitle number and language • Switches the subtitle number each time the touch switch is touched and switches the displayed subtitle language.
Switching dubbed audio language When dubbed voices in several languages are recorded on a disc, the voices can be switched. Touch on the DVD operation screen. Touch AUDIO . • The audio number and language will be displayed. Touch AUDIO . Audio number and language DVD • The audio number will change and the language of voices being played will be switched. • Each time AUDIO is pressed, the audio language will change in order from among the languages recorded on the disc.
How to operate the DVD player How to use the DVD player Setting the DVD player The language preference for voices, subtitles and menu display used during DVD playback can be set in advance. Optional display of the multiple angle mark, viewer restriction and other functions can also be set. Touch Touch SET . Touch SETUP . on the DVD operation screen. • The SET UP screen will be displayed. Touch any of the touch switches. Settings can be made for the following items.
Pressing one of the switches that can switch screens ( CONT or (SOURCE) MENU ) without touching ENTER after changing settings with the default setting screen will stop playing of the DVD. Touch operation screen to start playback again. (Refer to page 72.) on the Setting the audio language The preferred language for the video being played can be selected. Touch AUDIO LANGUAGE on the SET UP screen. Touch the preferred language.
How to operate the DVD player How to use the DVD player Subtitle language setting The preferred subtitles for the video being played can be selected. Touch SUB TITLE on the SET UP screen. Touch the preferred language. • Touching OTHER enables setting of a language other than those displayed on the screen. • Touching OFF plays the video with no subtitles on the screen. Input a code Touch OTHER on the SUB TITLE setting screen. Input a language code.
Menu language setting Allows selection of a preferred menu language from those recorded on the disc. Touch MENU LANGUAGE on the SET UP screen. Touch the preferred language. • Touching OTHER enables setting of a language other than those displayed on the screen. Input a code Touch OTHER on the MENU LANGUAGE setting screen. Input a language code. • Refer to "Table of language codes" on page 89 for language codes. DVD Touch ENTER .
How to operate the DVD player How to use the DVD player Setting display of multi-angle mark (angle selection mark) The multi-angle mark can be set to display/not display for the video being played. Multi-angle mark Touch ANGLE INDICATOR on the SET UP screen. • Each time ANGLE INDICATOR is pressed, the condition will switch between "ON" and "OFF". Touch ENTER . • Language switching cannot be performed if the selected language is not recorded on the disc.
Viewer restriction setting This function allows restriction of viewing so that discs with adult themes or violent scenes will not be available to children. Viewer restriction can be set at different levels to match restriction ratings. Touch PARENTAL SETTING on the SETUP screen. Enter a password (4 digits) by touching one number at a time. Touch ENTER . Touch the preferred restriction level. DVD Touch ENTER .
How to operate the DVD player How to use the DVD player Changing video output Touch VIDEO OUT on the SETUP screen. • Each time VIDEO OUT is pressed, the screen size will be changed in the order shown below. 16:9 4:3 letter box 4:3 pan & scan Touch ENTER . • 16:9 The video is displayed in normal wide size. DVD software recorded in 4:3 size will be displayed with black left and right edges or will be expanded to the left and right.
Table of language codes These codes are used to specify the language for audio tracks, subtitles and on-screen menu displays.
How to operate the VTR How to use the VTR Connecting a VTR deck enables watching of video tapes. Videos can be played only if the vehicle is completely stopped in a safe location with the parking brake set and the ignition switch turned to ON or ACC. (Only sound can be heard if a VTR is played while the car is in motion.) To connect a VTR deck to this equipment, an optional connection cable is required. Power button CONT button SOURCE button Viewing the VTR Press (SOURCE) MENU . Touch VTR .
VTR
How to use the steering wheel switch About the steering wheel switches On vehicles equipped with steering wheel switches, these easy-access switches can be used to perform the main audio and other operations.
Radio operations Switch (∧) (∨) Name Channel selection switch Function Explanation of operation Pressing (∧)/(∨) briefly: • Calls up the preset Used to select the next broadcast channels in (previous) preset channel order. • Pressing the switch until it Pressing (∧)/(∨) for longer: Starts automatic channel beeps starts automatic selection. channel selection.
How to use the steering wheel switch About the steering wheel switches DVD operations Switch (∧) (∨) Name Function Chapter selection Selects the next chapter or switches previous chapter. Explanation of operation (∧): Used to select the next chapter. (∨): Used to select the previous chapter. CD changer operations Switch (∧) (∨) 94 Name Track selection switches Function • Selects the next track or previous track or beginning of the current track.
Steering Wheel Switch
How to use an optional remote control How to use an optional remote control (RMC105) Precautions in use of the remote control • Be careful when handling the remote control, especially because it is small and light. Dropping or striking it hard may damage it, wear out the battery or cause a malfunction. • Keep the remote control free of moisture, dust and water. Do not subject it to shock. • Do not place the remote control unit where it will get hot, such as on the dashboard or near a heater vent.
PWR Remote-Control light receptor button button MUTE button button Turning the power on/off When the power is turned on, the state used when the power was turned off such as CD and tuner will be restored. Press PWR . • The power turns on or off each time the button is pressed. When the main unit is shut down, the remote control will not work. Adjusting the audio volume Press • or . button: Increases the volume. button: Decreases the volume.
How to use an optional remote control How to use an optional remote control (RMC105) MODE PRESET•CH button button TUNE•SEEK button Switching playback modes Press MODE . • Press the button to switch modes in the following sequence: AM → FM →CD(MP3) →CD Changer1 →CD Changer2 →DVD →VTR →SIRIUS How to play the tuner Select the tuner mode first. Selecting a station (manually or automatically) A short press of the button will allow manual station tuning.
BAND DISC button button TRACK button How to play CDs Switching CD Changer modes Select the CD Changer mode first. Press BAND . When two CD changers are connected, press BAND to change modes from CD changer 1 → CD changer 2. Advancing to the next track or returning to the beginning of the track being played Select the CD or CD Changer mode first. Press • TRACK . button: Skips to the next track. button: Returns to the beginning of the track being played.
How to use an optional remote control How to use an optional remote control (RMC105) Replacing the battery To prevent accidents, store batteries out of the reach of children. If a child has swallowed one, consult a doctor immediately. Use two AAA-size batteries. Remove the back cover of the remote control unit by gently pressing and sliding it in the direction indicated by the arrow. Install the two batteries provided into the compartment as illustrated.
Remote control
For reference Information you should know If one of these messages appears If any of the following messages are displayed, check the equipment while referring to the Cause and Corrective action columns. Messages 102 Cause Corrective action CD SEEK The CD changer is searching for discs when a magazine has been set in the CD changer. Wait until the unit has finished identifying the type of disc. CD DOOR OPEN The door of the CD changer is open. Close the door of the CD changer.
Messages Cause Corrective action ANTENNA The SIRIUS antenna is disconnected. Check the connection of the SIRIUS antenna. ACQUIRING Displayed when the signal is lost (during access). Try receiving the signal again in the place where there are no obstacles. CALL888-539-SIRIUS You are tuned to a valid channel but you are not subscribed to that channel. Subscribe to SIRIUS. Or, check/change your subscription plan.
For reference Information you should know Before asking for repairs Slight differences in operation can sometimes be mistaken for malfunctions, so check the following table before asking for any repairs. If the following fail to solve the problem, contact the place of purchase. Problem Corrective action This is a characteristic of LCDs. This is not a malfunction. Wait for a brief period. The display is distorted for a brief period after the power is turned on.
For reference Others Products equipped with Dolby Digital Manufactured under license from Dolby Laboratories. "Dolby" and the double-D symbol are trademarks of Dolby Laboratories. Products equipped with Macrovision For reference This unit includes copyright protection technology used in accordance with US patents and other intellectual property rights owned by Macrovision Corporation and other entities.
For reference Glossary CD-R (Compact Disc Recordable) CD-DA (Compact Disc Digital Audio) CD-RW (Compact Disc ReWritable) This disc is the standard for recording and playing of music data. One track is recorded with one song, and a maximum of 74 minutes can be used with the CD. This disc uses a phase transformation method that enables recording and deleting of data as many times needed. Capacity is 700MB (80 minutes of music).
Viewing Restriction This is a DVD video function that "Restricts playing of discs that support viewing restrictions, in accordance with the regulated levels of each country." Restrictions differ by DVD video and may completely prevent playing of the video or may skip or insert alternate scenes for extreme scenes. Title This is the largest unit for divisions of video or songs recorded on a DVD video.
For reference Index by topic About screen and sound adjustment [Regarding screen adjustment] To make the audio operation screen or VTR screen easier to see "Adjusting/setting the screen" . . . . . . . . . . . . . . . . . . . . . . . . . . . . . . . . P34 To turn off the screen "Turning off the screen" . . . . . . . . . . . . . . . . . . . . . . . . . . . . . . . . . . . . . . P35 To change the wallpaper "Changing the wallpaper" . . . . . . . . . . . . . . . . . . . . . . . . . . . . . . . . . . . .
Usage when an HD RADIO tuner is connected To listen to HD RADIO "Listening to HD RADIO". . . . . . . . . . . . . . . . . . . . . . . . . . . . . . . . . . . . . P43 To search for a radio station "Selecting radio stations" . . . . . . . . . . . . . . . . . . . . . . . . . . . . . . . . . . . . P44 To save radio stations "Saving radio stations" . . . . . . . . . . . . . . . . . . . . . . . . . . . . . . . . . . . . . .
For reference Index by topic About using the MP3 player To play an MP3 file "Playing MP3". . . . . . . . . . . . . . . . . . . . . . . . . . . . . . . . . . . . . . . . . . . . . . P53 To select a music file "Selecting a music file" . . . . . . . . . . . . . . . . . . . . . . . . . . . . . . . . . . . . . . P53 When you want to return to a level or don't know the current level "Changing display of the current level". . . . . . . . . . . . . . . . . . . . . . . . .
About using the DVD player To play a DVD video "Watching a DVD" . . . . . . . . . . . . . . . . . . . . . . . . . . . . . . . . . . . . . . . . . . . P72 To learn about discs • To learn about the marks displayed on discs and packages "About marks displayed on discs" . . . . . . . . . . . . . . . . . . . . . . . . . . . . . P69 • To learn about discs that can be played "About playable discs" . . . . . . . . . . . . . . . . . . . . . . . . . . . . . . . . . . . . . . .
For reference Index by topic About using the VTR To use the VTR "How to use the VTR" . . . . . . . . . . . . . . . . . . . . . . . . . . . . . . . . . . . . . . . . P90 Useful functions To operate the audio system by fingertip operations while driving "About the steering wheel switches" . . . . . . . . . . . . . . . . . . . . . . . . . . . P92 When something isn't clear When you don't understand a screen message "If one of these messages appears" . . . . . . . . . . . . . . . . . . . . . . . . . . .
For reference
For reference INDEX A M Adjusting sound quality ...... 23 Adjusting the volume .......... 22 ANGLE ............................... 79 AUTO.P ........................ 40, 45 Multi-angle mark .................79 B Night screen .......................35 NORMAL mode ..................37 BRIGHT .............................. 36 P C POS (position selector) .......28 CD-R (CD-Recordable) ...... 17 CD-RW (CD-ReWritable) .... 17 COLOR ............................... 36 CONT ...............................
V Volume balance ................. 29 VOLUME switch ................. 22 W For reference Wallpaper (background) .... 32 WIDE 1 mode ..................... 37 WIDE 2 mode ..................... 37 WIDE 3 mode ..................... 37 Woofer ................................