™ 1/18-Scale Monster Truck ECX8300 | ECX8300OMP ECX8400 | ECX8400OMP Instruction Manual Bedienungsanleitung Manuel d’utilisation MANUALE Congratulations on your purchase of the ECXTM SmashTM Monster Truck. This 1/18-scale model introduces you to the sport of RC driving. Herzlichen Glückwunsch zum Kauf des ECXTM SmashTM Monster Truck. Dieses 1/18 Scale Model öffnet Ihnen die Welt des RC Car Sports. Nous vous félicitons pour l’achat du ECXTM SmashTM Monster Truck.
EN NOTICE All instructions, warranties and other collateral documents are subject to change at the sole discretion of Horizon Hobby, Inc. For up-to-date product literature, visit http://www.horizonhobby.com and click on the support tab for this product.
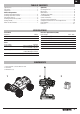
EN Table of Contents Specifications................................................................................. 3 Transmitter..................................................................................... 3 Components................................................................................... 3 Vehicle Preparations Installing Transmitter Batteries..................................................... 4 Installing Transmitter Antenna......................................................
EN Vehicle Preparations Installing Antenna Tube and Body 2 1. Body Clips (ECX8323) 2. Antenna (ECX1087) 1 installing transmitter batteries 1. Slide the panel open on the bottom of the transmitter. 2. Obey the battery plus (+) and minus (-) diagram in the transmitter to install 8 AA batteries. 3. Slide the panel closed. We recommend using only alkaline AA batteries in the transmitter. CAUTION: If using rechargeable batteries, charge only rechargeable batteries.
EN Transmitter controls Reverse Switch ST. D/R Adjusts the amount the front wheels move when turned left or right (Steering Dual Rate) Allows you to change the direction of steering (ST. REV) and throttle (TH. REV) controls. (Default settings are Normal for steering and Reverse for throttle) Throttle Trim Power Switch Power on or off the transmitter Adjusts the neutral point of the electronic speed control Steering Trim Battery Level Indicator Bright Green: Indicates good battery voltage.
EN installing vehicle battery holder 1. Obey the battery plus (+) and minus (-) diagram in the battery holder to install 4 AA batteries. 2. Remove the clip and raise the battery hold down. 3. Install the battery box. 4. Lower the battery hold down and reinstall the clip. 5. Connect the battery box to the Receiver/ESC unit. getting started 1. Power on the transmitter. 3. Do a test of the transmitter’s control of the vehicle with the vehicle’s wheels off the ground. 2.
EN when you are finished 1. Power off the vehicle. 3. Disconnect the battery box from the ESC/Receiver unit. OFF 2. Power off the transmitter. 4. Remove the battery box from the vehicle. OperatioN • • ALWAYS turn on your transmitter before you turn on the receiver in the vehicle. Always turn off the receiver before turning your transmitter off. ALWAYS operate your vehicle in a wide open area. Operating the vehicle in a small space or indoors can cause overheating at low speeds.
EN resetting the esc The ESC comes preset and ready for use. If for some reason you should need to reset the ESC, use the following instructions: 1. Turn on the transmitter and ESC. Press the setup button—the RED and GREEN LEDs will come on. 2. Pull the throttle trigger all the way back (full speed) and press the setup button once—only the GREEN LED will come on. 3. Push the trigger full forward (brake/reverse) and push the setup button once—only the RED LED will come on. 4.
EN Troubleshooting Guide Problem Possible Cause Solution Short Run Time • Vehicle batteries damaged/low voltage • Motor dirty or brushes worn • Check/change AA batteries • Check/clean/replace the motor Sluggish Action • Motor dirty or brushes worn • Bind in drivetrain • Vehicle batteries have low voltage • Check/clean/replace the motor • Clean/adjust the gear mesh between the spur and pinion gears • Replace AA vehicle batteries Controls Reversed • ST. REV or TH.
EN Contact information Country of Purchase United States of America United Kingdom Horizon Hobby Horizon Service Center (Electronics and engines) Horizon Product Support Horizon Hobby Limited Address Phone Number/Email Address 4105 Fieldstone Rd Champaign, Illinois 61822 USA 877-504-0233 productsupport@horizonhobby.com Units 1-4 Ployters Rd Staple Tye Harlow, Essex CM18 7NS United Kingdom +44 (0) 1279 641 097 sales@horizonhobby.co.
IT parts diagram | explosionszeichnung | vue ÉclatÉe des pieces | esploso del modello con referenza pezzi 32 28 37, 38, 39, 40, 41, 42 12 15 24 27 28 15 11 19 34 8 33 17 17 15 36 9 31 23 31 11 18 18 19 13 26 6 39
IT parts diagram | explosionszeichnung | vue ÉclatÉe des pieces | esploso del modello con referenza pezzi 24 24 24 24 12 29 5 30 19 24 19 10 10 29 36 22 31 10 23 13 31 18 7 13 25 3,4,5 40
IT parts diagram | explosionszeichnung | vue ÉclatÉe des pieces | esploso del modello con referenza pezzi 21 16 21 21 14 20 35 35 10 10 parts list | Ersatzteile | Pièces de rechange | Pezzi di ricambio # Description Beschreibung Description Descrizione 1 ECX8150 Transmitter Radio: Smash Sender: Smash Emetteur: Smash Trasmettitore: Smash 2 ECX8151 Transmitter Replacement Antenna Ersatzantenne Sender Antenne de remplacement pour émetteur Antenna di ricambio per trasmettitore 3 ECX830
IT parts list | Ersatzteile | Pièces de rechange | Pezzi di ricambio # Description Beschreibung Description Descrizione 13 ECX8311 Wheel Nut & Drive Pin Set: Smash Radmutter & Mitnehmer Set: Smash Ecrou de roue avec goupille: Smash Set pin e dado fissaggio ruote: Smash 14 ECX8312 Transmission Set: Smash Getriebe Set: Smash Transmission: Smash Set trasmissione: Smash 15 ECX8313 Top Plate & Kickplate: Smash Top & Kickplate: Smash Renfort de châssis avec plaque de friction: Smash Piastra
ECX8300, ECX8300OMP | ECX8400, ECX8400OMP www.ecxrc.com © 2011 Horizon Hobby, Inc. ECX and Smash are trademarks or registered trademarks of Horizon Hobby, Inc.