
User's Manual

Acclarix AX3 Series Diagnostic Ultrasound System User Manual Getting Started
- 24 -
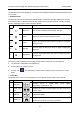
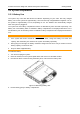
Figure 3-7 Installation of the Battery
5. Close the battery door and screw the three screws.
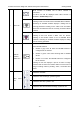
To remove a battery:
1. Turn off and unplug the system.
2. Close the monitor, turn the system upside down and rest it on a flat stable surface.
3. Unscrew the three screws securing the battery door, and remove the battery door.
4. Remove the battery.
5. Close the battery door and screw the three screws.
WARNING
1. When the battery capacity is ≤20%, the battery status icon turns red.
2. When the battery capacity is ≤10%, the system displays a prompt “Low Battery. The
system will shutdown in 3 mins. Please plug in the power supply immediately."
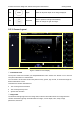
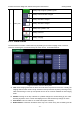
3.3.2. AC Power Use
When using AC power, position the system so that it is easy to disconnect it from AC power supply.
To connect AC power:
1. Connect the AC power cord with the power adapter.
2. Connect the DC power cord from the power adapter to the power connector on the system. Make
sure the side with a "Direction Indicating Dot" should face upside when connecting the DC power
connector, as the illustration below.