
User's Manual


Acclarix LX9 Series Diagnostic Ultrasound System User Manual Presets
- 154 -
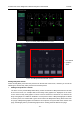
Deleting a Body Mark from a Preset:
Move the cursor to a Body Mark graphic in pre-defined graphics area and press <Set> key. Press
the Delete button on the touch screen to delete it.
Or, press the added Body Mark graphic on the touch screen again to delete it from the selected
preset.
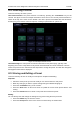
Moving a Body Mark in Pre-Defined Graphics Area:
1. Move the cursor over a Body Mark graphic in pre-defined graphics area, then press-and-hold
the <Set> key , the selected Body Mark graphic will pop up
2. Move the trackball to a desired position and press the <Set> key to confirm the moving. To
move it to another page, move the trackball over page up or down icons.
Setting a Default Body Mark for a Preset:
Select a Body Mark graphic from pre-defined graphics area and press Default, the Body Mark
graphic is set as a default Body Mark to the selected preset.
The default Body Mark can not be deleted from a preset until another Body Mark is selected as a
default one.
General Settings:
Auto-erase Body Mark when the image is unfrozen: If this option is enabled, the Body Mark
will be erased when the image is unfrozen, otherwise the Body Mark will only be erased on
demand or at the start of a new exam.
Suppress Body Mark on Unfreeze: If this option is enabled the Body Mark function goes
away when the system is unfrozen, and comes back again with the next freeze. Manually
exiting the function causes it to remain inactive until manually activated.
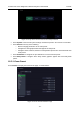
10.4 Measure Presets
Press Utilities->Measure on the touch screen to display the Measure Preset page.
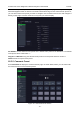
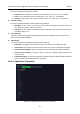
10.4.1. General Set-up
Figure 10-10 General Set-up Screen