
Product Manual


SE-2003&SE-2012 Holter System Recorder User Manual
- 30 -
1. Make electronic labeling registration of SD card (recorder) in analysis system or other
specialized software, or stick the labeling on the SD card surface manually;
2. Insert the SD card into SE-2003/SE-2012 Holter System Recorder (or unplug USB cable);
3. Attach electrodes on patient as per guidance mentioned in previous section and then insert
patient cable into recorder;
4. Load one AAA battery in correct polarity;
5. Set parameters through recorder LCD and keyboard, and then preview ECG wave;
6. If the wave quality is not good, adjust electrodes to receive good ECG graph. Reduce
electrode impedance by adding weight of electrodes if baseline shifts when patient breathes.
7. Start to record and write down starting time in patient log;
8. If necessary, switch recording screen to ECG display so as to observe ECG while recording
data.
NOTE: The inner-placed clock in SE-2003/SE-2012 exactly records starting and ending
time which can be obtained from creating time of event files or data files
afterwards. Some analysis software possibly does not support the function.
Manual recording time depends on the analysis software used.
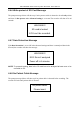
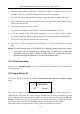
5.2.1 Start Recording
Move cursor to Start Recording in the first level menu, press confirmation key to initiate Start
recording process.
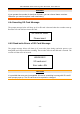
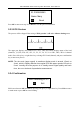
5.2.2 Input Patient ID
The process will be skipped if the setting of Input Patient ID is off under Advance Setting
menu.
The value of position selected by cursor changes from 0 to 9 by pressing left-up key or
right-down key. The cursor will move one digit backward after pressing confirmation key and
move to OK until all of ten patient ID numbers are entered. Shift the cursor between OK and
Reset by pressing left-up key or right-down key. Confirm the selection by pressing confirmation
key to move to the next process. Press Reset to delete entered patient ID and re-input.
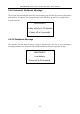
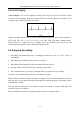
If the patient has been registered in the analysis software beforehand, it will show
ID: 2345604560
OK Reset