Instructions MODEL 130 Professional Sharpening Station® Diamond Hone® GB Read these instructions before use. It is essential that you follow these instructions to achieve optimum results. © 2014 EdgeCraft Corp.
Important Safeguards When using electrical appliances, basic safety precautions should always be followed including the following: 1. Read all instructions. 2. To protect against electrical hazards, do not immerse the Chef’sChoice® in water or other liquid. 3. Make sure that only clean knife blades are inserted in the Chef’sChoice®. 4. Disconnect the appliance from its power source when not in use, before cleaning, during service and when replacing parts. 5. Avoid contacting moving parts. 6.
P You Made a Good Choice rofessional chefs and serious cooks world-wide have for years relied on Chef’sChoice® Diamond Hone® sharpeners to maintain high performance edges on their favorite cutlery. Now with your Chef’sChoice® Professional Sharpening Station® Model 130 you will share the professional’s advantage with knife edges of astonishing sharpness and durability.
Understanding the Versatile Chef’sChoice® Sharpening Station® Model 130 The unique Chef’sChoice® Sharpening Station Model 130 is designed to sharpen each knife according to your intended use, whether it be gourmet food preparation, butchering, dressing of game or filleting of fish. You can sharpen knives made with either straight or serrated edges.
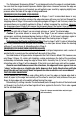
The Sharpening Station (Figure 1) is equipped with elastomeric guide springs that are positioned over each stage to provide a spring action that holds the face of your knife securely against precision angled guide planes in the right and left slots of each stage. Unless you have special blades designed to be sharpened primarily on one side of the edge (such as Japanese Kataba blades), you will want to sharpen equally and alternately in the right and left slots of each stage that you use.
Do not twist the knife (See Figure 3). (Retain the Stage 1 cover as a ready reminder of the sharpening steps.) Move the blade down in the slot until you feel it contact the diamond disk. Pull it towards you lifting the handle slightly as you approach the tip. This will give you a feel for the spring tension. Remove the knife and press the Power Switch. A red “indicator” on the switch appears when this switch is turned “ON”. Stage 1: Start in Stage 1.
Stage 3: In general only two pairs of pulls in Stage 3 will be necessary to obtain a razor sharp edge. As in Stage 1, make alternate pulls in the left (Figure 6) and right slots, pulling the knife through the slots at the same speed used in Stage 1. More pulls in Stage 3 will refine the edge further, creating an edge particularly desirable for gourmet preparations. Fewer pulls in Stage 3 may be preferable if you will be cutting fibrous foods.
Understanding the Professional Steeled Edge With the Chef’sChoice® Professional Sharpening Station® you will for the first time be able to experience the pleasure of cutting and slicing with perfectly steeled edges. You can in just seconds create steeled edges with that extra “bite” and sharpness unmatched by even the most experienced professionals.
new surface on the steel becomes necessary, rotate the slot counter-clockwise one click. By this means, approximately 28 pairs of “steeling” areas are available over the lifetime of the rod. Because the knife edge can be pulled over a given pair of areas on the rods several thousand times before the wear affects the rate or precision of the edge formation, the rods will not need to be rotated very often and they can last a lifetime with normal household use.
The Professional Sharpening Station® is not designed to steel the edge of serrated blades. You can steel the single beveled Japanese Kataba type knives. However, because the edge on one side of these knives is not beveled, you will optimize your results by applying slightly less pressure when that side of the edge is being conditioned.
SUGGESTIONS 1. Always clean all food, fat and foreign materials from knife before sharpening or resharpening. If soiled, wash the blade before sharpening. 2. Use only light downward pressure when sharpening – just enough to establish secure contact with the abrasive disk. 3. Always pull the blade at the recommended speed and at a constant rate over length of blade. Never interrupt or stop the motion of the blade when in contact with the abrasive disks. 4.
particles adhered to a magnet attached to the inside of that cover. Simply rub off or brush off accumulated filings from the magnet with a paper towel or tooth brush and reinsert the cover in the opening. If larger amounts of metal dust have been created or if the Stage 3 disk has been cleaned (using the cleaning/dressing tool) you can shake out any remaining dust through the bottom opening when the cover is removed. After cleaning, replace the cover securely with its magnet in place. Figure 11.