
Owner's Manual


10
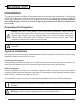
Note: The kegerator should be installed on a rm and level surface that will be able to
support the entire weight of a fully loaded unit. It is important for the kegerator to be level
in order to work properly. If needed, you can adjust the height of the kegerator by rotating
the feet. See the “Leveling the Kegerator” section.
Note: A standard electrical supply (115V AC only, 60 Hz), properly grounded in accordance
with National Electrical Code and local codes and ordinances, is required.
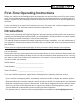
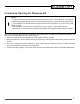
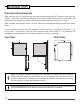
Clearance Requirements
Make sure the top cover, guard rail, drip tray, and installation pegs are NOT installed on the top of the
cabinet. These items will create an obstacle for the cabinet to be installed under counter. Move the
kegerator so the opening on the top of the cabinet is aligned with the opening in the counter.
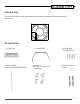
When installing the kegerator under a counter, follow the recommended spacing dimensions shown
below:
To ensure proper service access and ventilation, allow at least 1-2” of clearance at the back,
1
/
2
” at
the top, and
1
/
4
” at the sides. If the door side is against a wall, allow at least 2
3
/
8
” of clearance. The
installation should allow the unit to be pulled forward for servicing, if necessary.
90
Door Swing
2“
24
5
/
8
"
2 /”
1-2”
1/4
”
1/4”
1/2”
1 - 2”
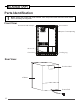
Top View: Side View: