
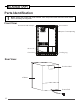
Owner's Manual


8
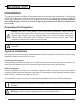
Installation
The kegerator should be installed in accordance with local electrical code requirements. The kegerator
should also be placed in a location that is strong enough to support its total weight, keeping in mind that
it will weigh substantially more when fully loaded than when empty. Before you plug the kegerator
into a power supply, be sure to let it stand upright for at least 24 hours to allow the compressor’s
oils to settle.
Unpacking the Kegerator
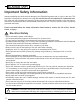
Warning: Use two or more people to move and install the kegerator. Failure to do so
can result in back or other injury. Carefully remove the packaging materials. Remove any
shipping tape and glue from your kegerator before use. Do not use sharp instruments,
rubbing alcohol, ammable uids, or abrasive cleaners to remove tape or glue. These
products can damage the surface of your kegerator.
!
Warning: Do not remove any safety, warning, or product information labels from your
kegerator.
!
Warning: DO NOT install the kegerator behind a closed cabinet door.
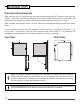
This kegerator has been designed for freestanding or built-in installation. In each case, there must be
adequate ventilation and access for service.
Freestanding Installation:
A freestanding installation will allow you to install the kegerator in almost any place you desire. You
must follow the stated instructions for electrical requirements and leveling the kegerator.
Built-in Installation:
A built-in installation will allow you to install the kegerator under a counter as long as the required
clearance space around the kegerator is provided. It is necessary to allow adequate ventilation space
around the unit, including at the back of the unit.
This installation requires several more steps and considerations than a free standing installation.
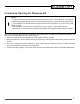
Types of Installation
!
Note: Please refer to the dispense kit installation guide to complete the full assembly of the
kegerator.