TWO-CONSOLE (One Local , One CAT5 Remote) 8 port / 16 port 19” RACK MOUNTABLE PS/2 KVM SWITCH USER’S MANUAL Rev 1.
TABLE OF CONTENTS INTRODUCTION……………….……………………………………..1 FEATURES…………...……………………………………………….2 PACKAGE CONTENTS……………...…………..……………………3 TECHNICAL SPECIFICATIONS………..…………………………….4 SYSTEM REQUIREMENT…………………………………………..5 CABLE DIAGRAMS………………………………………………….5 PRODUCT DETAILS…………………………………………………6 HARDWARE INSTALLATION………………………………………6 USAGE…………………………………………………………………7 DAISY CHAIN CONNECTION DIAGRAM…………………………10 HOT PLUG……………………………………………………………11 ON SCREEN DISPLAY OPERATION……………………………11 TROUBLESHOOTING………………………..…………………….
Introduction Thank you for purchasing Two-Console PS/2 KVM switch. Two-Console PS/2 KVM switch can save your MONEY, TIME, SPACE, EQUIPMENT and POWER. The Two-Console switch controls multiple PCs from One Keyboard, Mouse and VGA Monitor with complete keyboard and mouse emulation for simultaneous PCs boot-up process.
Features z 8/16 port Two-Console PS/2 KVM switch is 19” rack mount size design. z Support one local console and one CAT5 remote console up to 500 feet away from KVM switch. z Support Microsoft Intellimouse, Microsoft Intellimouse Explorer, Logitech Net Mouse or the other fully compatible MS mice. z Support DOS, Win3.
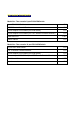
PACKAGE CONTENTS Model No.: Two-console 8 port PS/2 KVM Switch 8 port PS/2 KVM Switch 1 PC CAT 5 Remote Console Receiver 1 PC Power Adapter DC9V,500mA (for KVM Switch) 1 PC Power Adapter DC9V,500mA (for CAT5 Remote Console Receiver) 1 PC Rack Mount Kit User’s manual 1 SET 1 PC Model No.
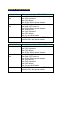
Technical Specifications Model No.
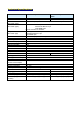
System Requirements Model No. Local Console side Two-console 8 port PS/2 KVM Switch One VGA Monitor One PS/2 Keyboard One PS/2 Mouse One DC9V 500mA power adapter Remote Console One CAT5 cable side One KVM CAT5 receiver One DC9V 500mA power adapter One VGA Monitor One PS/2 Keyboard One PS/2 Mouse One 3-in-one KVM cable Computer side 8 HDDB 15 pin male to one HDDB 15 pin and Mini Din 6 pin special cables Model No.
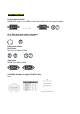
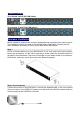
Cable Diagrams PC Port Special Cable: HDDB15 pin male to one HDDB 15 pin male and Mini Din 6 pin special cables ------------Æ AT to PS/2 keyboard adapter: (Optional) Din 5 pin Male to Mini Din 6 pin Female Daisy Chain Cable: PS/2 Cable: Mini Din 6 pin Male to Male VGA Cable: HDDB15 pin Male to Male CAT5/5E/6 Straight Through UTP/STP Cable: 8P8C
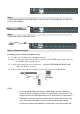
Product Details Two-console 8 port PS/2 KVM Switch: Two-console 16 port PS/2 KVM Switch: Hardware Installation Before installation, please make sure all of peripherals and computers have been turned off. The installation of below is based on 8 port-Rack Mount KVM Switch. Please follow the same installation procedure for 4 and 16 port Rack Mount KVM Switch. Step 1 Find a convenient place to put your KVM Switch. Its 19” rack mount form factor makes it ideal to be mounted on 19” rack.
Step 3 Connect the keyboard to the KVM Switch. If you have an AT type keyboard, you will need an AT to PS/2 adapter. Step 4 Connect the mouse to the KVM Switch. Step 4-1 (Remote Console) Extending your PC console up to 500 feet away: (1) To make sure the CAT5 cable is straight through type. (2) Plug one end of the CAT5 cable into RJ-45 connector of PS/2 KVM switch and the other end into KVM CAT5 receiver RJ-45 port.
remote console at the same time. 2. When the video signal is foggy or un-cleared on the screen, please check if VGA connector is connected properly, or the VGA resolution is too high for the length of cable being used. If the problem happened at VGA resolution, please shorten the CAT5 cable length or reduce VGA resolution. It is highly recommended to use “optimal CAT5 cable length “to get the best video quality and don’t waste unnecessary CAT5 cable.
Now you will see the LED for Port 1 light up, and you will hear a beep. Switch on your monitor. NOTE: It is suggested to plug in power adapter, although the PCs connected to KVM Switch are able to support enough power to the stand alone switch. However, KVM Switch will need a power adapter to daisy chain more banks and if you forget to plug in power adapter on the status of daisy chain, it may cause unexpected consequence.
Keyboard Hot Key Commands: You can also conveniently command KVM switch to switch ports simple via key sequences. To send commands to KVM switch, the “SCROLL LOCK” key must be pressed twice within 2 seconds. You will hear a beep for confirmation and then the keyboard is in hot key mode. If you have not pressed any key in hot key mode within 2 seconds (It means there is no keystroke after “Scroll Lock” “Scroll Lock” key ), the keyboard will be back to Operation System control state.
Scroll Lock + Scroll Lock + R = OSD setting back to factory default value (Note: Not including password) ROM Scroll Lock + Scroll Lock + F = REFLASH Search the same PC name (Note: Search PC name starting from 1st PC port) FIND:█ Scroll Lock + Scroll Lock + Space bar = On Screen Display Menu Below are the different hot key commands (for CAT5 remote): Scroll Lock + Scroll Lock + Scroll Lock + Scroll Lock + C = To select CAT5 Remote PC Port and local PC port which connected to re
B. Use one end of 3-in-one Cable Kit to connect the daisy chain port of bank 1 and the other end to the console port (white color block) of bank 2 KVM switch. C. Please repeat item B to daisy chain more bank as you want. But, the maximum level of daisy chain bank is eight. D. While chaining the slave bank up to six banks, you need a VGA extender between the fifth bank and the sixth bank to enhance the VGA signal.
NOTE: Some O.S. (Operation Systems) like SCO Unix are unable to support “ Hot Plug ” function. If you apply “Hot Plug” to this kind of O.S., it will cause unpredictable behavior or shut down the PC. Before using “ Hot Plug ” , please make sure your O.S. and mouse software driver supports the “Hot Plug” function. On Screen Display Operation 1. The OSD menu can work with the PC port that is powered on, powered off or even disconnected.
BANK : 1 01 SYSTEM 01 02 ☼SYS█EM 02 ( To press “ INS ” key for editing PC name. After finishing the edit, please press “ Enter “ key for saving information. Use “ Tab “ key to select items like Bank, OSD, SCAN, CHANGE PASSWORD, CONSOLE ON/OFF, etc… a. The “OSD: 10 SEC” means that PC system name exists 15 15☼SYSTEM 15 16 SYSTEM 16 10 sec. on your monitor. You can modify it from 05 OSD : 1 0 SEC. ( CHANGE PASSWORD sec to 99 sec. The factory default value is 10 sec.. SCAN: 1 0 SEC.
d. The “ CONSOLE ON/OFF “ means to manage the console users of KVM switch. If you select “ CONSOLE ON “, it means that any user can use the console. If you select “ CONSOLE OFF “(factory default OFF state), it means that any user will not be allowed to use the console unless you enter the password. When you enter the password and pass the KVM switch authentication, the CONSOLE will be set to ON. After you finish using KVM switch, please don’t forget to set CONSOLE ON state back to OFF state.
z When you switch one PC port to another, please set the scan time for 5 sec at least. . Normally, it takes one or tow seconds for the VGA monitor to change from one resolution mode to another. So, the scan time is not recommended to be less than 5 seconds. 7. The power switch is off, but the switch still works fine or power adapter is unplugged from the switch, but the switch still works fine. KVM Switch unit draws the power source from power adapter and all PC’s PS/2 port.
CE – Certificate This equipment is in compliance with the requirements of the following regulations: EN 55 022: CLASS B