
User Manual

23
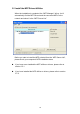
4. Using the MFP
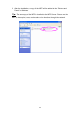
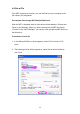
After the installation is completed, the MFP can be connected to your
computer by pressing the connect button. You can start sharing print, scan,
card reader or fax functions provided by the MFP. Please make sure you have
clicked on connect button when you would like to use functions like scanning
and faxing since a direct connection is needed in order to perform those
functions. However, for printing, you are not required to use the MFP utility as
the “windows add a printer” wizard would have made a direct connection from
your machine to the print server. Simply just choose the correct printer to
print from if you would like to print.
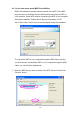
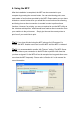
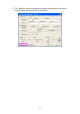
Tip 1: If you have finished using the MFP, please click “Disconnect” to
release the MFP. Another users can’t use the MFP until the MFP is released.
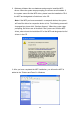
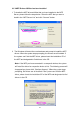
Tip 2: It is recommended to enable “Idle Timeout” setting. The MFP Server
will auto release your connection to the MFP after a period of idle time that
you have assigned. So the MFP will not be occupied too long and other users
can share the MFP frequently. Please refer to Section 6.1 in the manual for
more information.