D Originalbetriebsanleitung………………. 2 - 12 GB Original Instructions…………………….. 13 - 23 F Notice originale....................................... 24 - 34 NL Oorspronkelijke gebruiksaanwijzing…..
DEUTSCH Wichtige Hinweise Wichtige Anweisungen und Warnhinweise sind mittels Symbolen auf der Maschine dargestellt: Vor Inbetriebnahme der Maschine Bedienungsanleitung lesen Arbeiten Sie konzentriert und lassen Sie Sorgfalt walten. Halten Sie Ihren Arbeitsplatz sauber und vermeiden Sie Gefahrensituationen. Vorkehrungen zum Schutz des Bedieners treffen.
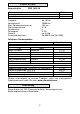
Technische Daten Betonschleifer EBS 1802 SH Nennspannung: Leistungsaufnahme: Bestellnr. 230 V ~ 1800 W 0633L Frequenz: Nenndrehzahl: Max. Scheibendurchmesser: Werkzeugaufnahme: Schutzklasse: Schutzgrad: Gewicht: Funkentstörung nach: 50 - 60 Hz -1 10000 min 125 mm M 14 II IP 20 ca.
Bestimmungsgemäßer Gebrauch Der Betonschleifer ist für den professionellen Einsatz bestimmt. Mit dem für die entsprechende Anwendung geeigneten Schleifteller dient er zum Glätten von Unebenheiten auf Betonflächen, Entfernen von Schalungsnähten, Schlämmhäuten, Beschichtungen sowie von Fugenresten bei der Fliesenerneuerung. Verwenden Sie nur vom Hersteller empfohlene Schleifteller. Diese haben ein geringes Gewicht und eine hohe Rundlaufgenauigkeit.
stehen bleibt. Sie vermeiden damit das plötzliche Anlaufen im unbeaufsichtigten Zustand. Benutzen Sie das Gerät nicht, wenn ein Teil des Gehäuses defekt ist, bzw. bei Beschädigungen an Schalter, Zuleitung oder Stecker. Überprüfen Sie, dass die auf der Scheibe angegebene Drehzahl gleich oder größer als die Drehzahl der Maschine ist. Schleifteller müssen sorgsam nach Anweisung des Herstellers aufbewahrt und gehandhabt werden.
Verwenden Sie nur Verlängerungskabel mit ausreichendem Querschnitt. Ein zu schwacher Querschnitt kann zu übermäßigem Leistungsverlust und zur Überhitzung von Maschine und Kabel führen Die Maschine verfügt über eine Anlaufstrombegrenzung die verhindert, dass flinke Sicherungsautomaten unbeabsichtigt auslösen.
Werkzeugwechsel Vorsicht! Der Schleifteller kann durch den Einsatz heiß werden. Sie können sich die Hände verbrennen oder sich an den Segmenten schneiden bzw. reißen. Benutzen Sie für den Werkzeugwechsel deshalb immer Arbeitsschutzhandschuhe. Vor allen Arbeiten am Gerät Netzstecker ziehen! Zuerst muss das hochklappbare Haubensegment geöffnet werden. Nun kann mit dem Maulschlüssel (1) SW 32 die Flanschscheibe zwischen Getriebe und Schleifscheibe gehalten werden.
Staubabsaugung Beim Arbeiten entstehender Staub ist gesundheitsschädlich. Beim Schleifen ist deshalb ein Staubsauger zu verwenden und eine Staubschutzmaske zu tragen. Die passenden Nass-Trocken-Sauger DSS 25 / 35 / 50 sind als Zubehör erhältlich. Diese werden direkt an den dafür vorgesehenen Stutzen an der Absaughaube angesteckt. Die Maschine ist nach den in der TRGS 559 (Technische Regeln für Gefahrstoffe) Abschnitt 4.3 aufgeführten Anforderungen konzipiert.
1 Gestell mit Halterung 1. 2. 2 Rahmenaufsatz mit Gewichten 3 Scheibe, Federring, 3. Flügelmutter 1 2 3 Montage Arretieren Sie den Ein-/ Ausschalter des Betonschleifers. 2 Danach setzen Sie das Gestell mit der Halterung 1 unterhalb des Rahmengriffes an und fixieren dieses mit Scheibe, Federring und Flügelmutter 3 am Rahmenaufsatz 2 . 2 1 Setzen Sie den Rahmenaufsatz mit den Gewichten 2 auf den Rahmengriff der Maschine auf.
Pflege und Wartung Vor Beginn der Wartungs- oder Reparaturarbeiten unbedingt Netzstecker ziehen! Reparaturen dürfen nur von qualifiziertem, auf Grund seiner Ausbildung und Erfahrung geeignetem Personal durchgeführt werden. Das Gerät ist nach jeder Reparatur von einer Elektrofachkraft zu überprüfen. Das Elektrowerkzeug ist so konstruiert, dass ein Minimum an Pflege und Wartung erforderlich ist.
Bediener erforderlich. Gehörschutz tragen! Die Hand-/Arm-Vibration ist typischerweise niedriger als 2,5 m/s². Messwerte ermittelt entsprechend EN 60 745. Der angegebene Schwingungspegel repräsentiert die hauptsächlichen Anwendungen des Elektrowerkzeugs. Wenn allerdings das Elektrowerkzeug für andere Anwendungen, mit abweichenden Einsatzwerkzeugen oder ungenügender Wartung eingesetzt wird, kann der Schwingungspegel abweichen.
Gewährleistung Entsprechend unserer allgemeinen Lieferbedingungen gilt im Geschäftsverkehr gegenüber Unternehmen eine Gewährleistungsfrist für Sachmängel von 12 Monaten (Nachweis durch Rechnung oder Lieferschein). Schäden, die auf natürliche Abnutzung, Überlastung oder unsachgemäße Behandlung zurückzuführen sind, bleiben davon ausgeschlossen. Achtung! Ein Motorschaden, welcher aufgrund von Nichtbeachten optischen Überlastanzeige entstanden ist, ist kein Garantiefall.
ENGLISH Important Safety Instructions Important instructions and warning notices are allegorized on the machine by means of symbols: Before you start working, read the operating instructions of the machine. Work concentrated and carefully. Keep your work-place clean and avoid dangerous situations. In order to protect the user, take precautions.
Technical Data Concrete Grinder EBS 1802 SH Rated voltage Power input Order no. 230 V 1800 W 0633L Frequency: Rated speed: Max. disc diameter: Spindle: Protection class: Degree of protection: Net weight: Interference suppression: 50 - 60 Hz 10,000 rpm 125 mm M 14 II IP 20 about 5,9 kg EN 55014 and EN 61000 Available special accessories: Item Order No.
Application for Indented Purpose The concrete grinder is indented for professional use. With an appropriate grinding wheel, the tool may be used for smoothing rough concrete, removing mould seams, residual mud, joint fillers and tile adhesives. Only use grinding wheels recommended by the manufacturer. These have a small weight and a high concentricity. Using other grinding wheels can cause an overload of the machine or damage of the bearings and danger to the user.
Don’t use the machine if a part of the housing is damaged or in case of damages on the switch, the cable or plug. Pay attention that the speed indicated on the grinding wheel meets or is higher than the max. speed indicated on the machine. Grinding wheels have to be stored and used carefully according to the instructions of the producer. Check the accessories before use. Do not use any products which are broken, cracked or damaged in another way.
Switching on and off Short-Time Operation Switching-on: Switching-off: press the on/off switch release the on/off switch Permanent Operation Switching-on: Switching-off: ! press the on/off switch and, keeping it pressed, engage the lock-on button press the on/off switch and release it again Attention! In case of every stop of the machine or a power cut, the lock-on button has to be released immediately by pressing the ON/OFF switch.
First of all, the detachable hood segment has to be opened. Now you can hold up the driving disc between gearbox and grinding wheel by using a jaw wrench 32 (1). Use the face spanner (2) to unscrew the driving nut. Then remove the mounted grinding wheel respectively mount the new one. The assembly works the other way round! Let the machine run for a short period of time and in a safe position. If the machine does not run easily, stop working immediately.
Changing the brush rim If the length of the brushes is – due to wear - smaller than 5 mm (extreme formation of dust during grinding), the brush rim has to be replaced completely. Therefore, remove the three fixing screws of the firm part of the dust guard and the two fixing screws of the detachable part. Pull out the worn brush rim and replace it by a new one. Pay attention that the fastening holes in the brush rim and the holes of the dust hood have the same same position. Screw both parts together.
Assembly Lock the ON/OFF switch of the concrete grinder. 2 Then put the device with the holder 1 under the frame handle and fix it with disc, spring ring and wing nut 3 on the top frame 2. 2 1 Put the top frame with the weights 2 on the frame handle of the machine. 3 Wind the line cord of the tool on the holder meant for this purpose. Make sure that the switch of the floor guiding device is not pressed or locked. Plug the grinder in the socket of the floor guiding device.
During work, please pay attention that no particles get inside the machine. In case of failure, a repair has to be carried out by an authorised service workshop. Environmental Protection Raw material recycling instead of waste disposal To avoid damages on transportation, the power tool has to be delivered in a sturdy packing. Packaging as well as unit and accessories are made of recyclable materials and can be disposed accordingly.
An estimation of the level of exposure to vibration should also take into account the times when the tool is switched off or when it is running but not actually doing the job. This may significantly reduce the exposure level over the total working period. Identify additional safety measures to protect the operator from the effects of vibration such as: maintain the tool and the accessories, keep the hands warm, organisation of work patterns.
Declaration of Conformity We declare under our sole responsibility that the product described under “Technical Data” is in conformity with the following standards or standardization documents: EN 60 745 according to the provisions of the directives 2011/65/EU, 2004/108/EG, 2006/42/EG Technical file (2006/42/EC) at: Elektrowerkzeuge GmbH Eibenstock Auersbergstraße 10 D – 08309 Eibenstock Lothar Lässig General Manager Frank Markert Head of Engineering 03.08.
FRANÇAIS Consignes de Sécurité Des instructions et avertissements importants sont présentés par symboles sur la machine. Pour utiliser la machine en toute sécurité, lire d’abord attentivement le mode d’emploi et respecter les directives indiquées. Travailler concentré et avec soin. Veuillez à ce que votre espace de travail reste propre et évitez des situations dangereuses.
Gerätekennwerte Ponceuse à Béton EBS 1802 SH Tension nominale Puissance absorbée Référence 230 V 1800 W 0633L Fréquence: Vitesse nominale: Max.
Mode d‘emploi La ponceuse à béton est un outil pour usage professionnel. En utilisant les disques appropriés, la ponceuse sert à égaliser des déformations sur surfaces de béton, à enlever des coutures de coffrage, surfaces de boue et des bavures de poses de carrelage. N'utilisez que les disques recommandés par le fabricant ! Des disques trop lourds ou non équilibrés peuvent conduire à la surcharge et à la détérioration de la machine.
Débrancher la machine si elle reste inutilisée pour une raison quelconque. Vous éviterez ainsi un démarrage brusque et sans surveillance. Ne pas utiliser l’appareil lorsqu’une partie du carter est endommagée, ou en cas de dégâts à l’interrupteur, au câble ou à la prise. Vérifiez que la vitesse maximale d’utilisation indiquée sur le disque soit au moins égale à celle de la machine. Stocker et utiliser les disques avec soin et selon les instructions du fabricant. Contrôler les outils avant toute utilisation.
Raccordement électrique Avant la mise en service, vérifiez si la tension et la fréquence du secteur correspondent aux données figurant sur la plaque signalétique. Des écarts de tension de + 6% à – 10% sont admissibles. Cette ponceuse est réalisée dans la classe de protection II. Utiliser uniquement des rallonges ayant un diamètre suffisant. Un diamètre trop petit pourrait diminuer considérablement la performance et faire surchauffer la machine et le câble.
Remplacement du Disque Précautions ! Le disque peut chauffer excessivement en ponçant. Vous pourriez vous brûler les mains, vous couper ou vous écorcher avec les segments. Portez donc toujours des gants de protection pour changer le disque. Avant de changer le disque, débranchez le câble d’alimentation de la machine ! Il faut commencer par déposer la partie démontable du capot anti-poussière. On peut ensuite verrouiller le disque d’entraînement entre la machine et le disque à l’aide de la clé de 32 (1).
PCD 12 000 tpm noir application universelle – par exemple : béton, arase, résidus d’adhésif et revêtement – meule de ponçage avec diamants monobloc Aspiration des poussières L’exposition aux poussières de béton peut nuire à la santé. C’est pour cette raison que la ponceuse à béton doit être raccordée à un aspirateur industriel et qu’il faut porter un masque anti-poussière (classe de filtre P2). Un tel aspirateur est disponible en accessoire, il peut être raccordé directement à la ponceuse.
1. 1 dispositif avec support 2. 2 châssis supérieur avec poids 3 disque, anneau élastique, 3. écrou papillon 1 2 3 Assemblage Bloquez l’interrupteur ON/OFF de la ponceuse à béton. 2 Placer le châssis supérieur avec les poids 2 sur la poignée du châssis de la machine Placez ensuite le dispositif avec le support 1 sous la poignée de châssis et fixez-le avec un disque, un anneau élastique et l’écrou sur le châssis supérieur .
Entretien Avant de procéder à des travaux d’entretien ou de réparation, retirer la prise du secteur et vérifier la mise hors service de la ponceuse. Les réparations ne peuvent être effectuées que par un personnel qualifié, choisi en raison de sa formation et de son expérience. Après chaque réparation, l’appareil doit être examiné par un électricien qualifié. De par sa conception, cette machine nécessite un minimum de soin et d’entretien.
Bruit / Vibration Le bruit de cet appareil est mesuré selon la norme DIN 45 635, partie 21. Le niveau de pression acoustique sur le lieu de travail peut dépasser 85 dB (A). Dans ce cas, il convient de prendre des mesures de protection antibruit pour l’utilisateur. Portez une protection acoustique ! Le niveau de vibration de la main et du bras est typiquement inférieur à 2,5 m/s². Mesures réalisées conformément à la norme européenne EN 60 745.
Garantie Conformément à nos conditions générales de vente, la durée de la garantie pour les entreprises est de douze mois (justification par facture ou bon de livraison).Les dommages résultant d’une utilisation anormale, d’une surcharge ou d’une manipulation non conforme en sont exclus. Les dommages résultant de vices de matières premières ou de fabrication seront pris en charge gratuitement par réparation ou remplacement.
NEDERLANDS Belangrijke richtlijnen Belangrijke richtlijnen en veiligheidsvoorschriften staan met symbolen op de machine Gebruiksaanwijzing lezen Werk voorzichtig en geconcentreerd. Houd uw werkplek schoon en vermijd gevaarlijke situaties. Neem voorzorgsmaatregelen om de gebruiker te beschermen.
Technische gegevens Betonslijper EBS 1802 SH Nominale spanning: Opgenomen vermogen: Bestelnummer: 230 V 1800 W 0633L Frequentie: Nominale draaisnelheid: maximale grootte van de slijpschijf: Gereedschapshouder: Beschermingsklasse: Beschermingsgraad: Gewicht: Ontstoring: 50 - 60 Hz -1 10,000 min 125 mm M 14 II IP 20 6,1 kg EN 55014 en EN 61000 Verkrijgbare accessoires: Item Bestelnummer Diamant slijpwiel Type Beton standard Beton premium Egalisatiebeton Rapid K PCD segmenten acute PCD segmenten afgero
Toepassing voor Bestemd Doeleinde De betonslijper is bedoeld voor professioneel gebruik. Het gereedschap, uitgerust met een gepast slijpwiel, kan worden gebruikt voor het effenen van ruw beton of het verwijderen van vormplooien, opgedroogde modder, voegvulling en kleefmiddelen voor tegels. Gebruik alleen slijpwielen die door de fabrikant worden aanbevolen. Deze zijn licht van gewicht en hebben een hoge concentriciteit.
demontage van de machine, in geval van een spanningsval of tijdens het plaatsen of afhalen van een accessoire. Schakel de machine uit als deze onverwacht stopt. Voorkom dat de machine plotseling en zonder toezicht wordt gestart. Niet gebruiken indien delen van de behuizing, de knoppen, de kabel of de stekker beschadigd zijn. Zorg dat de snelheid vermeld op het slijpwiel voldoet of hoger is dan de max. snelheid vermeld op de machine.
Gebruik uitsluitend verlengsnoeren met een voldoende dwarsdoorsnede. Een dwarsdoorsnede die te klein is kan leiden tot een aanzienlijke daling van de prestaties en oververhitting van de kabel machine. Het gereedschap is uitgerust met een snelheidsbegrenzer bij opstart om een snelle expulsie-smetveiligheid door onverwachte reacties te voorkomen.
Draag daarom altijd werkhandschoenen wanneer u het slijpwiel vervangt. Haal altijd de stekker uit het stopcontact voordat u een handeling op het gereedschap uitvoert! Ten eerste, de opvouwbare kap segment worden geopend. Dan kan men met de steeksleutel (1) SW 32 de flensschijf tussen de motor en de slijpschijf tegenhouden. Met de speciaalsleutel (2) kan de bevestigingsmoer losgedraaid worden. Het vastzetten van de nieuw slijpschijf gebeurt in de omgekeerde volgorde.
Stof Afzuiging Stof dat tijdens werkzaamheden ontstaat is gevaarlijk voor uw gezondheid. Daarom moet de betonslijper worden gebruikt in combinatie met een stofzuiger, en u dient een stofmasker te dragen. De ondersteunde Nat/Droog Stofzuiger DSS 25 / 35 / 50 is verkrijgbaar als accessoire. Deze kan direct worden aangesloten op de stofkap.
1 2 1 apparaat met houder 2 bovenzijde met gewichten 3 ring, aandrukring, vleugelmoer 3 Montage Zet de AAN/UIT schakelaar van de betonslijper vast. 2 Zet dan het apparaat met de beugel 1 onder de hendel en zet deze vast met de ring, aandrukring en vleugelmoer 3 aan de bovenzijde 2 . 2 1 Plaats de bovenzijde met de gewichten 2 op de beugel op de machine. 3 Wind het snoer van de machine op in de houder die hiervoor bedoeld is.
Onderhoud Sluit de stroomtoevoer af voordat u gaat werken aan de machine! Reparaties mogen uitsluitend door gekwalificeerd, op basis van haar opleiding en ervaring geschikt personeel doorgevoerd worden. Het apparaat dient na iedere reparatie door een vakkundige elektromonteur gecontroleerd te worden. Het elektrische gereedschap is zodanig ontworpen, dat een minimum aan onderhoud noodzakelijk is. Regelmatig dienen echter volgende werkzaamheden uitgevoerd c.q.
Geluid en trilling De geluidsontwikkeling van dit elektrische apparaat wordt gemeten volgens de DIN 45 635, deel 21. Bij gebruik van het apparaat op de werkplek kan het geluidsniveau van 85 dB worden overschreden. In dat geval is het noodzakelijk om gehoorgeschermende maatregelen te treffen. Draag oorbescherming ! 2 De hand-/arm-trilling is lager dan 2,5 m/s . De waarden zijn gemeten volgens de EN 60 745.
Gebruik samen met dit apparaat de industriële stofzuiger DSS 25/35/50 voor hout en/of mineralen om stofverzameling op een hoog niveau te verwezenlijken. De werkplaats moet goed geventileerd zijn. Wij raden het gebruik aan van een stofmasker of filter van klasse P2.
ČESKY Důležitá upozornění Důležité pokyny a výstražná upozornění jsou znázorněny na stroji formou symbolů: Před uvedením stroje do provozu si přečtěte provozní návod Pracujte soustředěně a s pečlivostí. Udržujte své pracoviště čisté a vyhněte se nebezpečným situacím. Učiňte opatření pro ochranu obsluhy.
Technická data Bruska na beton EBS 1802 SH Jmenovité napětí Příkon Objednací číslo 230 V ~ 1800 W 0633L Frekvence: Jmenovité otáčky: Maximální průměr vrtání: Upevnění nástroje: Třída ochrany: Stupeň ochrany: Váha: Odrušení dle 50 - 60 Hz -1 10000 min 125 mm M 14 II IP 20 cca 5,9 kg EN 55014 a EN 61000 dodávané zvláštní příslušenství: Označení Diamantový brusný talíř Typ Beton standard Beton premium Estrich Rapid K PKD segmenty akutní PKD segmenty zaoblené Objednací číslo Barva zlatavě hnědá zlatavě
Určené použití Bruska na beton je určena k profesionálnímu použití. Při použití vhodného brusného talíře odpovídajícího dané aplikaci slouží k hlazení nerovností na betonových plochách, odstraňování spojů bednění, vrstev usazenin a zbytků spár při renovaci obkladů. Používejte jen brusné talíře doporučené výrobcem. Ty mají malou hmotnost a vysokou přesnost oběhu. Použití jiných brusných talířů může vést k přetížení přístroje nebo poškození ložisek a ohrožení obsluhy.
popř. když je poškozený spínač, přívodní vedení nebo zástrčka. Zkontrolujte, zda je počet otáček uvedený na kotouči stejný nebo větší než počet otáček stroje. Brusné talíře musí být uloženy a manipulovány pečlivě dle pokynů výrobce. Před použitím zkontrolujte příslušenství, nepoužívejte zlomené, prasklé nebo jinak poškozené výrobky. Dbejte na to, aby byl nástroj před použitím správně umístěn a upevněn, a nechte jej na cca 30 sekund běžet naprázdno v bezpečné poloze.
Zapnutí/vypnutí Mžikové spínání Zapnutí: Vypnutí: Stiskněte spínač zap/vyp Uvolněte spínač zap/vyp Trvalé sepnutí Zapnutí: Vypnutí: ! Stiskněte spínač zap/vyp a ve stisknutém stavu aretujte západkové tlačítko Znovu stiskněte spínač zap/vyp a poté jej uvolněte Pozor! Při každém zastavení stroje nebo při výpadku proudu okamžitě uvolněte západku stisknutím spínače zap/vyp, abyste zabránili nenadálému opětnému rozběhu stroje (nebezpečí poranění).
Za prvé, na fold-up hood segment otevřít. Nyní podržte přírubový kotouč mezi převodovkou a brusným kotoučem pomocí plochého klíče (1) SW 32. Pomocí svorníkového klíče (2) uvolněte unášecí matici. Poté můžete brusný kotouč odstranit popř. namontovat nový. Montáž probíhá v opačném pořadí. Nechte stroj krátce běžet v bezpečné poloze. Při neklidném běhu nástroje okamžitě přerušte práci. Používejte jen originální příslušenství! Oblasti použití brusných talířů Typ Max.
Výměna kartáčového věnce Při opotřebení kartáčů až do 5 mm (extrémní tvorba prachu při broušení) musí být kartáčový věnec kompletně vyměněn. Odstraňte 3 šrouby v pevné části sací hubice a 2 šrouby v odnímatelné části. Vytáhněte opotřebovaný kartáčový věnec a nahraďte jej novým. Dbejte na to, aby se upevňovací otvory v kartáčovém věnci nacházely na stejném místě jako otvory v ochranném krytu. Sešroubujte oba díly k sobě.
Montáž Zaaretujte spínač zap/vyp na brusce. 2 Poté nasaďte stojan s držákem 1 pod rámovou násadu a upevněte jej na nástavci 2 pomocí kotouče, pružné podložky a křídlové matice 3 . 2 1 Nasaďte nástavec rámu se závažím 2 na rámovou násadu stroje. 3 Naviňte síťové vedení přístroje přes určený držák. Zajistěte, aby nebyl spínač systému podlahového vedení zmáčknut nebo aretován. Strčte brusku do zásuvky systému podlahového vedení. Hadici vysavače veďte přes systém podlahového vedení a spojte ji s bruskou.
Tento elektrický nástroj je konstruován tak, aby vyžadoval minimum péče a údržby. Vždy ale musí být dodrženy následující body: Elektrický nástroj a ventilační drážky musí být stále udržovány v čistotě. Při práci dbejte na to, aby se do vnitřku elektrického nástroje nedostala žádná cizí tělesa. Při výpadku přístroje musí být provedena oprava pouze v autorizovaném servisu.
s odlišnými vložnými nástroji, nebo nebude dostatečně udržováno, může se hladina vibrací lišit. Tím může dojít k podstatnému zvýšení vibračního zatížení. Pro přesný odhad vibračního zatížení by měly být zohledněny i doby, během kterých je přístroj vypnut nebo sice běží, ale ve skutečnosti není používán. Tím může být vibrační zatížení podstatně sníženo.
Prohlášení o shodě Prohlašujeme v plné naší zodpovědnosti, že v odstavci „Technická data“ popsaný výrobek je v souladu s následujícími normami nebo normativními dokumenty: EN 60 745 podle ustanovení směrnic 2011/65/EU, 2004/108/EG, 2006/42/EG Technická dokumentace (2006/42/EG) u: Elektrowerkzeuge GmbH Eibenstock Auersbergstraße 10 D – 08309 Eibenstock Lothar Lässig General Manager Frank Markert Head of Engineering 03.08.
Po polsku Ważne wskazówki Ważne pouczenia i ostrzeżenia zostały przedstawione za pomocą symboli na maszynie: Przed uruchomieniem maszyny przeczytać dokumentację techniczno-ruchową Pracować w sposób skoncentrowany, aby panować nad maszyną. Utrzymywać swoje stanowisko robocze w czystości i unikać niebezpiecznych sytuacji. Przestrzegać przepisów odnośnie ochrony osobistej użytkownika.. Podczas pracy używać ochronę słuchu, okulary, maskę przeciwpyłową, rękawice ochronne, mocne ubranie robocze.
Dane techniczne Szlifierka do betonu EBS 1802 SH Napięcie znamionowe: Pobór mocy: Numer zamówieniowy 230 V ~ 1800 W 0633J Częstotliwość: Znamionowa prędkość obrotowa: Max. średnica talerza szlifierskiego: Mocowanie narzędzia: Klasa ochronności: Współczynnik ochrony: Ciężar: Eliminacja zakłóceń elektrycznych wg: 50 - 60 Hz -1 10000 min 125 mm M 14 II IP 20 ok. 5,9 kg EN 55014 oraz EN 61000 Dostępne wyposażenie: Opis Numer zam.
Użycie zgodne z przeznaczeniem Szlifierka jest przeznaczona do profesjonalnego zastosowania. Szlifierka z wyposażeniem odpowiadającym obrabianemu materiałowi służy do wygładzania nierówności na powierzchniach betonowych, usuwania spoin po szalowaniu jak również resztek z fug po renowacji kafli i płytek. Stosować tylko talerze zalecane przez producenta. Mają one mały ciężar i nie wykazują bicia.
Nie używać maszyny, jeśli część obudowy jest uszkodzona lub jeśli dotyczy to również wyłącznika, kabla doprowadzającego i wtyczki. Sprawdzić czy podana na narzędziu prędkość obrotowa, jest równa lub większa od prędkości obrotowej maszyny. Posługiwanie się i przechowywanie talerzy szlifierskich musi odbywać się dokładnie według wskazówek ich producenta. Skontrolować wyposażenie przed użyciem; nie używać części popękanych, połamanych lub w inny sposób uszkodzonych.
Włączanie / Wyłączanie Chwilowe włączanie Włączanie: Wcisnąć włącznik/wyłącznik. Wyłączanie: Zwolnić włącznik/wyłącznik. . Trwałe włączanie Włączanie: Wcisnąć włącznik/wyłącznik i ustalić wciśnięty stan przyciskiem blokującym. Wyłączanie: Ponownie wcisnąć włącznik/wyłącznik i ponownie zwolnić.
Po pierwsze, składany kaptur segmentu powinny być otwarte.Teraz kluczem płaskim (1) SW 32 trzymać kołnierz między przekładnią a talerzem szlifierskim. Kluczem kołkowym (2) można odkręcić nakrętkę zabierającą. Wyjąć talerz szlifierski względnie zamocować nowy. Montaż wykonać w odwrotnej kolejności. Pozwolić na krótką pracę maszyny w bezpiecznej pozycji. W przypadku wystąpienia drgań narzędzia, natychmiast wyłączyć maszynę.
Wymiana wieńca szczotek Po zużyciu szczotki do 5mm (ekstremalne powstawanie pyłu podczas szlifowania) wieniec szczotek musi być całkowicie wymieniony. Odkręcić 3 śruby w stałej części pokrywy odsysającej i 2 śruby w zdejmowanej części. Wyjąć zużyty wieniec szczotkowy i wymienić go na nowy. Zwrócić uwagę, aby otwory mocujące w wieńcu znajdowały się na tym samym miejscu, co otwory pokrywy osłony. Ześrubować ze sobą obie części.
Montaż Zablokować włącznik / wyłącznik szlifierki. 2 Następnie nałożyć korpus z mocowaniem poniżej uchwytu ramy 1 i ustalić to położenie podkładką zwykłą, podkładką sprężystą, śrubą motylkową 3 na ramie przystawki 2 2 1 Nałożyć przystawkę ramową z obciążnikiem 2 na uchwyt szlifierki. 3 Nawinąć kabel sieciowy szlifierki na przewidziany w tym celu uchwyt. Zapewnić, aby wyłącznik podłogowego systemu szlifującego był w stanie wyłączonym i niezablokowanym.
Utrzymywać w czystości całą maszynę i szczeliny wentylacyjne. Uważać podczas pracy, aby do wnętrza maszyny nie przedostały się żadne ciała obce. W przypadku defektu maszyny zlecać naprawy tylko autoryzowanemu warsztatowi. Ochrona środowiska Odzysk surowców zamiast wyrzucenia do śmieci Dla wykluczenia szkód transportowych maszynę należy dostarczać tylko w stabilnym opakowaniu. Opakowanie jak i maszyna wraz wyposażeniem zostały wykonane z łatwych do recyklingu materiałów i należy je odpowiednio utylizować.
konserwowane, poziom drgań może odbiegać od podanego. Może to znacznie podnieść poziom wibracji w ciągu całkowitego czasu roboczego. Dla dokładnego określenia obciążenia drganiami, powinno się uwzględnić czasy, w których urządzenie jest wyłączone lub pracuje, lecz faktycznie nie jest obciążone. Wyliczenia takie mogą wyraźnie zredukować obciążenie drganiami w ciągu całego czasu pracy urządzenia.
Deklaracja zgodności Oświadczamy z pełną odpowiedzialnością, że produkt, przedstawiony w „Dane techniczne“, odpowiada wymaganiom następujących norm i dokumentów normatywnych: EN 60 745 zgodnie z wymaganiami dyrektyw 2011/65/EU, 2004/108/EG, 2006/42/EG Dokumentacja techniczna (2006/42/EG): Elektrowerkzeuge GmbH Eibenstock Auersbergstraße 10 D – 08309 Eibenstock Lothar Lässig General Manager Frank Markert Head of Engineering 03.08.
Ihr Fachhändler Your distributor Votre marchand spécialisé Uw distributeur Váš specializovaný prodejce Wasz sprzedawca 68 08/2015 95010S39 Elektrowerkzeuge GmbH Eibenstock Auersbergstraße 10 D – 08309 Eibenstock www.eibenstock.