DIVA T/A ISDN Modem User’s Guide International
Third Edition (July 1999) 206-269-03 DIVA T/A ISDN Modem is a trademark of Eicon Technology Corporation. Microsoft, Windows, and Windows NT are registered trademarks of Microsoft Corporation. CompuServe is a registered trademark of CompuServe Incorporated. Hayes is a registered trademark of Hayes Microcomputer Products, Inc. Changes are periodically made to the information herein; these changes will be incorporated into new editions of the publication.
Contents Introduction .......................................................................................................................................... 5 Installation Requirements ................................................................................................................... 6 Connecting the Cables to the DIVAT/A ............................................................................................... 7 Windows 95/98/NT Installation and Setup ..............................
Contents Multiple Subscriber Numbering ...................................................................................................... 120 Assigning Primary and Secondary Numbers to the Phone Ports ................................................................121 Configuring a Port to Answer Any Number no tConfigure dElsewhere ...................................................123 Specifying what numbers the data port should answer ..................................................................
Introduction The DIVA T/A is an external ISDN modem available in S/T and U interface versions. It provides easy and affordable access to the Internet via ISDN. With the DIVA T/A, Small Office Home Office (SOHO) users and telecommuters can combine the higher performance of ISDN with the simplicity of a terminal adapter. The DIVA T/A supports all standard modem AT commands.
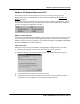
Installation Requirements To install the DIVA T/A, you will require the following: Item Description DIVA T/A Package • • • • • • • • • Desktop or Notebook DIVA T/A can be attached to any desktop or notebook computer. Remote Access Client Software Supplied as part of operating platform or by Internet Service Provider (ISP). ISDN Basic Rate Line Must be installed by your telephone company.
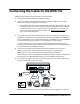
Connecting the Cables to the DIVA T/A Follow the steps below to connect the cables to your DIV AT/A. 1 Turn off your computer before you connect the cables. 2 Connect the RJ45 end of the ISDN cable to the jack labeled ‘ISDN’ on the rear of the DIVA T/A. See below to complete the connection. • • 3 Integrated NT1 (U): Connect the other end of the ISDN cable to your ISDN wall jack. S/T Interface: Connect the other end of the ISDN cable to an NT1 interface, whether part of the ISDN service (e.g.
Connecting the Cables to the DIVA T/A After Connecting the Cables After connecting the power and the ISDN cable to the DIVA T/A, wait at least 10 seconds for the DIVA T/A to initialize and then check the ‘D’ and ‘Link’ LEDs. If they are both glowing continuously, then your DIVA T/A is operational from a previous configuration. If not, you will have to provide information on your ISDN setup using the DIVA Terminal Adapters software, which you will install next. See below.
Windows 95/98/NT Installation and Setup To properly set up the DIVA T/A with a Windows 95/98/NT system, you must connect the cables, configure the operating system, and install the DIVA Terminal Adapters Software. Once the Terminal Adapters software is installed, you will use the Configuration Wizard to set your ISDN parameters. Step 1: Connect the Cables to your DIVAT/A Following the steps outlined on page 7.
Windows 95/98/NT Installation and Setup Windows 95 (Original Release and SP1) This install procedure is for the original release and Service Pack 1 (SP1) version of Windows 95. If you are using Windows 95 Service Release 2 (OSR2), go to “Windows 95 (OSR2)” on page 12. To verify the version installed on your machine, click ‘Start’, ‘Settings’, ‘Control Panel’, ‘System’, then click the ‘General’ tab. If you have the original or SP1 version of Windows 95 installed, you will see ‘4.00.950’ or ‘4.00.
Windows 95/98/NT Installation and Setup 5 In the ‘Install From Disk’ window, enter the drive letter of your CD drive (or use the Browse button to locate your CD drive) and click ‘OK’. 6 In the ‘Select Device’ window, select ‘Eicon DIVA T/A ISDN Modem’ and click ‘OK’. 7 Go to “Installing the DIVA Software” on page 20.
Windows 95/98/NT Installation and Setup Windows 95 (OSR2) This install procedure is for Windows 95 Service Release 2 (OSR2). If you are using original release or Service Pack 1 (SP1) version of Windows 95, go to “Windows 95 (Original Release and SP1)” on page 10. To verify the version installed on your machine, click ‘Start’, ‘Settings’, ‘Control Panel’, ‘System’, then click the ‘General’ tab. If you have Windows 95 OSR2 installed, you should see ‘4.00.950 B’, as shown. DUN 1.
Windows 95/98/NT Installation and Setup 6 Enter the drive letter of your CD drive (or use the Browse button to locate your CD drive) and click ‘OK’. 7 In the ‘Update Device Driver Wizard’ window, click ‘Finish’. 8 Go to “Installing the DIVA Software” on page 20.
Windows 95/98/NT Installation and Setup Windows 98 Warning! It is very important to follow the steps, exactly as described below, to install the DIVA T/A software. The setup file for ISDN modems (mdmisdn.inf), supplied on the Microsoft Windows 98 CD, contains incorrect information about the DIV AT/A ISDN Modem (incorrectly referred to as ‘Eicon T-A External’). Using this setup file will cause the DIV AT/A to operate incorrectly.
Windows 95/98/NT Installation and Setup 6 Select ‘CD-ROM drive’ and click ‘Next’. 7 Click ‘Next’. 8 Click ‘Finish’ and go to “Installing the DIVA Software” on page 20.
Windows 95/98/NT Installation and Setup Windows NT 4.0 RAS Recommended Before you begin installing the DIVA T/A, we suggest that the Remote Access Service (RAS), also known as Dial-Up Networking, be installed with at least one modem. Any modem will do; it is only needed to install the DIVA T/A and can later be removed. Setup Instructions Follow these steps to set up the DIVA T/A under Windows NT 4.0. 1 Power on your PC with all cables connected (see page 7 for instructions).
Windows 95/98/NT Installation and Setup 4 The ‘Install New Modem’ window appears. Select ‘Don't detect my modem; I will select it from a list’ then click ‘Next’. Important: Make sure that you select the choice above and do not let Windows NT choose its own modem driver. If you let Windows NT select the modem driver, you will not be able to communicate with the DIVA T/A. You will then have to delete the Windows NT installed modem and begin the install process again from Step 3.
Windows 95/98/NT Installation and Setup 6 Select ‘Eicon DIVA T-A ISDN Modem’, then click ‘Next’. 7 Select the appropriate COM Port the DI VAT/A is connected to. Click ‘Next’, then click ‘Finish’. 8 Close the ‘Modem Properties’ window. 9 After closing the ‘Modem Properties’ window, you are prompted to configure Dial-Up Networking, as the install modem list has changed. Click ‘Yes’ to configure Dial-Up Networking.
Windows 95/98/NT Installation and Setup Windows NT 3.51 Note on RAS If you are going to use the DIVA T/A with RAS, RAS must already be installed with at least one modem. Any modem will do; it is only needed to install the DIVA T/A and will later be removed. If you do not want to use RAS, go to “Installing the DIVA Software” on page 20. Setup Instructions 1 Power on your PC with all cables connected (see page 7 for instructions). 2 Insert the DIV AT/A CD into your computer's CD drive.
Windows 95/98/NT Installation and Setup Installing the DIVA Software The Setup Wizard installs all necessary files on your system. These include the DIVA T/A on-line documentation, the DIVA Terminal Adapters Program, and the Uninstall utility. Before you proceed, make sure you have completed the pre-installation procedure relevant to your software platform. To find the procedure relevant to your platform, see “Step 2: Configure your Operating System” on page 9.
Windows 95/98/NT Installation and Setup 5 Click the ‘Install DIVA T/A ISDN Modem Software’ button. 6 The Setup Wizard starts. Click ‘Next’ in the Setup Wizard's ‘Welcome’ screen.
Windows 95/98/NT Installation and Setup 7 Specify where you want to install the DIV AT/A software. Click ‘Next’ to install in the default directory (this differs according to your platform); otherwise, click the ‘Browse’ button and select a directory, then click ‘Next’. The Setup Wizard installs all necessary files. 8 Once complete, the ‘Congratulations’ screen appear. Verify that the ‘Launch Configuration Tool’ option is checked and click ‘Finish’.
Windows 95/98/NT Installation and Setup 10 The Configuration Wizard’s ‘Welcome’ screen appears. Click ‘Next’ and follow the on-screen instructions. Note: If an existing configuration is detected, you can skip the Wizard. To keep the existing configuration, click ‘Next’. To reconfigure your device using the Wizard, select ‘Reconfigure using the Configuration Wizard’, then click ‘Next’.
Windows 95/98/NT Installation and Setup 11 When the ‘Congratulations’ screen appears, the installation is complete. Click ‘Finish’. The Wizard closes and the Eicon DIVA Terminal Adapters program appears. (For more information on using this software, see page 32.) Installation Complete The installation under Windows 95/98/NT is complete. If the ‘D’ LED on your DIVA T/A is glowing continuously, the modem is ready to use.
Macintosh (System 7 or Later) Installation and Setup To properly set up the DIVA T/A with a Macintosh system (System 7 or later), you must connect the cables, then install the DIVA Terminal Adapters software. You can then use the Configuration Assistant to set your ISDN parameters. Step 1: Connect the Cables to your DIVAT/A Following the steps outlined on page 7. Step 2: Install the DIVA Terminal Adapters Software The installation program copies all necessary files on your system.
Macintosh (System 7 or Later) Installation and Setup Installing the DIVA Software The installation program copies all necessary files on your system. These include the DIVA T/A on-line documentation and the DIVA Terminal Adapters Program. 1 Power on your PC with all cables connected (see page 7 for instructions). 2 Insert the DIV AT/A CD into your CD ROM drive. 3 Double-click the CD icon. 4 Double-click the ‘Eicon DIVA T/A Installer’ icon.
Macintosh (System 7 or Later) Installation and Setup 8 Click ‘OK’ at the ‘Installation was successful’ message. 9 Continue with “Specifying ISDN Settings via the Configuration Assistant” on page 28.
Macintosh (System 7 or Later) Installation and Setup Specifying ISDN Settings via the Configuration Assistant The Configuration Assistant helps you configure your DIVA T/A ISDN Modem to work with your ISDN network connection. Later you may re-run the Assistant or make changes manually using the Configuration Tool. 1 Open the ‘Eicon Technology’ folder, then the ‘DIVA Terminal Adapters’ folder. 2 Double-click the ‘Eicon DIVA Terminal Adapters’ icon.
Macintosh (System 7 or Later) Installation and Setup 5 At the ‘Welcome’ screen, click ‘Next’ and follow the Configuration Assistant’s on-screen instructions. Note: You should not click the ‘Configure’ button unless you know all of your ISDN parameters and want to configure them manually. If you click ‘Configure’, the Assistant closes and the Configuration Tool starts. If you select this option, see “Configuring a Profile using the Configuration Tool” on page 60.
Macintosh (System 7 or Later) Installation and Setup 7 The Assistant closes and the Eicon DIVA Terminal Adapters program appears. Setup is now complete; you may quit the program by selecting ‘Quit’ from the ‘File’ menu. Installation Complete The installation is complete. If the ‘D’ LED on your DIVA T/A is glowing continuously, the modem is ready to use.
Setup for Other Operating Systems The DIVA T/A does not include native installation applications for Windows 3.x, Windows for Workgroups 3.11, DOS, OS/2, Macintosh (prior to System 7), and other operating systems. However, it is still possible to configure the DIV AT/A using the VT100 Configuration Tool. A VT100-compatible terminal emulation program is required. Windows 3.x and Windows for Workgroups 3.
The DIVA Terminal Adapters Program for Windows 95/98/NT The DIVA Terminal Adapters Program and Configuration Tool for Windows 95/98/NT provides a variety of convenient utilities for editing your ISDN settings. In this Chapter: Introduction........................................................................................... 33 The Profiles Window ........................................................................... 35 About Configuration Profiles...................................................
The DIVA Terminal Adapters Program for Windows 95/98/NT Introduction Launching the DIVA Terminal Adapters Program To launch the Terminal Adapters program: • double-click the T/A icon on the taskbar, or • click ‘Start’, ‘Programs’, ‘Eicon DIV AT-A ISDN Modem’, ‘Eico nDIVA Terminal Adapters’. The ‘Eicon DIVA Terminal Adapters Program’ window appears as shown below. You can launch the Configuration Tool by double-clicking on the DIVA T/A icon.
The DIVA Terminal Adapters Program for Windows 95/98/NT The following table describes the action that each icon performs. To make sure you can see all the icons, select ‘Toolbar’ from the ‘View’ menu, then enable all the options in the list. Click or Select To perform this Action File > Configure Opens the Configuration Tool for the active profile, allowing you modify your ISDN settings. See “Configuring a Profile using the Configuration Tool” on page 37 for more information.
The DIVA Terminal Adapters Program for Windows 95/98/NT The Profiles Window The Profiles window allows you to edit any of the three profiles using the Configuration Tool or Configuration Wizard. You can also rename profiles or set the active profile. To open the Profiles window: 1 Double-click the T/A icon on the taskbar to start the Terminal Adapters program, or click ‘Start’, ‘Programs’, ‘Eicon DIVA T-A ISDN Modem’, ‘Eicon DIVA Terminal Adapters’.
The DIVA Terminal Adapters Program for Windows 95/98/NT About Configuration Profiles A profile is a set of parameters that define a particular ISDN setup. When you installed the DIVA software, the Configuration Wizard helped you configure your ISDN settings. This set of settings was given the default name Profi l e0. In addition to this profile, you can configure two other profiles that define different ISDN setups, which can correspond to the needs of your different applications.
The DIVA Terminal Adapters Program for Windows 95/98/NT Configuring a Profile using the Configuration Tool To configure a profile manually using the Configuration Tool: 1 Double-click the T/A icon on the taskbar to start the Terminal Adapters program, or click ‘Start’, ‘Programs’, ‘Eicon DIVA T-A ISDN Modem’, ‘Eicon DIVA Terminal Adapters’. 2 To configure the active profile, double-click the ‘DIVA T/A’ icon. The Configuration Tool appears. By default, the General tab is displayed.
The DIVA Terminal Adapters Program for Windows 95/98/NT General Tab The General tab allows you to configure your location as well as the protocol you wish to use. If your DIVA T/A does not have phone ports, this is also where you specify your ISDN directory numbers. For DIVA T/A models with phone ports, this tab allows you to enable or disable individual ports; directory numbers are specified in the Phone Port tabs (see page 41).
The DIVA Terminal Adapters Program for Windows 95/98/NT Setting Description MultiLink PPP When you activate Multilink PPP, the DIVA T/A combines both ISDN B-channels into a single 128 kbps communications link. Both channels remain in use as long as long as the connection is active, which may result in excessive ISDN connection charges if the link is frequently idle. Multilink PPP reserves both ISDN B-channels for its exclusive use.
The DIVA Terminal Adapters Program for Windows 95/98/NT Setting Description V.120 The V.120 protocol, more popular in North America, adapts other transmission rates to the 64 Kbps ISDN line rate. V.110 The V.110 protocol, used mostly in Europe, adapts other transmission rates to the 64 Kbps ISDN line rate. V.110 carries asynchronous data rates from 2.4 to 19.2 Kbps.
The DIVA Terminal Adapters Program for Windows 95/98/NT Phone Port Tabs These tabs only applies if your DIVA T/A is equipped with analog device ports. Certain DIVA T/A models provide two phone ports for connecting analog devices such as telephones, fax machines, and modems. Voice calls originating from analog devices are carried over ISDN. Since there are two B-channels, the DIVA T/A supports up to two concurrent phone line connections, depending on whether there is a data call in place or not.
The DIVA Terminal Adapters Program for Windows 95/98/NT Number Assignment Your ISDN Phone number is assigned by your ISDN Service Provider and is used by the DIVA T/A to identify itself on outgoing calls and to recognize incoming calls which are destined for it. Enter the ISDN number you are going to assign for this Phone Port connection. All calls made with this Phone Port will always use the ISDN number you enter here.
The DIVA Terminal Adapters Program for Windows 95/98/NT Second Number If you have a second number that you want to use with this Phone Port, enable this option and enter the second number in this field.
The DIVA Terminal Adapters Program for Windows 95/98/NT Data Tab This panel allows you to change the ISDN number assignment for your connections. If your DIVA T/A has phone ports and the data protocol is set to MultiLink PPP, you also have the option of enabling ‘Dynamic Bandwidth Allocation’. Number Assignment (models with phone ports) If your DIVA T/A does not have phone ports, see “Number Assignment (models without phone ports)” on page 45 .
The DIVA Terminal Adapters Program for Windows 95/98/NT Number Assignment (models without phone ports) If your DIVA T/A is equipped with phone ports, see “Number Assignment (models with phone ports)” on page 44 . Within the Number Assignment group box, you can assign a previously configured number or numbers to your data ports for all your data connections. If you select a specific number for your data connections, you can then monitor the charges for your data calls.
The DIVA Terminal Adapters Program for Windows 95/98/NT BACP Tab This tab is visible only if the data protocol is set to ‘MultiLink PPP with BACP’ or ‘MultiLink PPP with AODI’. BACP activates the DIVA T/A’s automatic traffic monitor for Multilink PPP connections. When activated, this DIVA T/A function monitors the send-and-receive traffic volume. BACP opens or closes the second B-channel as the traffic volume warrants.
The DIVA Terminal Adapters Program for Windows 95/98/NT For example, if your ISDN provider charges a particular amount for the first five minutes online, select 300 seconds in the Initial Billing Interval field. If your ISDN provider charges another amount for each subsequent minute online, select 60 seconds in the Billing Interval field. 1st B-Channel The ‘1st B-Channel’ tab is only visible if the data protocol is set to ‘MultiLink PPP with AODI’.
The DIVA Terminal Adapters Program for Windows 95/98/NT X.25 Tab This tab is visible only if the data protocol is set to ‘MultiLink PPP with AODI’. As AO/DI uses the ISDN D-channel X-25 packet service to maintain an “always on” connection between you and your Service Provider, there are X.25 parameters that can be configured. These are X.25 Facilities and your X.25 Version. This information is provided by your Service Provider.
The DIVA Terminal Adapters Program for Windows 95/98/NT X.25 Facilities options X.25 facilities are optional network services that let you perform tasks such as reversing charges on your calls, accessing a Closed User Group, or specifying a Network User Identification (NUI). The options you select must be supported by your Service Provider. Facilities fall into two groups: those specified at subscription time, and those specified on a per-call basis. X.25 Facilities you configure must match your X.
The DIVA Terminal Adapters Program for Windows 95/98/NT Parameter Description Other Lets you request additional facilities that are not listed in the ‘Common Facilities’ group box. Specifies the code for additional facilities that you want to request each time the destination makes an X.25 call. Enter facilities as hexadecimal octets (eight-bit bytes). This is not intended as an exhaustive description of the User Facilities supported either by the CCITT or by the network you may be using.
The DIVA Terminal Adapters Program for Windows 95/98/NT Advanced Tab This tab allows you to configure advanced options, such as call routing. Call Routing (models with phone ports) If your DIVA T/A does not have phone ports, see “Call Routing (models without phone ports)” on page 52. Call Routing allows you to specify where your incoming calls should be routed.
The DIVA Terminal Adapters Program for Windows 95/98/NT Data Drop Down List Parameter Description PC All data calls to the selected number are forwarded to the PC via the serial port. Not Answered Any data calls to the selected number will not be answered. Call Routing (models without phone ports) If your DIVA T/A is equipped with phone ports, see “Call Routing (models with phone ports)” on page 51. Call Routing allows you to specify where your incoming calls should be routed.
The DIVA Terminal Adapters Program for Windows 95/98/NT Voice to PC Tab This tab is visible only if the ‘Voice to PC’ option is enabled in the ‘Advanced’ tab. The Voice to PC configuration dialog allows you to select the number(s) you wish to assign to all the voice calls made or received via your PC's serial port. You can select either both numbers or one number. If you select a specific number for your voice calls, you can then monitor the charges for your voice calls.
The DIVA Terminal Adapters Program for Windows 95/98/NT Configuring a Profile using the Wizard The Configuration Wizard can take you step-by-step through the configuration of a profile. To use the Configuration Wizard: 1 Double-click the T/A icon on the taskbar to start the Terminal Adapters program, or click ‘Start’, ‘Programs’, ‘Eicon DIVA T-A ISDN Modem’, ‘Eicon DIVA Terminal Adapters’. 2 Right-click on the device icon and choose ‘Wizard’. The Configuration Wizard appears.
The DIVA Terminal Adapters Program for Macintosh The DIVA Terminal Adapters Program for Macintosh computers (System 7 or later) provides you with convenient utilities for editing your ISDN settings. In this chapter: Introduction.................................................................................................... 56 About Configuration Profiles....................................................................58 The Profiles Window .............................................................
The DIVA Terminal Adapters Program for Macintosh Introduction Launching the DIVA Terminal Adapters Program To launch the Terminal Adapters program, double-click on the DIVA Terminal Adapters icon. The ‘Eicon DIVA Terminal Adapters Program’ window appears as shown below. You can launch the Configuration Tool, which allows you to edit your ISDN settings, by clicking on the ‘Profiles’ tab, choosing a profile, then clicking the ‘Configure’ button.
The DIVA Terminal Adapters Program for Macintosh Select To perform this Action Modem > Refresh Modem Info Scans the serial ports for devices. Modem > Factory Default Reverts your DIVA T/A to the original factory settings. Modem > Remove Device Removes the currently selected device. The device will not be available until detected again, and will be presented as a new device for configuration. To detect the device again, use the ‘Refresh Modem Info’ command.
The DIVA Terminal Adapters Program for Macintosh About Configuration Profiles A profile is a set of parameters that define a particular ISDN setup. When you installed the DIVA software, the Configuration Assistant helped you configure your ISDN settings. These settings were saved to Profile 0. In addition to this profile, you can configure two other profiles that define different ISDN setups, which can correspond to the needs of your different applications.
The DIVA Terminal Adapters Program for Macintosh The Profiles Window The Profiles window allows you to edit any of the three profiles using the Configuration Tool or Configuration Assistant. You can also rename profiles or set the active profile. To open the Profiles window: 1 Launch the DIVA Terminal Adapter Program. 2 Click on the ‘Profiles’ tab. 3 If you want to...
The DIVA Terminal Adapters Program for Macintosh Configuring a Profile using the Configuration Tool To configure a profile manually using the Configuration Tool: 1 Launch the DIVA Terminal Adapter Program. 2 Click on the ‘Profiles’ tab. Three default profiles are available: Profile 0, Profile 1, and Profile 2. Profile 0 was modified using the Configuration Assistant when you ran the DIVA Terminal Adapters program for the first time.
The DIVA Terminal Adapters Program for Macintosh 4 Go through each panel and make your changes. To move from panel to panel, click on the tabs at the top of the window. Note that some tabs are not available unless certain options are configured. For example, the ‘X.25’ tab is not available unless ‘Enable Always On / Dynamic ISDN’ is checked in the ‘Protocol’ tab. Parameters are explained on the following pages: Protocol Tab ......................................... 62 Location Tab.........................
The DIVA Terminal Adapters Program for Macintosh Protocol Tab The Protocol tab lets you choose the protocol settings for your ISDN line. By default, 'PPP' is enabled. Both ‘PPP’ and ‘Multilink PPP’ require that a PPP communications stack be installed on your computer. Note that the protocol you choose must match the protocol on the receiving system. About the Protocol panel • For the ‘Enable Always On / Dynamic ISDN (AO/DI)’ option to be available, the protocol must be set to ‘MultiLink PPP’.
The DIVA Terminal Adapters Program for Macintosh Location Tab The ‘Location’ tab contains information on your ISDN switch type and telephone numbers. Use the table below as a guideline for setting these parameters. Parameter Description Switch Type Specifies the ISDN switch type used by your ISDN service provider. Your choices are Europe (EuroISDN), Australia (MicroLink), Australia (OnRamp), Japan (INS-Net64), China ISDN, and Singapore ISDN. Default: Europe (EuroISDN).
The DIVA Terminal Adapters Program for Macintosh Phone Lines tab This tab contains information on your phone lines. Use the table below as a guideline for setting these parameters. Parameter Description This phone line is used for a fax / modem only Selecting this option: • Enables ‘3.1KHz Audio’. This specifies that the ISDN network has to preserve the quality of the 3.1KHz voice band that is required for data audio signals such as faxes and modems.
The DIVA Terminal Adapters Program for Macintosh BACP Tab This tab allows you to configure the BACP options you want implemented on your DIVA T/A. Note that this tab is visible only if the protocol is set to ‘MultiL inkPPP’. Use the table below as a guideline for setting these parameters. Parameter Description BACP/BOD (Bandwidth Allocation Control Protocol / Bandwidth on Demand) This option only applies if your ISDN connection protocol is set to ‘Multilink PPP’.
The DIVA Terminal Adapters Program for Macintosh Parameter Description ISDN Cost Reduction Timers This option only applies if your ISDN connection protocol is set to ‘Multilink PPP’. Note: You must activate ‘BACP/BOD’ before setting the intervals. Set these intervals to ensure your second B-channel is used most economically. ‘Initial Billing Interval’: Specifies the minimum time a B-channel can remain open (in seconds).
The DIVA Terminal Adapters Program for Macintosh Parameter Description 2nd B-channel ‘Delay before opening’: Specifies the amount of time (in seconds) the throughput on your 1st B-channel must exceed the Opening Threshold before the 2nd B-channel is added to the AO/DI connection. For example, if you specify 5 seconds, and the Opening Threshold is 70%, once the throughput on the 1st B-channel reaches 70%, there will be a delay of 5 seconds before the 2nd B-channel is added to the AO/DI connection.
The DIVA Terminal Adapters Program for Macintosh X.25 Tab This tab allows you to configure X.25 settings. Note that this tab is visible only if the protocol is set to ‘MultiLink PPP’ and if ‘Enable Always On / Dynamic ISDN (AO/DI)’ is enabled. The X.25 tab's default parameters are suitable for most configurations, but in some cases (such as with certain X.25 long distance providers), you may need to modify them. Use the table below as a guideline. Parameter Description X.25 Version There are two X.
The DIVA Terminal Adapters Program for Macintosh Parameter Description Fast selection Increases the amount of Call User Data that you can include in the Call Request packet to 128 bytes, and specifies the type of response requested from the host. Fast selection is designed for short-duration, low-volume, transaction-oriented applications. • ‘No’: Turns off Fast Selection. • ‘Without Restriction’: Host replies with a Call Accept packet that can contain up to 128 bytes of data.
The DIVA Terminal Adapters Program for Macintosh Advanced Tab This tab allows you to configure advanced options you want implemented on your DIVA T/A. Use the table below as a guideline for setting these parameters. Parameter Description DBA (Dynamic Bandwidth Allocation) This option only applies if your ISDN connection protocol is set to ‘Multilink PPP’. Note: Only available on models equipped with analog device ports.
The DIVA Terminal Adapters Program for Macintosh Configuring a Profile using the Assistant The Configuration Assistant can take you step-by-step through setting the parameters required for your ISDN network connection. To use the Assistant: 1 Launch the DIVA Terminal Adapter Program. 2 Click on the ‘Profiles’ tab. Three default profiles are available: Profile 0, Profile 1, and Profile 2.
The DIVA Terminal Adapters Program for Macintosh 5 You are returned to the DIVA Terminal Adapters program. 6 If you want the profile to be active when you restart the DIV AT/A, select its name from the ‘Active Profiles’ pick list. 7 Select ‘Save’ from the ‘File’ menu. The changes are written to the device, the DIVA T/A restarts automatically, and the profile you selected in previous step is implemented. Your DIVA T/A is ready for use.
The VT100 Configuration Tool The VT100 Configuration Tool is included in your DIVA T/A firmware and can be used to configure your ISDN settings on any computer platform. To access the VT100 Configuration Tool, you need a VT100-compatible terminal emulation program such as Telix, HyperAccess, or Zterm. 1 Start the VT100-compatible terminal emulation program.
The VT100 Configuration Tool Navigating in the VT100 Configuration Tool screen The following table describes the function keys that let you navigate the VT100 Configuration Tool’s screen: Key Function Up arrow Moves the cursor to the previous field. Down arrow Moves the cursor to the next field. Right arrow Displays the sub-menu level. In a text field, it moves the cursor one character to the right. Left arrow Displays the previous menu level.
The VT100 Configuration Tool 6 Select ‘ISDN Parameters’ and press Enter. *-----------------------------------------------------------------------------* | DIVA T/A ISDN Modem - International Version 2.
The VT100 Configuration Tool 8 Models equipped with analog device ports: From the main menu, select ‘Phone Line’ and press Enter to open the configuration screen. *-----------------------------------------------------------------------------* | DIVA T/A ISDN Modem - International Version 2.
The VT100 Configuration Tool 10 From the main menu, select ‘Advanced’ and press Enter. *-----------------------------------------------------------------------------* | DIVA T/A ISDN Modem - International Version 2.
The VT100 Configuration Tool Parameter Description Initial Billing Interval Billing Interval This option only applies if your ISDN connection protocol is set to ‘Multilink PPP’. Note: You must activate ‘BACP/BOD’ before setting the intervals. Set these intervals to ensure your second B-channel is used most economically. ‘Initial Billing Interval’: Specifies the minimum time a B-channel can remain open (in seconds).
Updating Firmware This chapter contains procedures for loading new firmware into your DIVA T/A. The procedure you use depends on your computer platform. Windows 95/98/NT................................ 80 Macintosh (System 7 or Later)........... 81 Other Operating Systems ................... 82 Updating the DIVA T/A INF file..........
Updating Firmware Windows 95/98/NT When you download new firmware, the DIVA T/A will ask you if you want to export your current profiles. It is recommended that you export the profiles. This assures you have a backup available in the event the profiles are lost during the download. If the profiles do get lost, use the Import Profile command and copy the exported profiles back to the device. To update your firmware: 1 Launch the DIVA Terminal Adapters program.
Updating Firmware Macintosh (System 7 or Later) When you download new firmware, the DIVA T/A will ask you if you want to export your current profiles. It is recommended that you export the profiles. This assures you have a backup available in the event the profiles are lost during the download. If the profiles do get lost, use the Import Profile command and copy the exported profiles back to the device. To update your firmware: 1 Launch the DIVA Terminal Adapters program.
Updating Firmware Other Operating Systems Procedure for updating the firmware using Windows 3.x, Windows for Workgroups 3.11, DOS, OS/2, Macintosh (prior to System 7), and Others When you update your DIVA T/A firmware, the current profile configurations might get erased. It is recommended, therefore, that you record your current settings and SPID numbers before updating (use the AT command AT&V or AT@MENU with any terminal emulation program to view the current settings).
Updating Firmware Updating the DIVA T/A INF file Procedure for Windows 3.x, Windows for Workgroups 3.11, and Windows NT 3.51 This section only applies if you are using RAS. To update the DIVA T/A INF file: 1 Open any text editor. 2 Open the file MODEM.INF found in the Windows\System directory for Windows 3.x or Windows\System32\RAS directory for Windows NT 3.51, and remove all sections relating to the DIVA T/A ISDN Modem. 3 Open the updated file WFWNTEI2.INF. 4 Copy the contents of WFWNTEI2.
Using the DIVA T/A Once you have installed and configured DIVA T/A, you can dial into your office LAN, access the Internet, as well as exchange data/faxes with any remote ISDN or analog equipment. Before attempting this, make sure that your PC is equipped with remote-access client software such as Dial-Up Networking, Shiva PPP client, or Microsoft RAS client software. In this chapter: SecurID Connectivity .................................................85 Dialing with Multilink PPP ........................
Using the DIVA T/A SecurID Connectivity If you are using V.120, SecurID is available on all platforms. If you are using PPP or multilink PPP, SecurID is only available with Windows 95/98/NT4. Note that SecurID using PAP-Token and CHAP is not supported. PAP-Token and CHAP are usually used with servers other than Shiva (e.g. Ascend). Using Windows 95/98 to Connect to a V.120 Server The following example demonstrates how to use Windows 95/98 to connect to a V.
Using the DIVA T/A Dialing with Multilink PPP When you establish a Multilink PPP connection, each B-channel connects to a remote-directory number. In some ISDN implementations, each B-channel connects to a unique number. If this is the case, enter both numbers and separate them with the character ‘~’ or ‘&’. For example, to make a Multilink PPP connection to the numbers 555 1134 and 555 1135, enter them as follows: 5551134~5551135. For each telephone number, the maximum number of dialed digits is 40.
Using the DIVA T/A • The " symbol can be used with all other ATD commands, for example: ATDX8323000&8323001&"2 ATD%123&8323001&"2 Note: If your ISDN implementation requires two numbers and BACP/BOD is enabled (on both your DIVA T/A and the remote ISDN device), you have the option of entering only one number. BACP will try to discover the second number and connect to it. If you know the two numbers, however, it is recommended that you enter both.
Using the DIVA T/A Establishing a Connection Go to the section that corresponds to your platform and follow the procedure. Windows 95/98..................89 Windows NT 4.0.................91 Windows NT 3.51 ..............94 Windows 3.x........................96 DOS ........................................98 OS/2 .................................... 100 Note: For a destination ISDN telephone number, the maximum number of dialed digits you can enter is 40.
Using the DIVA T/A Windows 95/98 1 Double-click the ‘Dial-Up Networking’ icon. 2 Double-click ‘Make New Connection’. The ‘Make New Connection’ wizard opens: Select the ‘Eicon DIV AT-A ISDN Modem’ from the ‘Select a modem field’, then click ‘Next’. 3 Enter the ISDN number and country code of the location you wish to call, click ‘Next’, then click ‘Finish’. 4 Double-click the newly created ‘My Connection’ icon.
Using the DIVA T/A 5 Enter your user name and password, and click ‘Connect’. 6 If you successfully establish the connection, you can communicate with the remote host. If you do not establish the connection, verify your server type and TCP/IP settings and alter them as required.
Using the DIVA T/A Windows NT 4.0 1 In the ‘Dial-Up Networking’ folder, double-click the ‘Make Connection’ icon. 2 Click ‘New’. 3 The ‘Phonebook Entry Wizard’ window opens. Click ‘Next’. 4 Check each applicable statement, then click ‘Next’.
Using the DIVA T/A 5 Enter the phone number you want to call, then click ‘Next’. 6 Click ‘Finish’. 7 Click ‘Dial’.
Using the DIVA T/A 8 Enter your user name and password, then click ‘OK’. 9 If you successfully establish the connection, you can communicate with the remote host. If you do not establish the connection, verify your configuration and TCP/IP settings and alter them as required.
Using the DIVA T/A Windows NT 3.51 The following example assumes you are using RAS. 1 In the ‘Remote Access Service’ group, double-click ‘Remote Access’. 2 Click ‘Add’. 3 Enter the name and number you want to call, then click ‘OK’. 4 Click ‘Dial’.
Using the DIVA T/A 5 Enter your user name and password, then click ‘OK’. 6 If you successfully establish the connection, you can communicate with the remote host. If you do not establish the connection, verify your configuration and TCP/IP settings, and alter them as required.
Using the DIVA T/A Windows 3.x Note: If your workstation is configured as a Windows for Workgroups Remote Access Service (RAS) client, you must configure the V.120 rate adaption protocol on both the DIVA T/A workstation and on the remote device (RAS Server ISDN adapter). The following example assumes you are using the Shiva PPP protocol stack. If you are using the Shiva PPP protocol stack (or similar), you can use PPP or MLPPP.
Using the DIVA T/A 7 Ensure that ‘IPX’ and/or ‘IP’ are enabled, then click ‘OK’. 8 Click ‘Connect’. 9 If you successfully establish the connection, you can communicate with the remote host. If you do not establish the connection, verify your configuration and TCP/IP settings, and alter them as required.
Using the DIVA T/A DOS 1 Ensure that the ShivaRemote connection software (or similar) is installed on your computer. 2 Enter the following command: C:\SHIVA\CONNECT 3 From the ‘Tools’ menu, choose ‘Port Setup’ and select the COM port. 4 Select ‘Modems’. Enter ‘Eicon DIVA T/A ISDN Modem’ in the ‘Modem Name’ field and set the speed to 115200 bps (or 230400 if your COM port supports it), then select ‘OK’. 5 Click ‘Network’. 6 Enable ‘IP’ and/or ‘IPX’ (as required), then select ‘OK’.
Using the DIVA T/A 7 Enter your user name, password, and the phone number you want to dial, then click ‘Connect.’ 8 If you successfully establish the connection, you can communicate with the remote host. If you do not establish the connection, verify your configuration and TCP/IP settings, and alter them as required.
Using the DIVA T/A OS/2 1 Double-click ‘Programs’, then double-click ‘Internet Modems’. 2 Double-click ‘Dial Other Internet Providers’. 3 Click ‘Add Entry’.
Using the DIVA T/A 4 Enter your login ID, password, and the phone number you want to dial. 5 Click ‘Connect Info’, then enter your domain name server, your host name, and your server name. 6 Click ‘Modem Info’. Select a modem from the drop-down list, then select the COM port assigned to the DIVA T/A ISDN Modem.
Using the DIVA T/A 7 Click ‘Dial’ to place your call. 8 If you successfully establish the connection, you can communicate with the remote host. If you do not establish the connection, verify your configuration and TCP/IP settings, and alter them as required.
Using the DIVA T/A Connecting to the World Wide Web To connect to the World Wide Web, follow the instructions in the section “Establishing a Connection” on page 88; when the procedure instructs you to enter a dial-up number, enter the number of your Internet Service Provider (ISP). Once you are successfully connected to your ISP, go to your desktop and double-click the icon representing the web browser you want to use. The web browser opens and you are ready to explore the World Wide Web.
Analog Device Support Analog device ports are only available on certain DIVA T/A models. These two ports let you connect analog devices such as ordinary telephones, answering machines, fax machines, or modems to your DIVA T/A. Calls to and from these analog devices are carried over your ISDN line. You also get additional calling features such as Call Forwarding, etc. For more information on these calling features, see “Calling Features” on page 105.
Analog Device Support Calling Features The DIVA T/A’s phone ports support a variety of calling features. Call Hold .............................................................................106 Call Waiting .......................................................................107 Calling Line Identity Presentation.............................110 Calling Line Identity on Call Waiting ........................111 Calling Line Identity Restriction (CLIR)....................112 Call Forwarding...............
Analog Device Support Call Hold Call Hold lets you suspend a voice conversation with a person (place them on hold), and make a call to a second number. You can then toggle back and forth between the first and second caller. When you are finished talking to the second person, you can hang up that call, and continue the call with the first person. Using Call Hold To place a call on hold: 1 2 3 With a voice call active, press R. The person you are speaking with is placed on hold, and you hear a dial tone.
Analog Device Support Call Waiting Call Waiting alerts you to a second incoming call during an active call. This feature is available as a service through your ISDN line (referred to as “ISDN Call Waiting”) and also from the DIVA T/A modem itself (referred to as “DIV AT/A Call Waiting”). The DIVA T/A’s internal Call Waiting uses the second B-channel (if available) to receive a second incoming call and offer it to you.
Analog Device Support To disconnect from the current call and accept the incoming call: 1 2 Press R and wait for a dial-tone. Press 1. To place the first call on hold and answer the incoming call: 1 2 Press R and wait for a dial-tone. Press 2. Once the call is on hold, you can toggle back and forth between the two parties by pressing R,2. To disconnect from the current call and reconnect to the held call, pres sR,1.
Analog Device Support If... Then... • ISDN Call Waiting is not available • The DIVA T/A’s Call Waiting is enabled • But both B-channels are in use • The second call receives a busy signal, as the DIVA T/A’s internal Call Waiting requires a free B-channel in order to hold the call. • ISDN Call Waiting is not available • The DIVA T/A’s Call Waiting is enabled • One B-channel is free! • You will hear a Call Waiting alert. • The second call occupies the available B-channel.
Analog Device Support Calling Line Identity Presentation Calling Line Identity Presentation works with telephones equipped with a Call Display indicator. When you receive an incoming call, the number of the call is displayed. This feature is supported in Ireland, United Kingdom, Sweden, Denmark, France, and the United Arab Emirates.
Analog Device Support Calling Line Identity on Call Waiting Calling Line Identity on Call Waiting works with telephones equipped with a Call Display indicator. With this feature, if you are on the phone and another call comes in, the number of the second incoming call is displayed. This feature is supported in Ireland, United Kingdom, China, Australia, Hong Kong, Singapore, and Denmark. Note: In Denmark, this feature is known as CallerID Plus.
Analog Device Support Calling Line Identity Restriction (CLIR) This feature permits you to restrict Calling Line Identity on outgoing calls on a per-call basis. Currently this feature is supported on the DIV AT/A’s phone ports only, i.e., identification cannot be disabled on a data call or a voice-to-pc call. This feature is currently supported in Denmark, United Kingdom, and Ireland. To restrict identification on a per-call basis, you must enter a code before dialing the number.
Analog Device Support Call Forwarding When enabled, Call Forwarding automatically transfers incoming calls to another number. This feature is supported in Sweden and may be supported in other countries; check with your ISDN service provider. The following instructions list the codes for Sweden. Check with your service provider for codes that will work in your area. To forward incoming calls when your line is busy: 1 2 3 4 Lift the receiver, then wait for a dial tone. Press *67*.
Analog Device Support To forward all incoming calls to a number you specify: 1 2 3 4 Lift the receiver, then wait for a dial tone. Press *21*. Enter the telephone number to which calls are to be forwarded. Press #. To deactivate, lift your receiver, wait for a dial tone, press #21#. To detect if Call Forwarding is active: If you are not sure whether or not this service is currently activate, lift the receiver and listen for the dial tone. If the tone is fast and intermittent, the service is active.
Analog Device Support Malicious Caller Identification Malicious Caller Identification allows you to register a calling number with your ISDN Service Provider. To invoke this feature while you are on a call, press R, wait for the dial-tone, then press *39#. The held call is then automatically reconnected. This feature is supported in Sweden and may be supported in other regions (but is not supported in Australia). Check with your ISDN service provider.
Analog Device Support Call Redirection between Analog Ports If two analog devices are connected to your DIVA T/A, you can transfer a call from the device on one port to the device on the other. For example, you can transfer a call from the phone on the PHONE 1 port to the phone on the PHON E2 port. (This is also referred to as “internal transfer.”) To receive the transferred call, the second device must be on hook and not ringing. This feature requires Call Hold to be supported by your ISDN service.
Analog Device Support Three-party Conference Call This feature lets you speak with up to two people at the same time. Once a Three-party Conference Call is set up, you may drop a call and continue with the other caller, or you put the one caller on hold while staying connected to the other caller. Using Three-party Conference Call Setting up a Three-party Conference Call: 1 2 3 Dial the first number, then press R to place the call on hold. Dial the second number. Press R,3 to begin the conference call.
Analog Device Support Terminal Portability Terminal Portability allows you to transfer an active analog call from your DIVA T/A to another ISDN terminal (an ISDN phone, for example) that shares the same access connection but is separate from the DIVA T/A. To transfer the active call to a separate ISDN device: 1 2 Press R. Press *79#. If you hear a dial tone, the call has been transferred successfully. You can hang up the phone. Note: If the transfer fails, you are reconnected to the active call.
Analog Device Support Quick Reference Always listen for a dial tone after pressing the R button. Call Hold R,1 Disconnect the current call and reconnect the held call R,2 Toggle between calls Call Waiting R,0 Reject the incoming call and disable Call Waiting for the duration of the current call. R,1 Disconnect from the current call and reconnect the held call R,2 Hold the current call and accept the incoming call *43# Activate DIVA T/A Call Waiting. #43# Deactivate DIVA T/A Call Waiting.
Multiple Subscriber Numbering Many telephone companies can assign several directory numbers to your ISDN line. This service, called Multiple Subscriber Numbering, allows you to use one directory number for your telephone and one for you fax machine (for example), as well have a separate number for data calls that should be sent directly to your computer. But when an incoming call is received by the DIVA T/A, a decision must be made as to where the call should go.
Multiple Subscriber Numbering Assigning Primary and Secondary Numbers to the Phone Ports To assign primary and secondary numbers to the phone ports, use the Configuration Tool’s Phone Port 1 or Phone Port 2 panels. The primary numbers from each Phone Port tab will be used in other panels (the ‘Call Routing’ setting in the ‘Advanced’ tab for example) and will also be answered by the Data port if a data call comes in. The secondary numbers are answered exclusively by the phone ports.
Multiple Subscriber Numbering • • • Set the primary number of Phone Port 1 to 555-1111; Set the ‘Second Number’ field of Phone Port 1 to 555-3333; Set the primary number of Phone Port 2 to 555-2222. In this scenario, calls placed to your mobile phone will be forwarded to 555-3333 if the mobile phone is not on.
Multiple Subscriber Numbering Configuring a Port to Answer Any Number not Configured Elsewhere When a port is assigned a specific directory number, it only answers calls dialed to that number. For example, if you have been assigned the numbers 555-1234, 555-1235, and 555-1236, and you configure Phone Port 1 to answer 555-1234, this phone port won’t try to answer calls placed to any of the two numbers assigned to you.
Multiple Subscriber Numbering Specifying what numbers the data port should answer If you wish to set the data port parameters for the scenario described on the previous page, you would use the Configuration Tool’s ‘Data’ tab. Notice that the choices for the option ‘Select a previously configured number’ are ‘555-1111’ (the primary number you specified in Phone Port 1 tab) and ‘No number’ (since you left the primary number field blank in the Phone Port 2 tab).
Multiple Subscriber Numbering Specifying an Exclusive Data Port Directory Number A specific number can be assigned exclusively to the data ports via the ‘Data’ tab. Click on the option ‘Configure a unique number to use for data calls’, then enter the number. The data port will answer only on that directory number, ignoring all other assignments.
Multiple Subscriber Numbering Routing voice calls to your computer (Voice to PC) In addition to the two phone ports, calls can be sent to your computer through the serial port. Normally these are data calls, and the DIVA T/A can make the decision automatically; a data call should not be sent to the phone port, for example. With the advent of Voice over PC software and hardware, it is possible to set up your computer to answer telephone calls.
Multiple Subscriber Numbering 2 Click the ‘Advanced’ tab and enable the option ‘Enable voice calls to the PC’. Enable this option 3 Go to the ‘Voice to PC’ tab and choose 555-1234 as the number to be answered.
Multiple Subscriber Numbering 4 Click on the ‘Advanced’ tab. In the ‘Call Routing’ group, under the column ‘Voice’, select ‘PC’ for the directory number 555-111. Select ‘PC’ to route voice calls to your PC 5 Click ‘OK’. The changes will be saved to the device. You can also use the AT command AT!An to set these options (see the DIV AT/A Reference Guide for more information).
ISDN Line Termination In Australia, if you are installing a DIVA T/A with an S/T interface, you must correctly set up ISDN line termination to ensure the proper operation of your equipment. To determine your termination requirements, see page 130. About Setting ISDN Line Termination To set ISDN line termination, you may have to install a terminating resistor or set a switch on the back of the DIVA T/A, depending on the model.
ISDN Line Termination Determining Termination Requirements Termination requirements vary depending on the number of devices connected to an external NT1 and the distance between these devices and the NT1. Single ISDN device If the DIVA T/A is the only device connected to the external NT1, determine the length of the cable linking the two devices then follow the instructions below.
Troubleshooting the DIVA T/A This section provides information that will help you to troubleshoot DIV AT/A problems. • For information on the DIVA T/A’s LED status indicators, see page 132. • To read about common problems and their solutions, see page 134. • To capture a memory dump of the DIVA T/A, see page 136.
Troubleshooting the DIVA T/A LED Status Indicators on the DIVA T/A The LED status indicators on the DIVA T/A display the state of the ISDN switch (D-channel) connection to the remote device (B-channel), and the connection to analog devices. D IVA T /A ISDN M ode m B1 ISDN B2 D Phone Serial TX-RX DTE FA ULT POWER B1, B2 LEDs LED Description Off No call activity on the specified B-channel. Flashing An outgoing or incoming connection is being established on the specified B-channel.
Troubleshooting the DIVA T/A Phone LEDs LED Description Off No call activity on the specified voice channel. Flashing An outgoing or incoming connection is being established on the specified voice channel. Steady There is a connection on the specified voice channel. TX-RX LED LED Description Off There is no data being transferred on the serial port. On (intermittent) Data is being transferred on the serial port.
Troubleshooting the DIVA T/A Common Problems Listed below are possible solutions to common problems. SecurID is not working with the DIVA T/A. Depending on the server type, the DIVA T/A might support SecurID. For more information see “SecurID Connectivity” on page 85. The Windows Configuration Tool does not detect the DIVA T/A. If you are running RAS or the Dial-Up Networking Server, or if other software is using the DIVA T/A, shut them down and restart the Configuration Tool.
Troubleshooting the DIVA T/A When you pick up the phone you do not get a dial tone. Make sure the ISDN line has voice capability. If you are using the S/T version, try removing other ISDN equipment on the line. Try using a different Directory Number on the phone port. If the problem persists, contact Eicon Technology. The ‘Link’ LED does not go on. Make certain that the cable in the ISDN connection has the right interface: ‘U’ or ‘S/T’.
Troubleshooting the DIVA T/A Dumping the DIVA T/A Memory If a software fault condition occurs while you are using the DIVA T/A (‘Fault’ LED is on), you may need to capture a memory dump to a file. This file can be used by Eicon support to determine what caused this condition. Follow the steps below to obtain a DIV AT/A dump: 1 Exit your dialer program (for example, Dial-Up Networking for Win95/98) and start a terminal-emulation program such as HyperTerminal. 2 Type at then press Enter.
Billing Interval Example Suppose a user is charged a flat fee of $.08 each time a connection is established, plus $.01 per minute of B-channel usage. Since the flat fee of $.08 is quite high relative to the per minute charge of $.01, the user should be careful not disconnect and reconnect too often. A good solution would be to set the initial billing interval to 480 (8 minutes), and the billing interval to 60 (1 minute).
DIVA T/A ISDN Modem Specifications Firmware Specifications Feature Supported on DIVA T/A WAN Protocols • • • • • PPP (Point-to-Point Protocol) Multilink PPP ISDN (Q.921/Q.931: EuroISDN, TPH1962/TS.013, and INS-Net64) V.110 Rate Adaption V.
DIVA T/A ISDN Modem Specifications Hardware Specifications Feature Supported on DIVA T/A ISDN Interface • 1 ISDN BRI U or ISDN BRI S/T (RJ45) Analog device Interface (selected models only) • 2 Analog Ports (RJ11) • Ringer Equivalence Number (REN) per POTS line: 3 Console Port • RS-232 Asynchronous • 1200 bps to 230.4 kbps • Automatic Baud Rate Detection Non-Volatile Configuration • 4 KB non-volatile memory for storing configuration profiles Physical Dimensions • Size: 1.5H x 6.0D x 8.
Technical Support Support via the World Wide Web To obtain technical support, visit the Eicon Technology HelpWeb at: • http://www.eicon.com/support/ Customer Service For customer service, contact your local Eicon Technology supplier. Other Eicon Technology Web Sites You can find ISDN-related information and general information about Eicon Technology products and services from the following web site: • http://www.eicon.
Regulatory Information and Conditions of Use Regulatory Information for Europe This equipment displays the CE 168 mark to show that it has been tested and found to be in full compliance with the requirements of the Terminal Equipment, EMC and Low Voltage Directives (98/13/EC, 89/336/EEC and 72/23/EEC, as amended by Directive 93/68/EEC). The CE 168 EU and EEA.
Limited Warranty Eicon Technology Corporation warrants to the original purchaser of this Eicon Technology Product that it is to be in good working order for a period of five (5) years from the date of purchase from Eicon Technology or an authorized Eicon Technology dealer.
Product Comment Form DIVA T/A ISDN Modem User's Guide - International 206-269-03 We value your comments. Please use the tables below to rate this product.
Index A Advanced menu VT100 Configuration Tool, 77 Advanced Tab Macintosh, 70 Win95/98/NT, 51 Analog Device Support, 104 Answering numbers, 123 Assistant Macintosh, 71 B B1, B2 LEDs, 132 BACP VT100 Configuration Tool, 77 BACP Tab Macintosh, 65 Win95/98/NT, 46 Billing Interval VT100 Configuration Tool, 78 Billing Interval Example, 137 Blank DNs, 123 C Call Routing settings Windows 95/98/NT , 51 Call Type setting Windows 95/98/NT , 42 Calling Features, 105 Call Forwarding, 113 Call Hold, 106 Call Redirectio
F N Fault LED, 133 Fault LED is on, 134 Fax/Modem Only option Macintosh, 64 VT100 Configuration Tool, 76 Windows 95/98/NT , 42 Firmware, updating , 79 Number Assignment Windows 95/98/NT , 44 Number assignment, 120 Number/Feature Association VT100 Configuration Tool, 77 G OS/2 setup, 31 General Tab (Win95/98/NT), 38 P H Phone LEDs, 133 Phone Line menu VT100 Configuration Tool, 76 Phone Lines Tab (Macintosh), 64 Phone Port Tabs (Win95/98/NT), 41 Phone support, 104 Power LED, 133 PPP protocol setting
Support, 140 Switch Type setting Macintosh, 63 VT100 Configuration Tool, 75 T Technical Support, 140 Telephone Number settings Macintosh, 63 Termination Resistor, 129 Three-party Conference Call calling feature, 117 Troubleshooting option (United Kingdom only), 52 Troubleshooting the DIVA T/A, 131 TX-RX LED, 133 U Update Date/Time VT100 Configuration Tool, 78 Update Time Macintosh, 70 Updating firmware, 79 Use 2 Numbers option Macintosh, 63 Using the DIVA T/A, 84 V V.