English User’s Manual FlexScan L350 â Color LCD Monitor
CONTENTS PRECAUTIONS __________________________ 4 INTRODUCTION _________________________ 9 About this Manual .................................................... 9 Package Contents .................................................... 9 Controls & Connectors ........................................... 10 1 INSTALLATION _______________________ 11 1-1 Connecting up ................................................. 11 PC Settings .......................................................................
5 SPECIFICATIONS _____________________ 33 APPENDIX ______________________________ i Pin Assignment ........................................................ ii Dimensions .............................................................. ii Preset Timing Chart ................................................. iii Copyright© 1999 by EIZO NANAO CORPORATION. All rights reserved.
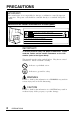
PRECAUTIONS IMPORTANT! * The manufacturer is not responsible for damage or malfunction caused by improper connection. The power cord should be connected directly to a standard wall power outlet. Location of the caution statements on the back panel. Risk of electric shock. Do not open. Risque de choc electrique. Ne pas ouvrir. Gefahr des elektrischen schlages. Rückwand nicht entfernen. The equipment must be connected to a grounded main outlet.
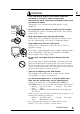
E WARNING • If the LCD monitor begins to emit smoke, smells like something is burning, or makes strange noises, disconnect all power connections immediately and contact your dealer for advice. Attempting to use a malfunctioning LCD monitor can be dangerous. • Do not dismantle the cabinet or modify the LCD monitor. Dismantling the cabinet or modifying the monitor may result in electric shock or burn. • Keep small objects away from the LCD monitor.
• The equipment must be connected to a grounded main outlet. Failure to do this may result in an electric shock. • Handle the power cord with care. * Do not place the cord underneath the LCD monitor or other heavy objects. * Do not pull on the cord. * Do not bend, bundle or tie up the cord. * Never attempt to repair a damaged cord. If the power cord becomes damaged, stop using it. Use of a damaged cord may result in fire or electric shock. • To disconnect the power cord, grasp the plug firmly and pull.
• Set the LCD monitor in an appropriate location. * Do not install in a dusty or humid environment. E * Do not place near water. * Do not place in a location where light shines directly on the screen. * Do not place near heat generating devices or a humidifier. CAUTION • At the end of the day, or if you plan to leave the LCD monitor unused for an extended period, turn off the main power switch and disconnect the power cord from the wall socket so that no power connections are made.
• Do not block the ventilation slots on the cabinet. * Do not place books or any other papers on the ventilation slots. * Do not install the monitor in a closed space. * Do not use the monitor laying down or upside down. * Do not remove the tilt-swivel stand. Using the monitor in this way blocks the ventilation slots and prevents proper airflow, leading to fire or other damage. Others • The screen may have some defective pixels. These pixels may appear as slightly light or dark areas on the screen.
INTRODUCTION About This Manual E This manual explains the precautions, features, specifications, and operation of your EIZO LCD monitor. For convenience, a “ScreenManager Quick Reference” guide has been included which shows how to implement basic adjustments with the ScreenManager utility.
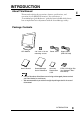
Controls & Connectors Front Viewing Angles Horizontal: 140° Vertical: 120° Auto Adjustment Button Automatically centers the displayed image and adjust clock and phase. Control Buttons The four control buttons (up, down, right and left buttons) are used to enter adjustments and settings when using the ScreenManager menu. Enter Button Power Switch Power Indicator Indicates the power-on status in the following ways: Green (Solid): Power is ON (normal mode) (Flashing): Power is switching off in 15 minutes.
1 INSTALLATION 1-1 Connecting up E PC Settings Before connecting your PC to the LCD monitor, change the display screen settings (resolution and frequency) in accordance with those below. Resolution and Frequency fH: 31 kHz-61 kHz fV: 50 Hz-75 Hz • The following 4 common display modes are preset in the LCD monitor's memory. If the display mode input to the LCD monitor is not one of the modes listed below, a part of the image may be distorted or missing.
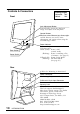
Connecting the Cables (1)Be sure that the power switches of both the PC and the LCD monitor are OFF. (2)Plug the signal cable into the D-Sub connector at the rear of the monitor. Please ensure that the arrow mark on the casing of the connector is visible when connecting. When connecting the signal cable, check that the shape of the cable connector matches the shape on the LCD monitor. (3)Plug the other end of the cable into the video connector on the rear of the PC.
Attaching an Arm Stand to the Monitor E WARNING • When attaching the monitor to the mount, use the enclosed screws and tighten them securely. When reattaching the monitor to the tilt stand, use the screws that was attached to the monitor originally. By not doing so may result in injury or failure of the monitor. To attach the mount to the monitor, please read the instruction manual of the mount. • Use a VESA approved arm-stand. The LCD panel requires 75 mm x 75 mm hole spacing on the arm mounting pad.
2 USING THE SCREENMANAGER 2-1 How to use the ScreenManager About ScreenManager As shown on the display, the ScreenManager is used to adjust the LCD monitor. Adjustments are made using the Enter and Control buttons (up, down, right and left) located on the front panel. Enter Button Control Buttons ScreenManager Menus ScreenManager consists of a main menu and six sub menus: “Screen”, “Color”, “PowerManager”, “Others”, “Information” and “Language.” Animated icons on each menu allows for easy adjustment.
E Sub menus Functions Menus Reference page 18 page 24 page 26 page 27 This menu shows the current ScreenManager settings. The menu contains two pages. Pressing the Enter key displays the following information: • Page 1: Input Signal • Page 2: “Color” adjustment settings, “PowerManager” settings, “Others” menu settings First select the preferred language to use. The ScreenManager’s messages will appear in the selected language.
How to use the ScreenManager Entering the ScreenManager Push the Enter button once to display the main menu of the ScreenManager. Enter the Settings (1) To enter any sub menu icon, highlight the desired icon by using the Control buttons (up, down, right and left) and push the Enter button. The sub menu appears. (2) Use the Control buttons to select the desired setting icon and push the Enter button. (3) The setting menu appears. Use the Control buttons to make all required adjustments.
Shortcut keys Brightness and contrast can be adjusted directly without any need to enter the ScreenManager. Press the Control buttons to adjust the settings and then the Enter button to save all changes. See the diagram below for adjustment directions. The brightness and contrast functions are also available in the ScreenManager “Screen” menu.
2-2 Screen Adjustment “Screen” adjustments for the LCD monitor should be used in suppressing screen flickering and also for adjusting the screen to its proper position. There is only one correct position for each display mode. It is also recommended to use the ScreenManager function when first installing the display or whenever changing the system. For convenience, an easy set-up Program installed on the utility disk to assist in the set-up procedure is provided.
• Allow the LCD monitor to warm up for at least 20 minutes before making adjustments. • For maximum viewing comfort, it is suggested that the monitor be tilted to eye level. • To make adjustment easily, install and run the “Screen Adjustment Program” in the attached utility disk. Before adjustment, read the “readme.txt” file.
• PC running MS-DOS (not Windows). • The background color for the “wallpaper” or “desktop” pattern is set to black or dark. • Some signals from some graphics boards may not function properly. Follow the adjustment procedure next page. • During the Auto adjustment, some icons (e.g. clock icon) appear on the screen continuously. (Example) (3) Enter the ScreenManager “Screen” menu. (4) “Clock” Adjustment Function Decreases the vertical bars of distortion.
(5) “Phase” Adjustment E Function Eliminates the horizontal bars of distortion. a) Select the “Phase” icon and push the Enter button to show the “Phase” menu. b) If horizontal bars appear, these can be eliminated by adjusting the right and left buttons. c) After finishing the adjustment, push the Enter button to memorize the settings and return to the “Screen” menu. · “Phase” adjustments should be done after adjusting the “Clock”.
(7) “Contrast” Adjustment Function Controls the contrast of the screen. a) Select the “Contrast” icon and push the Enter button to show the “Contrast/Brightness” menu. b) Press the Auto adjustment button on the front panel while displaying the “Contrast/Brightness menu to automatically adjust contrast. c) The screen blanks for a moment and adjusts the contrast to the maximum level of the current input signal.
E • At the lower display modes (refer to the page 11), the following adjustment is available. Function Smoothing Displays blurred texts clearly. · This adjustment does not operate when the resolution is 1024 x 768.
2-3 Color Adjustment About Color Adjustments Entering the ScreenManager, select the “Color” icon and push the enter button to show the “Color” menu. The ScreenManager “Color” menu provides 3 color setting modes; 1, 2, and 3. You can also adjust the color settings for each mode and store them for future use. • Allow the monitor to warm-up for at least 20 minutes before making an adjustment. Color Mode Function Color Mode (Standard) Adjusts: Color Mode Mode 1(default): The normal white color.
Gain Adjustments By adjusting the red, green and blue color tones for each mode, custom colors can be defined. Please use this function when high precision color adjustment is required. • Before you attempt to change the colors, always start with the color settings set to the default setting by using the “Reset” icon in each color mode. Function Gain Adjusts: Gain Gain The Gain adjustment has no effect on the starting point (the black level). It changes only the ending point (the white level).
2-4 Power-save Setup Function PowerManager Power saving adjustment The EIZO PowerManager functions comply with the VESA DPMS standard As an Energy Star® Partner, Eizo Nanao Corporation has determined that this product meets the Energy Star guidelines for energy efficiency. · Do your part to conserve energy, turn off the monitor when you are finished using it. Disconnecting the monitor from the power supply is recommended to save energy completely.
2-5 Other Settings E All of the icons shown in the ScreenManager “Others” menu are described below. Function Off Timer Automatically Turns off the Monitor What is Off Timer The Off Timer function allows the user to set the time in which the monitor will be in operation, called the “On Period” and automatically shifts the operation into the “Power Off” mode when the set “On Period” expires.
Function VGA Selection Selecting Appropriate VGA Mode The two display modes, VGA 720 x 400 (70 Hz) and 320 x 200 (70 Hz), have the same signal timings. Using this adjustment selects the appropriate display mode. 1) Select the “VGA Selection” icon and push the Enter button to show the resolution select menu. 2) Select “Text 720 x 400” or “Graphics 320 x 200, and push the Enter button. · This function effects only when the resolution is VGA 720 x 400 (70 Hz) or 320 x 200 (70 Hz).
3 TROUBLESHOOTING This page presents problems that can be corrected by the user. If a problem persists even after applying the suggested remedies, contact an EIZO dealer. T No picture Problems Points to check with possible solutions 1) Indicator status: OFF Check that the power cord is securely connected. 2) Indicator status: GREEN Check brightness and contrast settings. Minimum settings will cause screen to be blank. 3) Indicator status: YELLOW (flashing) Try pressing the power switch.
T Imaging problems Problems 1) Display position is incorrect. Points to check with possible solutions Adjust the image position using the “Position” icon in the ScreenManager “Screen” menu. See page 21. If the problem persists, use the graphics board's utility sofware to change the display position if available. (It may be called “back-porch”.) Change the resolution or refresh rate to match the preset mode. See page 11. 2) Vertical bars of distortion appear.
Problems 9) The screen has defective pixels (e.g. slightly light or dark). Points to check with possible solutions This is due to the characteristics of the panel itself, and not the LCD product. T Others Problems Points to check with possible solutions 1) The utility disk is unable to be opened (for Macintosh only). Some PCs without PC-Exchange do not allow the utility disk to be opened. Please set the desktop pattern to ever-other-dot before adjustment. See page 19.
4 CLEANING WARNING • Keep liquids away from the monitor. Spillage into the cabinet may result in fire, electric shock, or equipment damage. If an object or liquid falls/spills into the cabinet, unplug the monitor immediately. Have the unit checked by a qualified service engineer before using it again. CAUTION • To ensure safety, always unplug the monitor before cleaning it. Cleaning the monitor while it is plugged into a power outlet may result in electric shock.
5 SPECIFICATIONS Electrical Specifications LCD Panel Viewing Angle E 38 cm (15 inch), TFT color LCD panel 0.297 mm dot pitch, Anti-Glare Hard Coating Horizontal: 140°, Vertical: 120° (at Contrast Ratio > 5) Scan Frequency Horizontal: Vertical: Viewable Image Size 31 kHz-61 kHz (Automatic) 50 Hz-75 Hz (Automatic) 304 mm (H) ´ 228 mm (V)(11.9” (H) ´ 8.9”(V)) (Viewable Image Size: 38.0 mm (14.9”)) Power Supply 100-120/220-240 VAC ±10%, 50/60 Hz, 0,6/0.
MEMO 34 5 SPECIFICATIONS
Excluding Black-Cabinet LCD Monitor Congratulations! You have just purchased a TCO’99 approved and labelled product! Your choice has provided you with a product developed for professional use. Your purchase has also contributed to reducing the burden on the environment and also to the further development of environmentally adapted electronics products.
Excluding Black-Cabinet LCD Monitor Environmental requirements Flame retardants Flame retardants are present in printed circuit boards, cables, wires, casings and housings. Their purpose is to prevent, or at least to delay the spread of fire. Up to 30% of the plastic in a computer casing can consist of flame retardant substances. Most flame retardants contain bromine or chloride, and those flame retardants are chemically related to another group of environmental toxins, PCBs.
For U.S.A, Canada, etc. (rated 100-120 Vac) Only FCC Declaration of conformity We, the Responsible Party EIZO NANAO Technologies Inc. 5710 Warland Drive, Cypress, CA 90630 Phone: (562) 431-5011 declare that the product Trade name: EIZO Model: FlexScan L350 is in conformity with Part 15 of the FCC Rules.
For Europe, etc.