English User's Manual FlexScan T550 ® Color Display Monitor
CONTENTS PRECAUTIONS ............................................................... 3 INTRODUCTION ...............................................................7 About This Manual ................................................................ 7 Controls & Connectors .......................................................... 7 Package Contents ................................................................ 7 1 INSTALLATION ............................................................
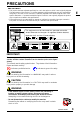
PRECAUTIONS IMPORTANT! * This product has been adjusted specifically for use in the region to which it was originally shipped. The performance of the product, (i.e. picture geometry, picture positioning and color convergence and purity in the case of color monitors) is optimally adjusted to the earth's magnetic field of the specific destination. If operated outside the region to which it was originally shipped, the product may not perform as stated in the specifications.
• Keep small objects away from the monitor. Small objects may accidentally fall through the ventilation slots into the cabinet, leading to fire, shock, or equipment damage. • Keep liquids away from the monitor. Spillage into the cabinet may result in fire, electric shock, or equipment damage. If an object or liquid falls/spills into the cabinet, unplug the monitor immediately. Have the unit checked by a qualified service engineer before using it again. • Place the monitor on a strong, stable surface.
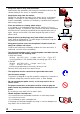
• To disconnect the power cord, grasp the plug firmly and pull. Never tug on the cord, doing so may cause damage and could result in fire or electric shock. OK E CAUTION • Disconnect the power cord, signal cables and remove the optional i·Sound™ sound unit and i·Station™ USB hub (if applicable) when moving the monitor. Moving the monitor with the cord attached or lifting it by the i·Sound sound unit or i·Station USB hub is dangerous. It may result in injury or equipment damage.
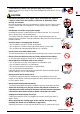
Others • Do not install the monitor within an area subject to strong magnetic fields (for example, in the vicinity of a speaker, except the optional i·Sound unit, or a high-voltage transformer). Magnetic fields can cause noise, image shaking, and other distortions. • Generally, for maximum viewing comfort position the monitor slightly below eye level. Staring at the monitor for prolonged periods can cause eye strain. Be sure to take adequate rests. (A 10-minute rest period each hour is suggested.
INTRODUCTION About This Manual This manual explains the precautions, specifications, and operation of your EIZO monitor. Please read through this manual as it will help you to get the most out of your monitor.
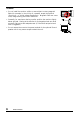
1 INSTALLATION Connecting the monitor to the PC 1) Be sure that the power switches of both the PC and the monitor are OFF. 2) Plug the signal cable into the connector at the rear of the monitor. • When connecting the signal cable or cable adapter, first check that the shape at the cable side matches the shape at the connecting side. After connecting, secure the connection with the screw-in fasteners. 3) Plug the other end of the cable into the video connector on the rear of the PC.
Using the AUTO-SIZING button After connecting the monitor to the PC, first press the AUTO-SIZING button on the front panel. The AUTO-SIZING function centers the displayed image, aligning the image’s borders with respect to the monitor frame. E In general, press the AUTO-SIZING button whenever changing the graphics board ro the resolution or when image size and/or position is incorrect.
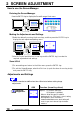
2 SCREEN ADJUSTMENT How to use the ScreenManager Entering the ScreenManager Press the ENTER key to display the ScreenManager Main menu. Main menu Making the Adjustments and Settings 1) Select the desired icon using the Arrow keys, and then press the ENTER key to display the each adjustment/setting menu. Adjustment menu 2) Use the Control pad (the four Arrow keys and the ENTER key) to make the required adjustments and settings.
OSD Function (Arrow Keys Used) Size Adjusts: Horizontal image size (left/right) Vertical image size (up/down) Position Adjusts: Screen position SidePin Balance/ SidePincushion Parallelogram/ Trapezoidal Adjusts: Side-pin balance (left/right) Side-pincushion (up/down) Tilt Tilts: Convergence Adjusts: Horizontal convergence (left/right) Vertical convergence (up/down) · The convergence adjustment adjusts the entire screen. It is not possible to limit adjustment to specific screen areas.
OSD Color Function (arrow keys usd) Adjusts: Color temperature Temperature can be set from 6,500 K to 10,000 K, in 500 K increments. · Each monitor is slightly different, if two monitors are set to the same color temperature value (i.e. 6,500K), they may not necessarily look the same. PowerManager · VESA DPMS · Off Timer (Refer to the text below) Reset Default settings are as follows.
Set-up Procedure 1) First, make the appropriate settings for the PC. E 2) Select VESA DPMS icon in the ScreenManager’s PowerManager menu. 3) Select “On”. Power saving method of VESA DPMS and the monitor VESA DPMS utilizes four signals: ON, STAND-BY, SUSPEND, and OFF. The monitor detects these signals from the graphics board and executes power-saving accordingly, as shown in the table below.
What is ENERGY STAR? “ENERGY STAR” is a set of power saving guidelines issued by the U.S. Environmental Protection Agency (EPA). The guidelines apply to PC systems and peripherals. Shortcut Keys Before entering the ScreenManager, brightness and contrast can be adjusted directly by moving the Control pad. To record the new setting and exit the ScreenManager, press the Enter key. (The brightness and contrast functions are also available in the ScreenManager “contrast/brightness” menu.
3 TROUBLESHOOTING Troubleshooting If a problem persists even after applying the suggested remedies, contact an EIZO dealer. Problems Points to check with possible solutions 1) Indicator status: OFF Check that the power cord is correctly connected. 2) Indicator status: GREEN Try pressing a key on the keyboard, or clicking the mouse. (The monitor may be in a power saving mode.) Check brightness and contrast settings. Minimum settings will cause screen to be blank.
Problems Points to check with possible solutions The monitor may be located close to a device that is generating a magnetic field. Such devices include speakers (other than the EIZO optional i·Sound speaker), electric motors, high-voltage cables, and other monitors. It may be solved by switching off or moving the interfering device, or by relocating the monitor. If the volume level of the EIZO optional i·Sound speaker is too high, it may, in some cases, cause a slight vibration.
Problems 10)• The entire screen appears bluish or reddish. Points to check with possible solutions The CRT is not warmed up. Allow 30 minutes for the monitor to stabilize. • Color purity is not uniform. • Misconvergence of colors. (red, green, blue) Explanation of the Characteristics of CRTs When the monitor is not fully warmed up, the screen may look slightly colored, e.g. reddish or bluish. This phenomenon is due to the unstableness of the electron gun during its warm-up period.
Problems 13)Two horizontal hairlines are visible on the screen. Points to check with possible solutions These are dampening wires. Dampening wires are used to support the CRT’s aperture grille, and are visible as thin dark lines across the screen. All EIZO aperturegrille type CRTs include two such horizontal wires. The aperture grille itself is a grid of taut metal filaments that spans the entire screen from top to bottom. 14)Faint black vertical lines are visible on the screen.
4 CLEANING WARNING E • Keep liquids away from the monitor. Spillage into the cabinet may result in fire, electric shock, or equipment damage. If an object or liquid falls/spills into the cabinet, unplug the monitor immediately. Have the unit checked by a qualified service engineer before using it again. Using the monitor in this condition could cause serious injury or equipment damage. CAUTION • To ensure safety, always unplug the monitor before cleaning it. Failure to do so may result in electric shock.
5 SPECIFICATIONS Electrical Specifications CRT CRT AG Pitch Scan Frequency Horizontal: Vertical: Max. Active Display Area Power Supply Power Consumption Normal: Max.: PowerManager Mode 1: PowerManager Mode 2: Input Connector Recommended Resolution Input Signal Sync: Video: Plug & Play 45 cm (17 inch) class, 90° deflection Aperture Grille type CRT with Anti-Reflective SuperErgoCoat® 0.25 mm 30 kHz-82 kHz (Automatic) 50 Hz-160 Hz (Automatic) 323 mm (H) × 242 mm (V) (12.7” (H) × 9.
Preset Timing E 2 factory presets shown below have been registered in the monitor’s microprocessor. Resolution Frequencies Interlace Sync Polarity fH (kHz) fV (Hz) Video Signal Level VGA (text) 720 × 400 31.47 70.09 Non H/Negative V/Positive 0.7V(p-p)/75Ω VESA 1024 × 768 68.68 85.00 Non H/Positive V/Positive 0.7V(p-p)/75Ω Pin Assignment D-Sub mini 15 pin connector Pin No. Signal Pin No.
LIMITED WARRANTY EIZO NANAO CORPORATION (“EIZO”) and EIZO’s authorized distributors warrant to the original purchaser that the product shall be free from defect in material and/or workmanship for a period of three (3) years from the date of purchase. The service parts stock for this model shall be maintained for 5 years after the production is discontinued. To ensure the warranty, EIZO highly suggests that you return your “Warranty Registration” card to EIZO.
GARANTIE EIZO NANAOCorporation (EIZO) und die autorisierten Distributoren garantieren dem Erstkäufer für drei (3) Jahre ab Kaufdatum, daß das von ihnen gelieferte Produkt frei von Material- und Verarbeitungsfehlern ist. Ersatzteile für dieses Modell werden für fünf (5) Jahre nach Produktionsende lieferbar sein. Um die Garantie zu gewährleisten, empfiehlt EIZO die Rücksendung der „Warranty Registration Card“ an EIZO.
GARANZIA LIMITATA EIZO NANAO CORPORATION (in seguito denominata EIZO) e i distributori autorizzati EIZO garantiscono il prodotto per quanto riguarda sia i difetti di materiale sia i difetti di lavorazione per il periodo di anni tre (3) dalla data di acquisto. Il magazzino delle parti di ricambio per questo modello dovrà essere mantenuto per 5 anni dopo il termine della produzione.
Congratulations! You have just purchased a TCO’99 approved and labelled product! Your choice has provided you with a product developed for professional use. Your purchase has also contributed to reducing the burden on the environment and also to the further development of environmentally adapted electronics products.
Environmental requirements Flame retardants Flame retardants are present in printed circuit boards, cables, wires, casings and housings. Their purpose is to prevent, or at least to delay the spread of fire. Up to 30% of the plastic in a computer casing can consist of flame retardant substances. Most flame retardants contain bromine or chloride, and those flame retardants are chemically related to another group of environmental toxins, PCBs.
For Europe, etc.
For U.S.A, Canada, etc. (rated 100-120 Vac) Only FCC Declaration of Conformity We, the Responsible Party EIZO Nanao Technologies Inc. 5710 Warland Drive, Cypress, CA 90630 Phone: (562) 431-5011 declare that the product Trade name: EIZO Model: FlexScan T550 is in conformity with Part 15 of the FCC Rules.