
Installation Guide
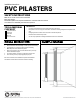

PVC PILASTERS
installation instructions:
construction adhesive
caulking gun
electric drill
miter saw
noncorrosive screws
TOOL & MATERIAL
CHECKLIST
IMPORTANT INFO
• It is highly recommended that you paint or nish pilaster before you install it.
• Place pilaster in room 2 to 3 days prior to installation. This allows the moulding to adjust to the temperature of the
room.
• Hot-dipped galvanized or stainless steel nails/screws are best for PVC products.
• Fill fastener holes in with PVC acrylic caulk.
• Use 100% acrylic paint before in stalling, nish with nal coat to cover caulked holes.
SAFETY INSTRUCTIONS
Make sure to use the correct tools recommended.
Wear safety goggles.
Follow xture, power tools, and paint manufacturers’ instructions and users manuals.
Use common sense and follow good construction practices.
1. Measure the distance from the landing floor to the top of the brickmoulding.
2. Cut the pilaster to 3/16” longer than the top of the brickmoulding.
Note: always trim from the bottom of the pilaster
3. Adhere using premium acrylic construction adhesive and any necessary
fasteners for additional support.
4. Use caulk to seal edges. Use a nger or putty knife to smooth caulk.
5. Once caulk is dry, touch up using a high quality acrylic paint.
Note: If new construction, after installation of the pilasters butt and t the
manufacturers recommended J-Channel to the sides of the moulding.
We Can Help. Call (866) 607-0453
www.ekenamillwork.comIndustry leading manufacturer of urethane, PVC, wood, rustic, and metal millwork