
Installation Guide
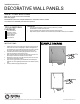

DECORATIVE WALL PANELS
installation instructions:
construction adhesive
power drill or hammer
nishing nails or screws
extra ne sandpaper
100% acrylic paint
level or chalk line
TOOL & MATERIAL
CHECKLIST
IMPORTANT INFO
• It is highly recommended that you paint or nish your panel before you install it.
• Recommended use of 100% acrylic latex paint
• Clean the installation surface and back of panel of any debris with a clean cloth.
• Always allow the panels to acclimate in the room where they’ll be installed for 48 hours prior to installation.
SAFETY INSTRUCTIONS
Make sure to use the correct tools recommended.
Wear safety goggles.
Follow adhesive, power tools, and paint manufacturers’ instructions and users manuals.
Use common sense and follow good construction practices.
1. Establish a level line for the top of the panels. Measure up from the floor and
make a mark. Use a level as a straight edge or chalk line and lightly draw a
line around the room. As you install the panels, make sure its top is even with
the level line. Mark vertical lines for desired spacing of panels as well.
2. Locate the wall studs and mark them lightly just above the level line. The
marks are useful when you nail the panels in place.
3. Apply construction adhesive to the back of the panel and set it in place. The
top of the panel should be flush with the level line on the wall.
4. Hold the panel in place and secure it with nails. If the panel covers an outlet,
cut a hole for the outlet before installing.
5. Apply caulk in any gaps between panel and wall and smooth with nger or
putty knife. Use caulk or lightweight spackle to ll in holes left from nishing
nails.
6. Touch‐up as needed using high quality latex paint.
We Can Help. Call (866) 607-0453
www.ekenamillwork.comIndustry leading manufacturer of urethane, PVC, wood, rustic, and metal millwork
ADHESIVE
FINISHING
NAILS
ADHESIVE
STEP BY STEP
INSTRUCTIONS
FINISHING
NAILS