Contents Warnings 2 Description of the machine 3 Installation 3 Operating instructions 6 Maintenance 8 Program tables 11-13 Control panel 13-15 Technical characteristics 15 1
Welcome! Thank you for choosing our washing machine. Please read the following instructions carefully for easy and safe usage of the machine’s many functions. WARNINGS T he equipment must only be used as a domestic washing machine. Any other use will be considered improper and therefore dangerous. Do not touch the machine with wet hands or feet. Do not allow children to operate the machine. The machine must only be opened on completion of the washing cycle.
DESCRIPTION OF THE MACHINE T he washing machine is a domestic appliance that is used to wash various types of fabrics. The machine is constructed from panels treated and painted such that high aesthetic quality is achieved. The motor and all moving parts have been designed and manufactured to provide quiet operation. The stainless steel drum is large and well mounted for a better quality wash and longer linen life. The control panel ensures easy selection of all the wash cycles desired.
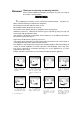
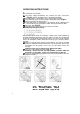
Warning! For transport reasons, the suspended unit located in the machine is locked in position by four distance pieces and screws. Before operating the machine, remove the blocking screws and insert four plastic caps to each hole accordingly. (Fig.3) Save the screws and distance pieces for future use. Once the screws and packing spacers have been removed, it is necessary to insert the plugs provided, which can be found inside the bag containing the documents.
Stain removal Not all stains can be removed by machine washing. The following instructions describe the treatment to be given to material prior to being loaded in the machine, in order to avoid an unsuccessful wash and the formation of residual discolouring. Wax: Remove the wax with a non-cutting edge in order to remove as much as possible, then place a sheet of paper between an iron and the stained item.
OPERATING INSTRUCTIONS For each wash ensure that: The water supply connections are secured*, the tap is turned on (Fig.10) and the discharge hose is positioned correctly. The programme selector (P) is in the stop position (STOP). Then, with dry hands, insert the plug in the power socket (Fig.11). Sort the washing into fabric types**. Check that there are no objects in the pockets of the clothing to be washed which may damage the fabric, washing machine or filter. Open the door (Fig.12).
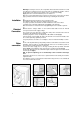
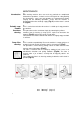
Pre-set using the “Adjustable thermostat (T) and programmer” (P) knob. Warning! Do not rotate the programmer knob (P) in an anticlockwise direction. Fig.16 Fig.17 Fig.18 Fig.19 Press the no-spin pushbutton if required (Fig.16). When this pushbutton is pressed, the machine completes the wash cycle without spinning. This option is useful for the wash-n-wear clothing. If the washing weighs 1/2kg or less, press the half-load pushbutton (Fig.17). Light soiled materials option.
MAINTENANCE Introduction Our washing machine does not need any particular or complicated maintenance operations, in that it has been designed for a long working life. Nevertheless, some care and attention are recommended*. Before carrying out the following operations, ensure that the machine is disconnected from the electricity supply (Fig.11) and the water is turned off (Fig.25).
IF THE MACHINE DOES NOT WORK Before consulting the technical assistance service, check that the following operations have been carried out. This may lead to a saving in both time and money. Does not work (indicator light off) Check that: 1) The power supply is available at the mains. 2) The plug is inserted correctly in the socket. 3) The programmer knob (P) is pulled out, or the start pushbutton (if fitted) is pressed*. 4) The door is closed. 5) Consult technical assistance.
Vibrates or is noisy The door does not open Check that: 1) Large articles (sheets, tablecloths, etc.) are not tangled or folded. 2) The washing machine is standing correctly on its feet *. 3) The four packing screws and distance pieces have been removed**. 1) Wait 3 minutes after the program has finished. Try to start the machine to see whether the problem has been solved. If the problem persists, call for technical assistance. * See Fig.4 (page 4) ** See Fig.
MAIN PROGRAMS FOR RESISTENT FABRICS Knob Knob (P)* (T)** 1 2 3 4 90℃ 90℃ 90℃ 60℃ Fabric Cotton, linen, hemp Examples and degree of soiling Sheets, white and solid colour tablecloths, heavy soil, underwear Cotton, linen, Coloured underwear, shirts resistant, bath robes, cotton knits, mixes sheets, normal soil Cotton, linen, hemp Sheets, white and solid colour tablecloths, light -soil, underwear Cotton, linen, Coloured underwear, shirts resistant, bath robes, cotton knits, mixes sheets, normal so
GENTLE ACTION PROGRAMS FOR SYNTHETICS AND MIXES Knob Knob (P)* (T)** Fabric Example and degree Dispenser of soiling compartments 8 60℃ Resistent mixes Shirts, sheets, baby wear nappies; heavy soil 1,2,3 9 40℃ Resistent mixes Shirts, sheets, baby wear, nappies; normal soil 2,3 Use of supplementary buttons Program description Prewash , main wash, 2 rinses, softener, empty and slow spin __ Recom mended __ As required Main wash, 2 rinses, softener, empty and slow spin __ Recom mended __ A
AUXILIARY PROGRAMS FOR WOOLLENS AND SILK Knob Knob (P)* Program (T)** Any Program description compartments Mixes, delicate 12 2 rinses, softener, Gentle rinse position Use of supplementary buttons Dispenser Fabric 3 synthetics empty and final spin __ Recom mende d __ As required Whitener, Any Mixes, delicate scented 1 rinses, softener, 13 3 position synthetics __ empty and slow spin softener Gentle As required Recom mende d __ spin Any Mixes, delicate 14 As Gentle spin
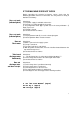
Control panel Control panel A – Program Table B – On/Off pushbutton C – No-spin pushbutton D – Half-load pushbutton E – Energy Saving pushbutton F – Water Saving pushbutton Technical characteristics 14 Rated Voltage Rated Frequency 220 ~240 V 50 Hz Water pressure range 0.05— — 1 MPa Input washing power Input spin power 315 W 750 W Heating power Maximum power 1700 W 2015 W Maximum current 9A Dimensions (cm) Height× × Width× × Depth 85× × 59.