USER MANUAL ALUMINIUM HEATER WITH SMART APP CONTROL EAH2000W Thank you for choosing electriQ Please read this user manual before using this heater and keep it safe for future reference. Visit our page www.electriQ.co.
CONTENTS SAFETY INSTRUCTIONS 3 SETTING THE UNIT UP 5 PRODUCT OVERVIEW 6 CONTROL PANEL 6 DISPLAY 7 QUICK USE GUIDE 7 SETTING THE DAY AND TIME 7 OPERATION 8 WEEKLY TIMER 9 SETTING UP THE APP 10 USING THE APP 15 SETTING THE UNIT TO WORK ON A TIMER 19 CLEANING AND MAINTENANCE 20 TROUBLESHOOTING 20 TECHNICAL SPECIFICATIONS 21 SUPPORT 21 PRODUCT FICHE 22 Page 2 of 22
SAFETY INSTRUCTIONS • • • • • • • • • • • • • • • • • • • • IMPORTANT Carefully read the instructions before operating the unit This appliance is for indoor use only. Rating: This unit must be only connected to a 220-240 V / 50 Hz earthed outlet. Installation must be in accordance with regulations of the country where the unit is used. If you are in any doubt about the suitability of your electrical supply have it checked and, if necessary, modified by a qualified electrician.
• • • • • • • • • • • • • • • • • The heater must not be located immediately below a socket outlet. Always ensure the unit is secure before operation. Do not use on unstable or uneven surfaces and if wall-mounted, it must be securely attached to a suitable wall. Do not move or tilt the unit. Avoid keeping the unit in direct sunlight for a long period of time. The heater is designed to be used at temperatures above -20°C.
SETTING THE UNIT UP FOR USE The appliance can be wall-mounted using the supplied mounting brackets, or alternatively can be set up as a portable heater using the supplied legs and castors. It is important that the unit is only operated if it is wall-mounted or has the castors fitted. WALL MOUNTING Please note: • A gap of at least 30cm should be left to both sides of the heater following installation. • It is the responsibility of the installer to ensure that the unit is securely installed. 1.
PRODUCT OVERVIEW Air Outlet Control Panel Power Switch Castors CONTROL PANEL STANDBY Button UP Button DOWN Button PROGRAM Button Page 6 of 22 TIMER Button
DISPLAY Chile Lock indicator Time Heating indicator Preset Indicator High Heat Mode Temperature Display Low Heat Mode WiFi Indicator Day Indicator Anti-Frost Mode Power Indicator High Heat Mode* Heating Mode for each hour* Low Heat Mode* * For 7 day timer Timer Indicator* Time* QUICK USE GUIDE 1. Switch the unit on using the main power switch on the rear of the unit. The heater will make a sound, and the display will flash. 2. Press the STANDBY button to turn on the heater.
OPERATION TURNING ON AND OFF The Standby button can be pressed to enter and exit standby mode. If the unit is not to be used for a while, we would advise for it to be turned off using the switch on the back and unplugged. CHANGING THE DESIRED ROOM TEMPERATURE The desired room temperature can be adjusted in both High heat and Low Heat modes, using the UP and DOWN buttons. After the UP or DOWN button has been pressed, the temperature display will show the desired temperature.
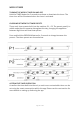
WEEKLY TIMER TURNING THE WEEKLY TIMER ON AND OFF Hold the TIMER button for 3 seconds to activate or deactivate the timer. The timer icon will be illuminated when the timer is activated. CHOOSING BETWEEN THE TIMER PRESETS There are 4 timer presets built into the machine: P1 – P3. The presets specify in which mode the unit operates throughout the day, changing the appliance between High Heat and Low Heat options. Press and hold the PROGRAM button for 3 seconds to change between the presets.
CONNECTING THE APPLIANCE TO WIFI DOWNLOAD THE APP TO YOUR PHONE Download the ”TUYA SMART” app, from your chosen app store, using the QR codes below, or by searching for the app in your chosen store. ANDROID IOS MODES AVAILABLE FOR SETUP The heater has two different setup modes, Quick Connection and AP (Access Point). The quick connection is a quick and simple way to set the unit up. The AP connection uses a direct local WiFi connection between your phone and the heater to upload the network details.
REGISTER THE APP 1. Press on the register button at the bottom of the screen. 4. A verification code will be sent by the method selected in step 3. Enter the code into the app. 2. Read the Privacy policy and press the Agree Button. 5. Type in the password you would like to create. This needs to be 6-20 characters, with letters and numbers. Page 11 of 22 3. Enter your email address or phone number and press continue to register. 6. The app is now registered.
SETTING UP YOUR HOME WITHIN THE APP TUYA is designed so it can work with a large number of compatible smart devices within your home. It can also be set up to work with multiple devices within different houses as such during the setup process, the app requires that different areas are created and named to allow easy management of all your devices. When new devices are added, they are assigned to one of the rooms you have created. CREATING ROOMS 1. Press on the ADD HOME button. 2.
CONNECTING USING THE QUICK CONNECTION METHOD Before initiating the connection, make sure the unit is in standby mode (Power switch ON, but unit turned off), with the WiFi indicator flashing twice per second. If not follow the instructions for changing the connection mode. Also ensure your phone is connected to the WiFi network. (We advise turning mobile data off during setup) 1. Open app and press “+” to add device, or use the add device button 4. Enter your Wi-Fi password and press confirm. 2.
CONNECTING USING APP MODE ALTERNATIVE METHOD Before initiating the connection, make sure the unit is in standby mode, with the WiFi Light Indicator flashing once per second. If not follow the instructions for changing the WiFi connection mode. Also ensure your phone is connected to the WiFi network. (We advise turning mobile data off during setup) 1. Open app and press “+” to add device, or use the add device button 2. Select the type of device as “Heater” within the Home Appliance tab. 4.
CONTROLLING YOUR APPLIANCE THROUGH THE APP THE HOME SCREEN Each device has its own entry on the home screen to allow the user to either quickly turn the unit on or off, or to enter the device screen to make other changes. Voice Control: Press to give verbal instructions for operation. Add Device: Add a device to the app, and go through the setup process.
DEVICE SCREEN The device screen is the main control screen for the heater, providing access to the controls to amend the functions and settings. Back: Returns to the Home Screen Device Name Edit Name: Use to change the name of the heater Current Mode: Shows the mode the heater is currently working in. Desired Temperature: Displays what has been set as the target room temperature.
SMART SCENES Smart Scenes is a powerful tool providing the option to customize the operation of the air heater based both on conditions within the room and outside influences. This gives the user the option of specifying much more intelligent actions. These are split into two categories Scene and Automation. TAP TO RUN Scene allows for a one touch button to be added to the Home Screen. The button can be used to change a number of settings in one go, and can change all the settings within the unit.
AUTOMATION Automation allows an automatic action to be set up for the device. This can be triggered by the Time, and a range of other influences, depending what other TUYA enabled devices you have on the network. 1. Press on the Scene tab at the bottom of the Home screen 2. Press on the Automation tab at the top of the screen. 4. Setup is very similar to the scene setup on the previous page, and includes an extra section for specifying a trigger for the scene to start. 3.
SETTING THE UNIT TO WORK ON A TIMER The automation feature within TUYA can be used to set up timed operation, this is done through the automation within SMART SCENES. Follow the steps on the previous page, on the “SET A CONDITION” screen, set the condition as schedule, choose the time and days you require the unit to turn on. Then press next and In the “SET UP A TASK” screen, choose the appliance, then the option to power the unit on, and the other settings required.
CLEANING AND MAINTENANCE CLEANING AND STORAGE ATTENTION: Please shut off the unit and unplug from the mains before cleaning or performing any maintenance. Cleaning the surface Clean the heater with a duster or a soft wet cloth. Do not use chemical solvents (such as benzene, alcohol or gasoline) as they may cause irreversible damage. Make sure no water enters the control panel or gaps in the casing. Do not run the unit until completely dry.
TECHNICAL DATA Model No. Voltage Frequency Max power Model colour Product dimensions Net weight (Kg) EAH2000W 220V-240V 50Hz-60Hz 1000W/2000W White/ Black 850x260x580 10.5 electriQ UK SUPPORT www.electriQ.co.uk/support Please, for your own convenience, make these simple checks before calling the service line. If the unit still fails to operate call: 0330 390 3061 or complete the online form 1. Is the unit plugged into the mains? 2. Is the fuse OK? 3.
PRODUCT FICHE Item Symbol Value Model Identifier: EAH2000W Unit Item Heat Output Unit Type of heat input, for electric storage local space heaters only (select one) Nominal heat output Pnom 1.8-2.0 kW manual heat charge control, with integrated thermostat No Minimal heat output Pmin 1.0 kW manual heat charge control with room and/or outdoor temperature feedback No Maximum continuous heat output Pmax 2.