
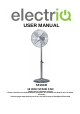
User Manual


5
INSTALLATION
BASE ASSEMBLY
1. Unscrew the RING and BASE LOCKING SCREW
from the POLE.
2. Insert the POLE through the hole in the center of
the BASE, and twist into position.
3. Turn the BASE upside down with the POLE facing
the floor and place the BASE WEIGHT SUPPORT
onto the underside of the BASE.
4. Tighten the BASE WEIGHT SUPPORT to the Base
using the RING and BASE LOCKING SCREW.
FAN HEAD ASSEMBLY
1. Remove the NECK FIXING BOLT and KNOB from
the top of the INNER POLE.
2. Remove the TILT ADJUSTMENT KNOB from the neck of the MOTOR UNIT; place the
NECK of the MOTOR UNIT over the INNER POLE ensuring the LOCATING SCREW is
aligned with the slot on the side of the pole. (See Figure 1)
3. Push the NECK FIXING BOLT through the NECK of the MOTOR UNIT and the INNER
POLE and tighten the LOCATING SCREW leaving a 3mm gap under the screw head.
(See Figure 2)
4. Fix the NECK FIXING KNOB to the NECK FIXING BOLT and fix the TILT ADJUSTMENT
KNOB to the neck of the MOTOR UNIT. Now you can adjust the tilt of the MOTOR UNIT
and secure it in position by tightening the TILT ADJUSTMENT KNOB. (See Figure 3)
FAN GRILL ASSEMBLY
1. Unscrew the 4 x GRILL SCREWS from the MOTOR UNIT.
2. Align the REAR GRILL on the MOTOR UNIT (the handle on the REAR GRILL should be
on the top), then fix with the 4x REAR GRILL SCREWS.
3. Remove the plastic sleeve from the MOTOR SHAFT and attach the BLADE to the
MOTOR SHAFT by tightening the BLADE SCREW. Ensure that the flat surface of the
MOTOR SHAFT is aligned with the BLADE SCREW.
4. Centre the FRONT GRILL by aligning the central logo so it is horizontal and parallel to
the floor. Then, secure the FRONT and REAR GRILLS completely together by snapping
5x GRILL CLIPS into place. Lastly, tighten the GRILL LOCKING SCREW at the bottom
of the REAR GRILL.