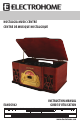
NOSTALGIA MUSIC CENTRE CENTRE DE MUSIQUE NOSTALGIQUE EANOS502 INSTRUCTION MANUAL GUIDE D’UTILISATION Thank you for your purchase of this Electrohome product. Please read this instruction manual carefully before using product to ensure proper use. Keep this manual in a safe place for future reference. Merci d’avoir fait l’achat de cet appareil Electrohome. S’il vous plaît lisez ce manuel attentivement avant de faire fonctionner l’appareil pour vous assurer de l’utiliser correctement.
IMPORTANT SAFETY INSTRUCTIONS TO PREVENT FIRE OR SHOCK HAZARD, DO NOT USE THIS PLUG WITH AN EXTENSION CORD, RECEPTACLE OR OTHER OUTLET UNLESS THE BLADES CAN BE FULLY INSERTED TO PREVENT BLADE EXPOSURE. TO PREVENT FIRE OR SHOCK HAZARD, DO NOT EXPOSE THIS APPLIANCE TO RAIN OR MOISTURE.
IMPORTANT SAFETY INSTRUCTIONS • • • • • Avoid installing this unit in places exposed to direct sunlight or close to heat radiating appliances such as electric heaters, on top of other stereo equipment that radiates too much heat, places lacking ventilation or dusty areas, places subject to constant vibration and/or humid or moist areas. Do not attempt to clean this unit with chemical solvents as this might damage the finish. Use a clean dry cloth. Operate controls and switches as described in the manual.
TABLE OF CONTENTS Important Safety Instructions ................................................................................................................................... 2 Important Notes........................................................................................................................................................ 3 What’s Included.................................................................................................................................................
BUTTONS AND CONNECTIONS Main Unit 1 2 3 Control Panel 4 5 6 14 15 16 17 18 19 20 21 7 8 9 10 11 12 13 Back of Unit Remote 22 Turntable 24 25 23 31 37 32 38 33 39 34 26 27 28 29 30 35 40 36 41 42 -5-
BUTTONS AND CONNECTIONS 1. 2. 3. 4. 5. 6. 7. 8. 9. 10. 11. 12. 13. 14. 15. 16. 17. 18. 19. 20. 21.
PREPARATION FOR USE UNPACKING AND SETUP • • • • • • • • • • Carefully remove the unit from the display carton and remove all packing material from the unit Unwind the AC power cord and extend it to its full length Unwind the FM Antenna wire and extend it to its full length Place the unit on a stable, level surface, close to an AC outlet, out of direct sunlight, and away from sources of excess heat, dust, moisture, humidity, or strong magnetic fields Raise the lid to expose the phonograph.
PREPARATION FOR USE RAISING AND LOWERING THE LID IMPORTANT: To open the lid, raise it as far as it will go until the lid support bracket ‘locks’ in the open position. To close the lid, lift it upward slightly until the lid support bracket ‘unlocks’ , and then gently lower the lid. TO AVOID DAMAGING THE CABINET OR THE LID, NEVER FORCE THE LID CLOSED. ALWAYS RAISE THE LID TO RELEASE THE LID SUPPORT BRACKET.
OPERATION INSERTING AND PLAYING A CD 1. Rotate the OFF/VOLUME control clockwise until a click is heard to turn the unit on. The LED power indicator will light. 2. Rotate the AM/FM/PH/CD switch to the CD position. ‘- -’ will appear in the display. 3. Press the OPEN/CLOSE button to open the CD tray. Place a CD in the tray, with the printed label facing up. Press the OPEN/CLOSE button again to close the CD tray. 4.
OPERATION RANDOM PLAYBACK During CD-R/RW stop mode, press the RANDOM button once; the random indicator will light and the unit will then play the tracks in a random order. Press the STOP button to cancel the random setting and the random indicator will turn off. Note: During RANDOM playback, press the REPEAT button once to activate repeat 1 playback. The REPEAT LED indicator will blink and the RANDOM LED indicator will light solid.
OPERATION PLAYING RECORDS This system includes a full-size, 3-speed, belt-drive turntable that plays 33,45 and 78 RPM records. 1. With the unit on, rotate the AM/FM/PH/CD switch to the PH position. Make sure that you have removed the stylus cover from the stylus and have released the Tone Arm Lock (See Page 7) 2. Set the turntable speed switch to the appropriate speed: 33, 45, or 78 RPM. Set the record onto the turntable. If you are playing 45 RPM singles, place the 45 RPM adapter on the center spindle. 3.
OPERATION Notes: • The Record indicator and ‘rEC’ will blink when recording. • Press the STOP button once to cancel the record function. • When recording (regardless of the source), the position of the volume will not affect the recording, as the recording volume is preset. • When you insert the USB drive with folders recorded by this system into the computer and then open, the time will be always shown as ‘2006-3-23 4:05’ for all of recording folders.
CARE AND MAINTENANCE IMPORTANT! To protect the turntable from damage during transportation, a silver transit screw is located at the upper right of the turntable platform. 1. Before playing, please use a screwdriver to turn the transit screw in clockwise direction (screw going down) completely to unlock the turntable. 2. To lock the turntable again for transportation, please turn screw in counterclockwise direction. TO REPLACE THE CARTRIDGE FROM TONE ARM PLEASE FOLLOW THE BELOW PROCEDURES. 1.
ELECTROHOME® WARRANTY Thank you for choosing ELECTROHOME® Consumer Electronics Products! BlueTronics Group gives the following express warranty to the original consumer purchaser or gift recipient for this ELECTROHOME product, when shipped in its original container and sold or distributed by BlueTronics Group or by an Authorized ELECTROHOME Dealer: BlueTronics Group warrants that this product is free, under normal use and maintenance, from any defects in material and workmanship.
INSTRUCTIONS DE SÉCURITÉ IMPORTANTES AFIN D’ÉVITER TOUT RISQUE DE FEU OU DE RISQUE ÉLECTRIQUE, N’UTILISEZ PAS CETTE PRISE AVEC UNE RALLONGE, UN RÉCEPTACLE OU UNE AUTRE PRISE À MOINS QUE LES LAMES NE PUISSENT ÊTRE TOTALEMENT INSÉRÉES POUR ÉVITER L’EXPOSITION DES LAMES. POUR ÉVITER TOUT RISQUE DE FEU OU DE RISQUE ÉLECTRIQUE, N’EXPOSEZ PAS CE MATÉRIEL À L’HUMIDITÉ OU À LA PLUIE.
NOTES IMPORTANTES • • • • • Évitez l’installation de cet appareil dans des endroits exposés à la lumière directe du soleil ou à proximité d’appareils de chauffage comme les radiateurs électriques, le dessus d’équipement stéréo qui produisent trop de chaleur, des endroits sans ventilation, des zones poussiéreuses, des endroits sujets à la vibration constante et/ou les zones humides Ne tentez pas de nettoyer cet appareil avec des solvants chimiques car cela pourrait endommager la finition.
TABLE DES MATIÈRES Instructions de sécurité importantes Notes importantes Ce qui est inclus Touches et Connexions Configuration Déballage et installation Source d’alimentation Élever et baisser le couvercle Protéger vos meubles Écouteurs Utilisation Fonctionnement de la radio Lecture d’un CD Lecture aléatoire Lecture répétée Lecture programmée Lecture de disques Changement de la pointe de lecture 14 15 16 17 19 19 19 20 20 20 21 21 21 22 22 22 23 24 Garantie Electrohome 25 CE QUI EST INCLUS • • • • • L
TOUCHES ET CONNEXIONS Unité principale 1 2 3 Panneau de commande 4 5 6 14 15 16 17 18 19 20 21 7 8 9 10 11 12 13 Panneau arrière Télécommande 22 Plateau 24 25 23 31 37 32 38 33 39 34 26 27 28 29 30 35 40 36 41 42 - 18 -
TOUCHES ET CONNEXIONS 1. 2. 3. 4. 5. 6. 7. 8. 9. 10. 11. 12. 13. 14. 15. 16. 17. 18. 19. 20. 21. 22.
CONFIGURATION DÉBALLAGE ET INSTALLATION • • • • • • • • • • Retirer avec précaution l’unité du carton d’emballage et retirer tous les emballages de l’unité. Dérouler le câble d’alimentation jusqu’à sa longueur maximale. Dérouler le câble d’antenne FM jusqu’à sa longueur maximale. Placer l’unité sur une surface stable et nivelée, proche d’une prise secteur, sans lumière du soleil directe, et loin de sources de chaleur excessive, de poussière, de moisissure, d’humidité ou de champs magnétiques puissants.
PRÉPARATION POUR L’UTILISATION LEVER ET BAISSER LE COUVERCLE IMPORTANT: Pour ouvrir le couvercle, le lever au maximum jusqu’à ce que la baguette de support se « bloque » sur la position ouverte. Pour fermer le couvercle, le soulever légèrement jusqu’à ce que la baguette de support se « débloque », et ensuite baisser doucement le couvercle. AFIN D’ÉVITER D’ENDOMMAGER LE COFFRET OU LE COUVERCLE, NE JAMAIS FORCER LE COUVERCLE FERMÉ. TOUJOURS LEVER LE COUVERCLE POUR LIBÉRER LA BAGUETTE DE SUPPORT DU COUVERCLE.
UTILISATION INSÉRER ET LIRE UN CD 1. 2. 3. 4. 5. 6. 7. Faire tourner le bouton OFF/VOLUME vers la droite jusqu’à ce qu’on entende un clic pour allumer l’unité. La LED power s’allumera. Faire tourner l’interrupteur AM/FM/PH/CD sur la position CD. ‘- -’ apparaîtra à l’écran Presser le bouton OPEN/CLOSE pour ouvrir le lecteur CD. Placer un CD dans le lecteur, face imprimée sur le dessus. Presser le bouton OPEN/CLOSE à nouveau pour fermer le lecteur.
UTILISATION LECTURE ALÉATOIRE Lorsque le mode CD-R/RW est sur stop, presser le bouton RANDOM une fois ; l’indicateur aléatoire s’allumera et l’unité jouera alors les chansons de manière aléatoire. Presser le bouton STOP pour annuler le réglage aléatoire et l’indicateur aléatoire s’éteindra. Note: Pendant la lecture RANDOM, presser le bouton REPEAT une fois pour activer la répétition d’une chanson. L’indicateur LED REPEAT clignotera et l’indicateur LED RANDOM sera fixe.
UTILISATION LIRE DES DISQUES Ce système inclue une platine taille réelle, à 3 vitesses, à entrainement par courroie qui joue des disques 33, 45 et 78 tours. 1. Une fois l’unité allumée, faire tourner l’interrupteur AM/FM/PH/CD sur la position PH. S’assurer que vous avez enlevé la couverture du stylet et que vous avez déverrouillé le Bras de Lecture (Voir Page 7) 2. Définir la vitesse de la platine sur la vitesse appropriée : 33, 45, or 78 Tours. Mettre le disque sur la platine.
UTILISATION Notes: • L’indicateur d’enregistrement clignote lors de l’enregistrement. • Appuyez sur la touche STOP une fois pour annuler la fonction d’enregistrement. • En enregistrant (sans tenir compte de la source), la position du volume n’affectera pas l’enregistrement, comme le volume d’enregistrement est préréglé.
CARE AND MAINTENANCE IMPORTANT! Pour protéger le plateau de dommages pendant le transport, une vis de transport argentée se trouve en haut à droite du plateau. 1. Avant de jouer, s’il vous plaît utiliser un tournevis pour tourner la vis de transport en commun dans le sens horaire pour débloquer complètement le plateau. 2. Pour verrouiller le plateau pour le transport à nouveau, s’il vous plaît tourner la vis dans le sens anti-horaire.
GARANTIE ELECTROHOME® Merci d’avoir choisi un produit électronique grand public ELECTROHOME! BlueTronics Group accorde la garantie expresse suivante à l’acheteur original de cet appareil ELECTROHOME ou à la personne qui l’a reçu en cadeau, pourvu qu’il ait été expédié et vendu ou distribué par BlueTronics Group ou un détaillant ELECTROHOME autorisé dans son emballage original.