P/N 218972302 (0101)
Product Registration The information contained within this Owner's Guide will instruct you on how to properly operate and care for your product. Please read through the information contained in your literature pack to learn more about your new appliance. Record Your Model and Serial Numbers Record the Model No. and Serial No. of this refrigerator in the space provided below. These numbers are found on the serial plate located on the top left wall of the refrigerator compartment. Model No. Serial No.
Important Safety Instructions Proper Disposal of Your Refrigerator/Freezer DANGER Risk of child entrapment. Child entrapment and suffocation are not problems of the past. Junked or abandoned refrigerators or freezers are still dangerous — even if they will sit for "just a few days." If you are getting rid of your old refrigerator or freezer, please follow the instructions below to help prevent accidents. BEFORE YOU THROW AWAY YOUR OLD REFRIGERATOR/FREEZER: • Remove doors.
First Steps Before starting the refrigerator, follow these important first steps: Location • 3" AIR SPACE • • • 1" Choose a place that is near a grounded electrical outlet. DO NOT use an extension cord or an adapter plug. If possible, place the refrigerator out of direct sunlight and away from the range, dishwasher or other heat sources. The refrigerator must be installed on a floor that is level and strong enough to support a fully loaded refrigerator.
Connecting Ice Maker to Water Supply To avoid electric shock, which can cause death or severe personal injury, disconnect the refrigerator from electrical power before connecting a water supply line to the refrigerator. To Avoid Property Damage: • Copper tubing is recommended for the water supply line. Water supply tubing made of 1/4” plastic is not recommended since it greatly increases the potential for water leaks.
Energy Saving Ideas • • • • • • • Setting the Controls Locate the refrigerator in the coolest part of the room, out of direct sunlight and away from heating ducts or registers. Do not place the refrigerator next to heatproducing appliances such as a range, oven or dishwasher. If this is not possible, a section of cabinetry or an added layer of insulation between the two appliances will help the refrigerator operate more efficiently. Level the refrigerator so the doors close tightly.
Fresh Food Storage Shelf Adjustment Refrigerator shelves are easily adjustable to suit individual needs. Some models have sliding shelves, others have cantilever shelves, or both. Before adjusting shelves, remove all food. The shipping clips which stabilize the shelves for shipping may be removed and discarded. To adjust sliding shelves, remove by pulling forward to the stop position, then lift the front edge up and pull out. Replace on any pair of rails by reversing this procedure.
Care and Cleaning Keep your refrigerator and freezer clean to prevent odor build-up. Wipe up any spills immediately and clean both sections at least twice a year. Never use metallic scouring pads, brushes, abrasive cleaners or strong alkaline solutions on any surface. Do not wash any removable parts in a dishwasher. Always unplug the power cord from the wall outlet before cleaning. Turning the control to OFF does not disconnect power to the controls, light bulb, or other electrical components.
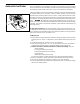
Automatic Ice Maker If your refrigerator has an automatic ice maker, it will provide a continuous supply of ice for normal use. The automatic ice maker is an optional accessory which may be installed in most models at any time. Call your local dealer for installation. G05U0016 After the plumbing connections have been completed, the water supply valve must be opened. Place the ice container under ice maker, pushing it as far back as possible. Lower the wire signal arm to its "down" or ON position.
Door Reversal Instructions Your refrigerator is equipped with reversible door hinges. Hinging of the door can be changed to the opposite side any time you wish. An envelope containing extra plastic hole plugs is included in some models. Turn the refrigerator control to OFF. Remove all food, bottles, and other items from the door. Begin with freezer door. Completely remove one door before beginning the other. 1. Refer to the Toe Grille Instructions on page 13 to remove the Toe Grille (some models).
6. To remove Freezer Door freezer handle: Reverse handles while doors are off. Remove the two screws attaching the handle to the bottom of the freezer door. Swing bottom of handle away from the door and slide handle straight up and off of dovetail button. Remove screw and dovetail button and install on other side, using the same holes as the nameplate. To move nameplate to other side, remove the magnetic nameplate from its frame, turn frame upside down and install in old handle holes.
11. Place original washer (some models) over hole in refrigerator door and line up hole in center hinge. Insert hinge pin through both holes. Place washer (some models) on hinge pin, then position freezer door on center hinge. 12. Remove plug from upper bearing of door and reinstall on opposite side. Bearing Plug 13. Assemble upper hinge to top of cabinet and door. Use opposite set of holes. Do not completely tighten screws. Align doors so there is a parallel gap between doors.
Refrigerator Toe Grille Assembly Instructions NOTE: If your refrigerator has the type of Mounting Clips shown in Figure 2 below, use this procedure. NOTE: If your refrigerator has the type of Mounting Clips shown in Figure 1B below, use this procedure. Tools Required: None Tools Required: None To Attach the Toe Grille to the Mounting Clips: To Attach the Toe Grille: • With the end of the Toe Grille against the side of the Lower Hinge, align the two (2) Assembly Slots with the two (2) Mounting Clips.
Avoid Service Checklist OCCURRENCE Before calling for service, review this list. It may save you both time and expense. This list includes common occurrences that are not the result of defective workmanship or materials in this appliance. SOLUTION RUNNING OF REFRIGERATOR Refrigerator compressor does not run. Refrigerator control is off. Set refrigerator control. See Setting the Controls. Refrigerator is in defrost cycle. This is normal for a fully automatic defrosting refrigerator.
OCCURRENCE SOLUTION TEMPERATURES ARE TOO WARM Temperature in the freezer is too warm. Freezer control is set too warm. Set the freezer control to a colder setting until the freezer temperature is satisfactory. Allow 24 hours for the temperature to stabilize. Temperature in the refrigerator is too warm and the freezer temperature is satisfactory. Refrigerator control is set too warm. Refrigerator control has some effect on freezer temperature. Set the refrigerator control to a colder setting.
OCCURRENCE SOLUTION OPENING/CLOSING OF DOORS/DRAWERS Door(s) will not close. Door is not designed to swing shut automatically. Close door securely. Door was closed too hard, causing other door to open slightly. Close both doors gently. Refrigerator is not level. It rocks on the floor when it is moved slightly. Be sure floor is level and solid and can adequately support refrigerator. Adjust levelers or rollers (some models) as needed. Floor is uneven or weak.
GIBSON REFRIGERATOR PLATINUM ADVANTAGE WARRANTY Your Gibson product is protected by this warranty WARRANTY PERIOD THROUGH OUR AUTHORIZED SERVICERS, WE WILL: THE CONSUMER WILL BE RESPONSIBLE FOR: FULL TWO-YEAR WARRANTY Two years from original Pay all costs for repairing or replacing any parts of purchase date. this appliance which prove to be defective in materials or workmanship. Costs of service calls that are listed under NORMAL RESPONSIBILITIES OF THE CONSUMER.
Service Information (Canada) To avoid unnecessary cost and inconvenience, make a few simple checks before calling for service. Common occurrences and their solutions can be found in the Avoid Service Checklist. Be sure you have followed the instructions in this manual. If you are unable to locate the cause of a problem, call for service. Insist on factory service by an authorized ELECTROLUX PARTS AND SERVICE depot.
REFRIGERATOR WARRANTY (CANADA) Your refrigerator is protected by this warranty WARRANTY PERIOD THROUGH OUR AUTHORIZED SERVICERS, WE WILL: FULL ONE-YEAR WARRANTY One year from original purchase date Pay all costs for repairing or replacing any parts of this appliance which prove to be defective in materials or workmanship. Excludes original and replacement Ice & Water filter cartridges (if equipped). Original and replacement cartridges are warranted for 30 days (parts only).
[DO NOT PRINT THIS PAGE TO BE LEFT INTENTIONALLY BLANK.