F53 FQ53 ................................................ .............................................
www.electrolux.com CONTENTS 1. 2. 3. 4. 5. 6. 7. 8. 9. 10. 11. SAFETY INFORMATION . . . . . . . . . . . . . . . . . . . . . . . . . . . . . . . . . . . . . . . . . . . . . . . . . . . 3 SAFETY INSTRUCTIONS . . . . . . . . . . . . . . . . . . . . . . . . . . . . . . . . . . . . . . . . . . . . . . . . . . 4 PRODUCT DESCRIPTION . . . . . . . . . . . . . . . . . . . . . . . . . . . . . . . . . . . . . . . . . . . . . . . . . 6 BEFORE FIRST USE . . . . . . . . . . . . . . . . . . . . . . . . . . . . . . .
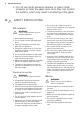
ENGLISH 3 1. SAFETY INFORMATION Before the installation and use of the appliance, carefully read the supplied instructions. The manufacturer is not responsible if an incorrect installation and use causes injuries and damages. Always keep the instructions with the appliance for future reference. 1.1 Children and vulnerable people safety WARNING! Risk of suffocation, injury or permanent disability.
www.electrolux.com • Do not use harsh abrasive cleaners or sharp metal scrapers to clean the glass door since they can scratch the surface, which may result in shattering of the glass. 2. SAFETY INSTRUCTIONS 2.1 Installation WARNING! Only a qualified person must install this appliance. • Remove all the packaging. • Do not install or use a damaged appliance. • Obey the installation instruction supplied with the appliance. • Always be careful when you move the appliance because it is heavy.
ENGLISH • Be careful, when you open the appliance door while the appliance is in operation. Hot air can release. • Do not operate the appliance with wet hands or when it has contact with water. • Do not apply pressure on the open door. • Do not use the appliance as a work surface or as a storage surface. • Always keep the appliance door closed when the appliance is in operation. • Open the appliance door carefully. The use of ingredients with alcohol can cause a mixture of alcohol and air.
www.electrolux.com 3. PRODUCT DESCRIPTION 1 2 3 5 Grill 4 6 Oven lamp 7 Fan 8 Aqua cleaning container 5 4 10 3 2 1 9 5 9 Rating plate 6 10 Shelf positions 7 8 1 Knob for the oven functions 2 Knob for the timer 3 Knob for the temperature 3.1 Oven accessories • Wire shelf For cookware, cake tins, roasts. • Grill- / Roasting pan To bake and roast or as pan to collect fat. 4 Temperature indicator 4. BEFORE FIRST USE WARNING! Refer to the Safety chapters. 1. 2. 4.
ENGLISH 7 temperature control knob to the Off position. 5.2 Oven functions Oven function Application Off position The appliance is off. Conventional Cooking To bake and roast on one oven level. The top and bottom heating elements operate at the same time. Fan Cooking To roast or roast and bake food with the same cooking temperature, on more than one shelf, without flavour transference. Grilling To grill flat food items in small quantities in the middle of the shelf. To make toast.
www.electrolux.com 8. HELPFUL HINTS AND TIPS • The appliance has five shelf levels. Count the shelf levels from the bottom of the appliance floor. • The appliance has a special system which circulates the air and constantly recycles the steam. With this system you can cook in a steamy environment and keep the food soft inside and crusty outside. It decreases the cooking time and energy consumption to a minimum. • Moisture can condense in the appliance or on the door glass panels. This is normal.
ENGLISH TYPE OF DISH Conventional Cooking Fan Cooking Cooking time Shelf po- Temp Shelf po- Temp [min] sition [°C] sition [°C] Notes Strudel 3 175 2 150 60 - 80 In a baking tray Jam-tart 2 170 2 (left and right) 165 30 - 40 In a 26 cm cake mould Sponge cake 2 170 2 160 50 - 60 In a 26 cm cake mould Christmas cake / Rich fruit cake 2 170 2 150 90 - 120 In a 20 cm cake mould1) Plum cake 1 175 2 160 50 - 60 In a bread tin 1) Small cakes - one level 3 170 3 140 150
www.electrolux.com BREAD AND PIZZA TYPE OF DISH Conventional Cooking Fan Cooking Cooking time Shelf po- Temp Shelf po- Temp [min] sition [°C] sition [°C] White bread 1 190 1 Rye bread Pizza 1 190 1 230 250 Scones 3 200 Notes 190 60 - 70 1 - 2 pieces, 500 gr per piece1) 1 180 30 - 45 In a bread tin 1 230 250 10 - 20 In a baking tray or a deep pan1) 3 190 10 - 20 In a baking tray1) 1) Preheat for 10 minutes.
ENGLISH TYPE OF DISH Conventional Cooking Fan Cooking Shelf Temp Shelf position [°C] position Temp [°C] Cooking time [min] Notes 11 English roast beef, medium 2 210 2 200 60 - 70 On a wire shelf English roast beef, well done 2 210 2 200 70 - 75 On a wire shelf Shoulder of pork 2 180 2 170 120 - 150 With rind Shin of pork 2 180 2 160 100 - 120 Two pieces Lamb 2 190 2 175 110 - 130 Leg Chicken 2 220 2 200 70 - 85 Whole Turkey 2 180 2 160 210 - 240 Whole
www.electrolux.com Quantity TYPE OF DISH Pieces Grilling Cooking time [min] [g] Shelf position Temp [°C] 1st side 2nd side 1000 4 max. 30 - 35 25 - 30 Chicken (cut in 2) 2 Kebabs 4 - 4 max. 10 - 15 10 - 12 Breast of chicken 4 400 4 max. 12 - 15 12 - 14 Hamburger 6 600 4 max. 20 - 30 - Fish fillet 4 400 4 max. 12 - 14 10 - 12 Toasted sandwiches 4-6 - 4 max. 5-7 - Toast 4-6 - 4 max. 2-4 2-3 9. CARE AND CLEANING WARNING! Refer to the Safety chapters.
ENGLISH 9.3 Oven lamp WARNING! Be careful when you change the oven lamp. There is a risk of electrical shock. Before you change the oven lamp: • Deactivate the oven. • Remove the fuses in the fuse box or deactivate the circuit breaker. Put a cloth on the bottom of the oven to prevent damage to the oven light and glass cover. Always hold the halogen lamp with a cloth to prevent grease residue from burning on the lamp. 1. 2. 3. 4. 13 Clean the glass cover.
www.electrolux.com 90° 3. Close the oven door to the first opening position (halfway). Then pull forward and remove the door from its seat. 4. Put the door on a soft cloth on a stable surface. 5. Release the locking system to remove the internal glass panel. 6. Turn the two fasteners by 90° and remove them from their seats.
ENGLISH 7. 8. 1 15 Carefully lift (step 1) and remove (step 2) the glass panel. Clean the glass panel with water and soap. Dry the glass panel carefully. 2 Installing the door and the glass panel When the cleaning is completed, install the glass panel and the oven door. Do the above steps in the opposite sequence. The screen-printing zone must face the inner side of the door.
www.electrolux.com We recommend that you write the data here: Model (MOD.) ......................................... Product number (PNC) ......................................... Serial number (S.N.) ......................................... 11. INSTALLATION WARNING! Refer to the Safety chapters. 11.1 Building In 548 558 20 600 min. 550 20 min. 560 6 573 589 A B 594 580 min. 550 20 min. 560 11.
ENGLISH For the section of the cable refer to the total power (on the rating plate) and to the table: Total power Section of the cable maximum 1380 3 x 0.75 mm² W Total power 17 Section of the cable maximum 3680 3 x 1.5 mm² W The earth cord (green / yellow cable) must be 2 cm longer than phase and neutral cables (blue and brown cables). maximum 2300 3 x 1 mm² W 12. ENVIRONMENT CONCERNS Recycle the materials with the symbol . Put the packaging in applicable and electronic appliances.
www.electrolux.
ENGLISH 19
892936825-C-442012 www.electrolux.