FQM465CB FQM465CN FQM465CX EN MICROWAVE OVEN USER MANUAL
www.electrolux.com CONTENTS 1. SAFETY INFORMATION............................................................................................ 3 2. SAFETY INSTRUCTIONS.......................................................................................... 5 3. PRODUCT DESCRIPTION.........................................................................................7 4. CONTROL PANEL.....................................................................................................7 5.
ENGLISH 1. 3 SAFETY INFORMATION Before the installation and use of the appliance, carefully read the supplied instructions. The manufacturer is not responsible if an incorrect installation and use causes injuries and damages. Always keep the instructions with the appliance for future reference. 1.
www.electrolux.com • • • • • • • • • • • • • • Do not use a steam cleaner to clean the appliance. Do not use harsh abrasive cleaners or sharp metal scrapers to clean the glass door since they can scratch the surface, which may result in shattering of the glass. If the supply cord is damaged, it must be replaced by the manufacturer, its Authorised Service Centre or similarly qualified persons in order to avoid a hazard. Do not activate the appliance when it is empty.
ENGLISH • • 5 The appliance should be cleaned regularly and any food deposits removed. Failure to maintain the appliance in a clean condition could lead to deterioration of the surface that could adversely affect the life of the appliance and possibly result in a hazardous situation. 2. SAFETY INSTRUCTIONS 2.1 Installation WARNING! Only a qualified person must install this appliance. • Remove all the packaging. • Do not install or use a damaged appliance.
www.electrolux.com • Do not let the appliance stay unattended during operation. • Deactivate the appliance after each use. • Be careful when you open the appliance door while the appliance is in operation. Hot air can release. • Do not operate the appliance with wet hands or when it has contact with water. • Do not apply pressure on the open door. • Do not use the appliance as a work surface or as a storage surface. • Open the appliance door carefully.
ENGLISH • Cut off the mains cable and discard it. • Remove the door catch to prevent children and pets to get closed in the appliance. 3. PRODUCT DESCRIPTION 3.1 General overview 1 1 2 3 4 5 6 7 2 3 4 4 7 5 3 2 Control panel Electronic programmer Heating element Microwave generator Lamp Shelf support, removable Shelf positions 1 6 3.2 Accessories For cookware, cake tins, roasts. Wire shelf 4. CONTROL PANEL 4.
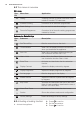
www.electrolux.com Use the sensor fields to operate the appliance. Sensor field 1 2 3 4 5 - 6 7 8 9 10 11 Function Comment ON / OFF To activate and deactivate the appliance. Grilling or Assisted Cooking To choose a heating function or a menu: Assisted Cooking. To access the necessary function, touch the field once or twice when the appliance is activated. To activate or deactivate the light, touch the field for 3 seconds. Home key To go back one level in the menu.
ENGLISH 9 Other indicators of the display: Symbol Function Minute Minder The function operates. Time of day The display shows the current time. Duration The display shows the necessary time for cooking. End Time The display shows when the cooking time is complete. Start Time The display shows when the heating function must start. Temperature The display shows the temperature. Time Indication The display shows how long the heating function operates. Press and time.
www.electrolux.com 6.2 The menus in overview Main menu Symbol Menu item Application Grilling A heating function to grill flat food items in the middle of the shelf. To make toast. Assisted Cooking Contains a list of automatic programmes. Basic Settings You can use it to set other settings. Favourite Programme Contains a list of favourite cooking programmes created by the user. Submenu for: Basic Settings Symbol Submenu Description Set Time of Day Sets the current time on the clock.
ENGLISH Press once or twice to go directly to the menus: Grilling, Assisted Cooking. 6.4 Heat-up indicator When you activate a heating function, the bar on the display comes on. The bar shows that the temperature increases. 6.5 Residual heat When you deactivate the appliance, the display shows the residual heat. You can use the heat to keep the food warm. 6.
www.electrolux.com Defrosting fruit, vegetables: • Do not fully defrost fruit and vegetables, which are to be further prepared while raw, in the appliance. Let them defrost at room temperature. • You can use a higher microwave power to cook fruit and vegetables without defrosting them first. Ready meals: be defrosted or heated in the microwave if they are expressively designated as suitable for use in the microwave. • You must follow the manufacturer's instructions printed on the packaging (e. g.
ENGLISH Cookware / Material Microwave 13 Grilling Defrost- Heating ing Cooking Clingfilm X -- -- -- Roasting film with microwave safe closure3) X X X -- Roasting dishes made of metal, e. g. -enamel, cast iron -- -- X Baking tins, black lacquer or siliconcoated3) -- -- -- X Baking tray X X X X Browning cookware, e. g.
www.electrolux.com 7.3 Setting the Microwave function To deactivate the Microwave function, touch . 1. Activate the appliance. 2. Touch to activate the Microwave function. If you touch or open the door, the function stops. To . The function: Duration is 3. Touch set to 30 seconds and the microwaves starts to operate. start it again, touch If you do not touch , the appliance deactivates after 20 seconds. 4. Touch to set the function: Duration. Refer to "Setting the clock functions".
ENGLISH Power setting Use • 600 Watt • 500 Watt • • • • Defrosting and heating frozen meals Heating one-plate meals Simmering stews Cooking egg dishes • 400 Watt • 300 Watt • 200 Watt • • • • • • Continuing to cook meals Cooking delicate food Heating baby food Simmering rice Heating delicate food Melting cheese • 100 Watt • • • • • Defrosting meat, fish, bread Defrosting cheese, cream, butter Defrosting fruit and cakes (gateaux) Raising yeast dough Heating up cold dishes and drinks 15 8.
www.electrolux.com 8.2 Setting the clock functions • Before you use the functions: Duration, End Time, you must set a heating function and temperature first. The appliance deactivates automatically. • You can use the functions: Duration and End Time at the same time if you want to automatically activate and deactivate the appliance on a given time later. 1. Set a heating function. again and again until the 2. Press display shows the necessary clock function and the related symbol. 3. Press time.
ENGLISH 17 When you use the Manual function, the appliance uses the automatic settings. You can change them as with other functions. 10. USING THE ACCESSORIES WARNING! Refer to Safety chapters. 10.1 Inserting the accessories Wire shelf: Push the shelf between the guide bars of the shelf support and make sure that the feet point down. • All accessories have small indentations at the top of the right and left side to increase safety. The indentations are also anti-tip devices.
www.electrolux.com memory position, touch or and press to overwrite an existing programme. You can change the name of a programme in the menu: Edit Programme Name. again and again until the 5. Press display shows: Set + Go. 6. Press to confirm. Press a sensor field (except for ) to start the function: Set + Go. The set heating function starts. Activating the programme 1. Activate the appliance. 2. Select the menu: Favourite Programme. When the heating function ends, an acoustic signal sounds.
ENGLISH to the day brightness mode for the next 10 seconds. – if the appliance is deactivated and you set the function: Minute Minder. When the function ends, the display goes back to the night brightness. 19 11.7 Cooling fan When the appliance operates, the cooling fan activates automatically to keep the surfaces of the appliance cool. If you deactivate the appliance, the cooling fan can continue to operate until the appliance cools down. 12. HINTS AND TIPS WARNING! Refer to Safety chapters.
www.electrolux.com Food Power (Watts) Quantity (g) Time (min) Standing time (min) Comments Steak 200 200 3-5 5 - 10 Turn halfway through, remove defrosted parts. Mixed 200 minced meat 500 10 - 15 10 - 15 Turn halfway through, remove defrosted parts. Goulash 500 10 - 15 10 - 15 Turn halfway through, remove defrosted parts.
ENGLISH 21 Defrosting fish Food Power (Watts) Quantity (g) Time (min) Standing time (min) Comments Whole Fish 100 500 10 - 15 15 - 20 Turn halfway through. Fish fillets 100 500 10 - 12 15 - 20 Turn halfway through. Defrosting sausage Food Power (Watts) Quantity (g) Time (min) Standing time (min) Comments Sliced sausage 100 100 20 - 40 Turn halfway through.
www.electrolux.com Food Power (Watts) Quantity Time (min) Standing time (min) Comments Cake (gateau) 100 1 piece 1-2 15 - 20 Turn plate halfway through. Dry cake (e. g. Pound cake) 100 1 piece 2-4 15 - 20 Turn plate halfway through. Fruit cake 100 1 piece 1-2 15 - 20 Turn plate halfway through. Bread 100 1000 g 15 - 20 10 - 15 Turn halfway through. Sliced bread 100 500 g 8 - 12 10 - 15 Turn halfway through.
ENGLISH 23 Defrosting heating Food Power (Watts) Quantity Time (min) Standing time (min) Comments Baby food in 300 jars 200 g 2-3 - Stir halfway through, check temperature. Baby milk (bottle, 180 ml) 200 g 0:20 - 0:40 - Put spoon into bottle, stir and check temperature. Convenience 600 food 400 - 500 g 14 - 20 5 Remove any aluminium lids, turn halfway through. Frozen ready 400 meals 400 - 500 g 4-6 5 Remove any aluminium lids, turn halfway through.
www.electrolux.com Food Power (Watts) Quantity Time (min) Standing time (min) Comments Fish fillets 500 500 g 6-8 - Cook covered, turn container several times during cooking. Vegetables, short cooking time, fresh1) 600 500 g 12 - 16 - Add approx. 50 ml water, cook covered, stir halfway through. Vegetables, 600 short cooking time, frozen1) 500 g 14 - 18 - Add approx. 50 ml water, cook covered, stir halfway through.
ENGLISH 25 Food Ovenware Power (Watt s) Temperature (°C) Time Shelf (min) position Comments 2 chicken halves (2 x 600 g) Glass dish with strainer 300 220 40 2 Turn after 20 min, standing time 5 min. au gratin po- Gratin dish tatoes (1 kg) 300 200 40 2 10 min standing time. Roast pork neck (1100 g) 300 200 70 1 Turn in between, 10 min standing time. Glass dish with strainer 13. CARE AND CLEANING WARNING! Refer to Safety chapters. 13.
www.electrolux.com 1. Deactivate the appliance. 2. Remove the fuses from the fuse box or deactivate the circuit breaker. The top lamp 2. Clean the glass cover. 3. Replace the lamp with a suitable 300 °C heat-resistant lamp. 4. Install the glass cover. 1. Turn the lamp glass cover counterclockwise to remove it. 14. TROUBLESHOOTING WARNING! Refer to Safety chapters. 14.1 What to do if... Problem Possible cause Remedy The oven does not heat up. The oven is deactivated. Activate the oven.
ENGLISH 14.2 Service data If you cannot find a solution to the problem yourself, contact your dealer or an Authorised Service Centre. the front frame of the appliance cavity. Do not remove the rating plate from the appliance cavity. The necessary data for the service centre is on the rating plate. The rating plate is on We recommend that you write the data here: Model (MOD.) ......................................... Product number (PNC) ......................................... Serial number (S.N.
867302654-A-062014 www.electrolux.