Use & Care Guide Over the Range Microwave Oven 316902458 ORM 2.
FINDING INFORMATION Please read and save this guide Thank you for choosing Electrolux, the new premium brand in home appliances. This Use & Care Guide is part of our commitment to customer satisfaction and product quality throughout the service life of your new appliance. We view your purchase as the beginning of a relationship. To ensure our ability to continue serving you, please use this page to record important product information.
TABLE OF CONTENTS FINDING INFORMATION.................................. 2 PRECAUTIONS TO AVOID POSSIBLE EXPOSURE Frozen Veggies chart ..................................... 19 Baked Potato chart ....................................... 19 Sensor Reheat chart ..................................... 19 TO EXCESSIVE MICROWAVE ENERGY ............... 2 TABLE OF CONTENTS .................................... 3 IMPORTANT SAFETY INSTRUCTIONS .......... 4 Auto Cook .........................................
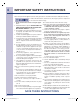
IMPORTANT SAFETY INSTRUCTIONS When using electrical appliances basic safety precautions should be followed, including the following: To reduce the risk of burns, electric shock, fire, injury to persons or exposure to excessive microwave energy: 1. Read all instructions before using the appliance. 2. Read and follow the specific “PRECAUTIONS TO AVOID POSSIBLE EXPOSURE TO EXCESSIVE MICROWAVE ENERGY” on page 2. 3. This appliance must be grounded. Connect only to properly grounded outlet.
UNPACKING AND EXAMING YOUR OVEN 5 Open the bottom of the carton, bend the carton flaps back and tilt the oven over to rest on plasticfoam pad. Lift carton off oven and remove all packing materials, WALL and TOP CABINET TEMPLATES. SAVE THE CARTON AS IT MAY MAKE INSTALLATION EASIER. 1. Remove the feature sticker from the outside of the door, if there is one. 2. Check to see that there is a WALL TEMPLATE and TOP CABINET TEMPLATE. Read enclosures and SAVE the Use and Care Guide.
GROUNDING INSTRUCTIONS This appliance must be grounded. This oven is equipped with a cord having a grounding wire with a grounding plug. It must be plugged into a wall receptacle that is properly installed and grounded in accordance with the National Electrical Code and local codes and ordinances. In the event of an electrical short circuit, grounding reduces risk of electric shock by providing an escape wire for the electric current.
INFORMATION YOU NEED TO KNOW 7 About Your Oven NEVER use the oven without the turntable and support nor turn the turntable over so that a large dish could be placed in the oven. The turntable will turn both clockwise and counterclockwise. Condensation is a normal part of microwave cooking. Room humidity and the moisture in food will influence the amount of moisture that condenses in the oven. Generally, covered foods will not cause as much condensation as uncovered ones.
INFORMATION YOU NEED TO KNOW About Safety • Check foods to see that they are cooked to the United States Department of Agriculture’s recommended temperatures. • ALWAYS use potholders to prevent burns when handling utensils that are in contact with hot food. Enough heat from the food can transfer through utensils to cause skin burns.
INFORMATION YOU NEED TO KNOW 9 About Food Food Do Eggs, sausages, nuts, seeds, fruits & vegetables • Puncture egg yolks before cooking to prevent “explosion”. • Cook eggs in shells. • Pierce skins of potatoes, apples, squash, hot dogs and sausages so that steam escapes. • Dry nuts or seeds in shells. Popcorn • Use specially bagged popcorn for microwave cooking. • Pop popcorn in regular brown bags or glass bowls.
INFORMATION YOU NEED TO KNOW About Utensils and Coverings It is not necessary to buy all new cookware. Many pieces already in your kitchen can be used successfully in your new Over the Range Microwave Oven. Make sure the utensil does not touch the interior walls during cooking. Use these utensils for safe microwave cooking and reheating: • glass ceramic (Pyroceram®), such as Corningware®.
BOTTOM VIEW PART NAMES 11 10 Fan pad Touch the fan pad once for high speed, twice for medium speed, three times for low speed and four times to turn off the fun. 11 Auto-Touch control panel 12 Time display: Digital display, 99 minutes, 99 seconds 13 Ventilation openings 14 Removable turntable The turntable will rotate clockwise or counterclockwise. Only remove for cleaning.
CONTROL PANEL Words in the lower portion of the display will light to indicate what function is in progress. 29 16 18-19 27-28 13 18 18-19 20-21 25 26 24 14 23 22 29 29 13, 28 13 29 29 Number next to the control panel illustration indicates pages on which there are feature descriptions and usage information. E ORM 2.
BEFORE OPERATING • Before operating your new oven make sure you read and understand this Use and Care Guide completely. START add 30 sec • Before the Over the Range Microwave Oven can be used, follow these procedures: 1. Start cooking. 1. Plug in the oven. Close the door. The oven display will show ENJOY YOUR OVEN TOUCH CLEAR AND TOUCH CLOCK. 2. Touch the STOP/clear pad. will appear. : 13 Touch the START add 30 sec pad to: 2. Cook for 30 seconds at 100 % power level during manual cooking.
MANUAL OPERATION • Suppose you want to defrost for 5 minutes at 30%. Time Cooking Your Over the Range Microwave Oven can be programmed for 99 minutes 99 seconds (99.99). Always enter the seconds after the minutes, even if they are both zeros. • Suppose you want to cook for 5 minutes at 100%. Touch 5 1. Enter cooking time. 2. Touch the START add 30 sec pad. 0 Step 1. Enter defrosting time. 2. Touch the power level pad eight times to enter a power level of 30%.
MANUAL OPERATION 15 Manual Defrost If the food that you wish to defrost is not listed on the Defrost chart or is above or below the limits in the Amount column on the Defrost chart (see page 26), you need to defrost manually. You can defrost any frozen food, either raw or previously cooked, by using Power Level for 30% Follow the exact 3-step procedure found under To set power level. Estimate defrosting time and touch power level pad eight times for 30% power.
SENSOR MODES SENSOR MODES has 6 functions, such as Sensor Cook, popcorn, fresh veggies, frozen veggies, baked potato and sensor reheat. NOTES 1. SENSOR MODES can be programmed with More or Less Time Adjustment. Touch the power level pad once or twice before cooking is started. See page 28. 2. Each food has a cooking hint. Touch the user pref pad when the HELP indicator is lighted in the display. 3.
SENSOR MODES 17 Sensor Cook chart Food Amount Procedure 1. Frozen Entrees* 6 - 17 oz 170 - 480 g Use this pad for frozen, convenience foods. It will give satisfactory results for most brands. You may wish to try several and choose your favorite. Remove package from outer wrapping and follow package directions for covering. After cooking, let stand, covered for 1 to 3 minutes. 2. Ground Meat* 0.25 - 2.0 lb 0.2 - 0.
SENSOR MODES Popcorn/Fresh Veggies/Frozen Veggies/Baked Potato/ Sensor Reheat • Suppose you want to cook popcorn. • Suppose you want to reheat soup. Procedure Step Procedure Touch Touch the popcorn pad once. Touch the popcorn pad twice. pop corn Step Touch Touch the sensor reheat pad for soup. sensor reheat pop x2 corn NOTES 1.
SENSOR MODES 19 Fresh Veggies chart Food Amount Procedure 1. Fresh Vegetables, soft Broccoli Brussels sprouts Cabbage Cauliflower (flowerets) Cauliflower (whole) Spinach Zucchini Baked apples 0.25 - 2.0 lb, 0.2 - 0.9 kg 0.25 - 2.0 lb, 0.2 - 0.9 kg 0.25 - 2.0 lb, 0.2 - 0.9 kg 0.25 - 2.0 lb, 0.2 - 0.9 kg 0.25 - 2.0 lb, 0.2 - 0.9 kg 1 medium 0.25 - 1.0 lb, 0.2 - 0.45 kg 0.25 - 2.0 lb, 0.2 - 0.9 kg 2 - 4 medium Wash and place in casserole. Add no water if vegetables have just been washed.
AUTO MODES AUTO MODES has 6 functions, such as auto cook, keep warm, melt/soften, snacks, auto reheat and auto defrost. NOTES 1. AUTO MODES except keep warm can be programmed with More or Less Time Adjustment. Touch the power level pad once or twice before cooking is started. See page 28. 2. Each food has a cooking hint. Touch the user pref pad when the HELP indicator is lighted in the display for a helpful hint.
AUTO MODES 21 5. CHICKEN AND RICE 8. SEAFOOD PASTA Place in a 3 quart casserole: 1 package (5 - 8 ounces) yellow rice mix with flavor packet 2 cups chicken broth Stir well and cover. Touch the auto cook pad, number 5 and touch the START add 30 sec pad. At pause, stir well and add: 1 cup frozen peas 1 red pepper, diced 11/4 pounds boneless chicken cutlets, sliced into thin strips Re-cover. Touch the START add 30 sec pad. At end, garnish with parsley.
AUTO MODES Keep Warm Keep warm allows you to keep food warm for 30 minutes at the maximum. Direct use • Suppose you want to keep a cup of soup warm for 30 minutes. Procedure Step 1. Touch the keep warm pad. 2. Enter the desired time. Ex : 30 minutes. 3. Touch the START add 30 sec pad. With manual cooking • Suppose you want to cook a cup of soup for 2 minutes at 70% and keep the soup warm for 15 minutes. Procedure Step Touch Touch keep warm 3 0 0 0 START add 30 sec The oven will start.
AUTO MODES 23 Melt, Soften Melt, soften automatically computes the correct heating time and microwave power level for melting and softening foods shown in the chart. There are 4 foods (butter, chocolate, ice cream and cream cheese) under the melt, soften. NOTE To melt, soften other food or foods except the quantity listed on the melt, soften chart, use manual operation. • Suppose you want to melt 1 square of chocolate. Procedure Step Touch 1.
AUTO MODES Snacks Snacks are for cooking/heating foods that take a short amount of time! There are 7 foods (frozen mw pizza, hand held snacks (3-4 oz / 0.085-0.113 kg), hand held snacks (5-6 oz / 0.142-0.17 kg), chicken nuggets, hot dogs, frozen kid's meal and pizza) under the snacks. • Suppose you want to reheat a slice of pizza with snacks. Procedure Step Touch 1. Touch the snacks pad and number 7 for pizza. 2.
AUTO MODES 25 Auto Reheat There are 4 foods (fresh rolls/muffins, frozen rolls/muffins, pasta and beverage) under the auto reheat. • Suppose you want to reheat 2 fresh muffins with auto reheat. Procedure Step Touch 1. Touch the auto reheat pad and number 1 for fresh muffin. 2. Repeat touching same number pad at Step 1 to increase quantity. Ex : 2 muffins. 3. Touch the START add 30 sec pad.
AUTO MODES Auto Defrost There are 6 foods (ground meat, stakes/chops/fish, chicken pieces, roast, casserole and soup) under the auto defrost. Auto defrost automatically defrosts all the foods found in the Defrost chart below. • Suppose you want to defrost a 1.8 pound or 1.8 kilogram steak. Procedure Step Touch 1. Touch the auto defrost pad and number 2 for steak. 2. Enter weight by touching number 1 and 8. Ex: 1.8 lb or 1.
CONVENIENT FEATURES User Pref 27 Procedure User pref provides 4 features that make using your oven easy because specific instructions are provided in the interactive display. Step Touch 1. Child Lock 5. Enter cooking time. Ex : 20 minutes The Child Lock prevents unwanted oven operation such as by small children. The oven can be set so that the control panel is deactivated or locked. To set, touch the user pref pad, the number 1 and then touch the START add 30 sec pad.
CONVENIENT FEATURES 4. Language Selection The oven comes set for English and U.S. Customary Unitpounds. Your oven can be selected 3 Languages, English, Spanish or French, and 2 units, pounds or kilograms for each language. To change, touch the user pref pad and number 4. Continue to touch the number 4 until your choice is selected from the table below. Then, touch the START add 30 sec pad. Press the user pref pad and number 4 Language 5. Touch the START add 30 sec pad for 2nd stage. NOTES 1.
CONVENIENT FEATURES Timer cooking or reheating time. After cooking or reheating, stir if possible. Using a lower power level will assist in better cooking or reheating uniformity. You can easily use Timer function as independent kitchen timer or while using microwave for cooking. Turntable ON/OFF function can be used in Manual Cooking and keep warm in AUTO MODES. When Turntable ON is set, Turntable is turned and when Turntable OFF is set, Turntable is stopped.
CLEANING AND CARE Disconnect the power cord before cleaning or leave the door open to deactivate the oven during cleaning. EXTERIOR ODOR REMOVAL The outside surface is precoated steel and plastic. Clean the outside with mild soap and water; rinse and dry with a soft cloth. Do not use any type of household or abrasive cleaner. Occasionally, a cooking odor may remain in the microwave oven.
CLEANING AND CARE 31 Disconnect the power cord before cleaning or leave the door open to deactivate the oven during cleaning. CHARCOAL FILTERS MICROWAVE OVEN LIGHT Charcoal Filters, which are attached with Hood Louver, are used for nonvented, recirculated installation. The filter should be changed every 6 to 12 months depending on use. Remove the louver per instructions 1-3 above, if used. 1. Disconnect power to the microwave oven at the circuit breaker panel or by unplugging. 2.
SERVICE CALL CHECK Please check the following before calling for service: Place one cup of water in a glass measuring cup in the oven and close the door securely. Operate the oven for one minute at HIGH 100%. A Does the oven light come on? YES ____ NO ____ B Does the cooling fan work? YES ____ NO ____ YES ____ NO ____ (Put your hand over the left side of louver.
SPECIFICATIONS * AC Line Voltage: Single phase 120V, 60Hz, AC only AC Power Required: 1650 W 14.3 amps. (for EI30SM55JB, EI30SM55JW, EI30SM55JS) 1500 W 13.0 amps. (for EI30SM5CJB, EI30SM5CJW, EI30SM5CJS) Output Power:* 1000 watts Frequency: 2450 MHz (Group 2/Class B)** Outside Dimensions (including handle): 29 15/16"(W) x 17 1/16"(H) x 18 15/32"(D) Cavity Dimensions: 22 1/2"(W) x 10 1/16"(H) x 14 31/32"(D) Microwave Oven Capacity***: 2.0 Cu. Ft. Weight: Approx.
WARRANTY INFORMATIONS Major Appliance Warranty Information Your appliance is covered by a one year limited warranty. For one year from your original date of purchase, Electrolux will repair or replace any parts of this appliance that prove to be defective in materials or workmanship when such appliance is installed, used, and maintained in accordance with the provided instructions. In addition, the magnetron tube of your appliance is covered by a two through five year limited warranty.
E ORM 2.
For toll-free telephone support in the U.S. and Canada 1-877-4ELECTROLUX (1-877-435-3287) For online support and internet product information: www.electroluxappliances.com ©2008 Electrolux Home Products, Inc. Post Office Box 212378, Augusta Georgia 30917, USA All right reserved. Printed in the Thailand ORM 2.