
Service manual


22
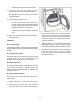
3. Place items to be dried on top of the rack. Weight
should not exceed 10 lbs. Leave space between
items, but do not let items hang over the sides or
through the grids. Do not tumble other items when
using the drying rack.
4. Select a timed dry. Use only the Air Fluff (no heat)
temperature setting for items containing plastic,
foamrubber, rubber-likematerials, feathersor down.
5. When items are dry, remove therack and replace the
lint screen. If lint screen is not in place, tumbling
items could enter the exhaust system and cause
damage to the dryer.
• If desired, add a dryer fabric softener sheet.
4. Close the dryer door and select the cycle,
temperature,dryness level and options desired.
See Operating Instructions card for your specific
modelinformation.
5. Press START to begin the cycle.
• To add or remove items when the dryer is
running open the door. The dryer will stop when
the door is opened. Allow the drum to come to a
complete stop before reaching inside.
• Close the door and press START to resume the
cycle.
6. When the cycle ends, remove items immediately
and hang or fold.
Features
End of Cycle Signal
A signalwill sound at the end of the cycle and periodically
during Press Saver at the volume level selected. (Some
models)
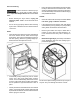
Drum Light (some models)
A drum light will come on whenever the door is opened
to illuminate the dryer drum during loading and
unloading. Closing the door turns off the light.
Reversible Dryer Door
Your dryer is equipped with a reversible door. The door
can be hinged on the right or left side. Refer to the
INSTALLATION INSTRUCTIONS for directions on
changing the door.
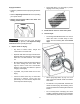
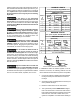
Drying Rack (some models)
Use the drying rack to dry items which should not be
tumble dried.
1. Open the dryer door and remove the lint screen.
2. Insert drying rack into the dryer drum. Place the
front bar under the lip of the lint screen opening.