EB4GL90 ................................................ .............................................
www.electrolux.com CONTENTS 1. 2. 3. 4. 5. 6. 7. 8. 9. 10. 11. 12. 13. 14. 15. SAFETY INFORMATION . . . . . . . . . . . . . . . . . . . . . . . . . . . . . . . . . . . . . . . . . . . . . . . . . . . 3 SAFETY INSTRUCTIONS . . . . . . . . . . . . . . . . . . . . . . . . . . . . . . . . . . . . . . . . . . . . . . . . . . 5 PRODUCT DESCRIPTION . . . . . . . . . . . . . . . . . . . . . . . . . . . . . . . . . . . . . . . . . . . . . . . . . 7 BEFORE FIRST USE . . . . . . . . . . . . . . . . . . . . . . .
ENGLISH 3 1. SAFETY INFORMATION Before the installation and use of the appliance, carefully read the supplied instructions. The manufacturer is not responsible if an incorrect installation and use causes injuries and damages. Always keep the instructions with the appliance for future reference. 1.1 Children and vulnerable people safety WARNING! Risk of suffocation, injury or permanent disability.
www.electrolux.com • • • • • • • • • • • • • appliance. Always use oven gloves to remove or put in accessories or ovenware. Do not use a steam cleaner to clean the appliance. Before maintenance cut the power supply. If the door or door seals are damaged, the appliance must not be operated until it has been repaired by a competent person.
ENGLISH 5 • Failure to maintain the appliance in a clean condition could lead to deterioration of the surface that could adversely affect the life of the appliance and possibly result in a hazardous situation. • Do not use harsh abrasive cleaners or sharp metal scrapers to clean the glass door since they can scratch the surface, which may result in shattering of the glass. • To remove the shelf supports first pull the front of the shelf support and then the rear end away from the side walls.
www.electrolux.com • • • • • way that it cannot be removed without tools. Connect the mains plug to the mains socket only at the end of the installation. Make sure that there is access to the mains plug after the installation. If the mains socket is loose, do not connect the mains plug. Do not pull the mains cable to disconnect the appliance. Always pull the mains plug.
ENGLISH • Do not clean the catalytic enamel (if applicable) with any kind of detergent. • Only use lamps with the same specifications. 2.4 Internal light 2.5 Disposal • The type of light bulb or halogen lamp used for this appliance, is only for household appliances. Do not use it for house lighting. WARNING! Risk of electrical shock. • Before replacing the lamp, disconnect the appliance from the power supply. WARNING! Risk of injury or suffocation. • Disconnect the appliance from the mains supply.
www.electrolux.com 4. BEFORE FIRST USE WARNING! Refer to the Safety chapters. 4.2 First Connection 4.1 Initial Cleaning • Remove all parts from the appliance. • Clean the appliance before first use. Refer to chapter "Care and Cleaning". When you connect the appliance to the mains or after a power cut, you have to set the language, display contrast, display brightness and time of the day. Press or to set the value. Press OK to confirm. 5.
ENGLISH Number Sensor Function field Comment Microwave function To set the microwave function (also when the appliance is deactivated). In Microwave function with Duration greater that 7 minutes and Combi mode the Microwave power is limited to 600 Watt. Temperature selection To set the temperature or show the current temperature in the appliance. 3 4 5 Down key 6 Up key To move down in the menu. To move up in the menu.
www.electrolux.com Symbol Function Duration It shows the time required for the cooking cycle. End Time It shows when the cooking cycle ends. Time Indication It shows how long the heating function operates. and at the same time to reset the Press time. Heat-up indicator It shows the temperature level in the oven. Weight Automatic The automatic weight system is active, or weight can be changed. Heat + Hold The function operates. 6. DAILY USE WARNING! Refer to the Safety chapters. 6.
ENGLISH Symbol Submenu 11 Description SET + GO When ON, you can choose the SET + GO function in the Select Options window. Heat + Hold When ON, you can choose the Heat + Hold function in the Select Options window. Extra time Activates and deactivates the Time Extension function. Display Contrast Adjusts the display contrast by degrees. Display Brightness Adjusts the display brightness by degrees. Set Language Sets the language for the display.
www.electrolux.com display shows the remaining temperature. • Cooking with the lamp off - Touch and hold for 3 seconds to deactivate the lamp during cooking. 7. MICROWAVE MODE 7.1 Microwave Information about operation General: • After you deactivate the appliance, let the food stand for some minutes (refer to “Microwave Tables: standing time”). • Remove the aluminium foil packaging, metal containers, etc. before you prepare the food.
ENGLISH 13 Suitable cookware and materials Cookware / Material Microwave Grilling Defrosting Heating Cooking Ovenproof glass and porcelain (with no metal components, e. g. Pyrex, heat-proof glass) X X X X Non-ovenproof glass and porcelain X -- -- -- Glass and glass ceramic made of ovenproof/frost-proof material (e. g.
www.electrolux.com 7.2 Microwave functions Functions Description Microwave Creates the heat directly in the food. Use it to heat pre-prepared meals and drinks, to defrost meat or fruit, and to cook vegetables and fish. Combi Use it to operate the oven function and the microwave mode together (selected models only). Use it to cook food in a shorter time and brown it at the same time.
ENGLISH Power setting Use • • • • • Heating liquids • Searing at the start of the cooking process • Cooking vegetables • Melting gelatine and butter 1000 Watt 900 Watt 800 Watt 700 Watt • 600 Watt • 500 Watt • • • • Defrosting and heating frozen meals Heating one-plate meals Simmering stews Cooking egg dishes • 400 Watt • 300 Watt • 200 Watt • • • • • • Continuing to cook meals Cooking delicate food Heating baby food Simmering rice Heating delicate food Melting cheese • 100 Watt • • • • • Defr
www.electrolux.com Setting the clock functions: 1. Set a heating function. 2. 3. 4. Touch again and again until the display shows the necessary clock function and the related symbol. Touch or to set the necessary time. Touch OK to confirm. When the time ends, an acoustic signal sounds. The appliance deactivates. The display shows a message. Touch a sensor field to stop the signal. • With Duration and End Time , the appliance deactivates automatically.
ENGLISH 17 10. USING THE ACCESSORIES WARNING! Refer to the Safety chapters. 10.1 Installing the accessories Wire shelf: Put the shelf in and make sure that the indentations point down. Push the shelf between the guide bars of the shelf support. All accessories have small indentations at the top of the right and left side to increase safety. The indentations are also anti-tip devices. The high rim around the shelf is a device which prevents cookware from slipping. 11. ADDITIONAL FUNCTIONS 11.
www.electrolux.com Activating the programme 1. Activate the appliance. 2. Select the Favourite Programme menu. Press OK to confirm. 3. Select your favourite programme name. Press OK to confirm. 11.2 Child Lock The Child Lock prevents an accidental operation of the appliance. Activating and deactivating the Child Lock function: 1. Activate the appliance. 2. Touch and at the same time until the display shows a message. 11.
ENGLISH 11.7 Cooling fan When the appliance operates, the cooling fan activates automatically to keep the 19 surfaces of the appliance cool. If you deactivate the appliance, the cooling fan can continue to operate until the appliance cools down. 12. CARE AND CLEANING WARNING! Refer to the Safety chapters. Notes on cleaning: • Clean the front of the appliance with a soft cloth with warm water and a cleaning agent. • To clean metal surfaces, use a usual cleaning agent.
www.electrolux.com Problem Possible cause Remedy The appliance does not heat up. The appliance is deactivated. Activate the appliance. The appliance does not heat up. The clock is not set. Set the clock. The appliance does not heat up. The necessary settings are not set. Make sure that the settings are correct. The appliance does not heat up. The Child Lock is on. Refer to “Activating and deactivating the Child Lock function”. The appliance does not heat up.
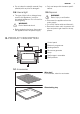
ENGLISH 21 min. 3 mm To lift the appliance, do not use the door handle. WARNING! During installation in combustible matter, NIN SEV 1000 and fire protection guidelines and regulations of the Association of Cantonal Fire Insurance shall be strictly adhered to. min. 20 450 min. 560 21 4 548 455 446 5 min.
www.electrolux.com 548 21 min. 20 450 450 114 455 4 min. 560 446 114 455 min. 550 5 567 594 548 450 21 min. 20 4 114 455 446 450 455 450 446 min. 560 455 min.
ENGLISH 90° 23
www.electrolux.com 13 20 2x3,5x25 14.1 Electrical connection Let a qualified electrician connect the appliance to the electricity supply. Use a power cable of the type H05VV-F or higher. Install the appliance with a socket supply line. If there is no socket supply line, the fixed home electrical system must include an isolating device with at least a 3 mmcontact separation to enable a simultane- 15. CH ous and all-pole cut off from the mains (according to NIN SEV 1000).
ENGLISH Servicestellen Points de Service Servizio dopo vendita 25 Point of Service 7000 Chur Comercialstrasse 19 Ersatzteilverkauf/Points de vente de rechange/Vendita pezzi di ricambio/ spare parts service: 5506 Mägenwil, Industriestrasse 10, Tel. 0848 848 111 Fachberatung/Verkauf/Demonstration/Vente/Consulente (cucina)/Vendita 8048 Zürich, Badenerstrasse 587, Tel. 044 405 81 11 Garantie Für jedes Produkt gewähren wir ab Verkauf bzw. Lieferdatum an den Endverbraucher eine Garantie von 2 Jahren.
www.electrolux.
ENGLISH 27
892960482-A-342013 www.electrolux.