
User manual


2. Put all the reaction zones of the strip
into the water for approximately 1
second.
Do not put the strip into the running
water!
3. Shake the strip to remove the excess
of the water.
4. After 1 minute check the hardness of
the water according to the table
below.
The colours of the reaction zones
continue to change after 1 minute. Do
not consider this in the measurement.
5. Set the hardness of the water in the
menu: Basic Settings.
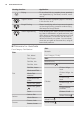
Test strip Hardness of the
water
1
Test strip Hardness of the
water
2
3
4
The black squares in the table correspond
to red squares on the test strip.
You can change the hardness level of the
water in the menu: Basic Settings / Water
hardness.
6. DAILY USE
WARNING!
Refer to Safety chapters.
6.1 Navigating the menus
1. Activate the appliance.
2. Press or to select the menu
option.
3. Press to move to the submenu or
accept the setting.
At each point you can go
back to the main menu with
.
6.2 The menus in overview
Main menu
Sym-
bol
Menu item Application
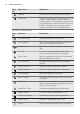
Heating Functions Contains a list of heating functions.
SousVide Cooking Contains a heating function and a list of auto-
matic programmes.
Recipes Contains a list of automatic programmes.
Favourites Contains a list of favourite cooking programmes
created by the user.
Cleaning Contains a list of cleaning programmes.
Basic Settings Used to set the appliance configuration.
ENGLISH
11