EBL80CN EN OVEN USER MANUAL
www.electrolux.com CONTENTS 1. SAFETY INFORMATION...................................................................................... 3 2. SAFETY INSTRUCTIONS.....................................................................................4 3. PRODUCT DESCRIPTION................................................................................... 7 4. BEFORE FIRST USE............................................................................................ 7 5. DAILY USE...........................
ENGLISH 1. 3 SAFETY INFORMATION Before the installation and use of the appliance, carefully read the supplied instructions. The manufacturer is not responsible for any injuries or damages that are the result of incorrect installation or usage. Always keep the instructions in a safe and accessible location for future reference. 1.
www.electrolux.com • • • • • • • • Before carrying out any maintenance, disconnect the appliance from the power supply. Ensure that the appliance is switched off before replacing the lamp to avoid the possibility of electric shock. Do not use a steam cleaner to clean the appliance. Do not use harsh abrasive cleaners or sharp metal scrapers to clean the glass door since they can scratch the surface, which may result in shattering of the glass.
ENGLISH • Make sure not to cause damage to the mains plug and to the mains cable. Should the mains cable need to be replaced, this must be carried out by our Authorised Service Centre. • Do not let mains cables touch or come near the appliance door, especially when the door is hot. • The shock protection of live and insulated parts must be fastened in such a way that it cannot be removed without tools. • Connect the mains plug to the mains socket only at the end of the installation.
www.electrolux.com furniture panel until the appliance has cooled down completely after use. 2.4 Care and cleaning • WARNING! Risk of injury, fire, or damage to the appliance. • Before maintenance, deactivate the appliance and disconnect the mains plug from the mains socket. • Make sure the appliance is cold. There is the risk that the glass panels can break. • Replace immediately the door glass panels when they are damaged. Contact the Authorised Service Centre.
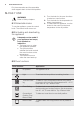
ENGLISH 2.7 Disposal WARNING! Risk of injury or suffocation. • Disconnect the appliance from the mains supply. • Cut off the mains electrical cable close to the appliance and dispose of it. • Remove the door catch to prevent children or pets from becoming trapped in the appliance. 2.8 Service • To repair the appliance contact an Authorised Service Centre. • Use original spare parts only. 3. PRODUCT DESCRIPTION 3.1 General overview 1 11 2 3 4 5 6 5 4 3 2 1 7 8 9 10 3.
www.electrolux.com Put the accessories and the removable shelf supports back to their initial position. 5. DAILY USE WARNING! Refer to Safety chapters. 5.1 Retractable knobs To use the appliance, press the control knob. The control knob comes out. 1. Turn the knob for the oven functions to select an oven function. 2. Turn the knob for the temperature to select a temperature. 3. To deactivate the appliance, turn the knobs for the oven functions and temperature to the off position. 5.
ENGLISH Oven function 9 Application Defrost This function can be used for defrosting frozen foods, such as vegetables and fruits. The defrosting time depends on the amount and size of the frozen food. Grilling To grill flat food and to toast bread. Fast Grilling To grill flat food in large quantities and to toast bread. Turbo Grilling To roast larger meat joints or poultry with bones on one shelf position. Also to make gratins and to brown.
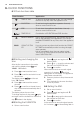
www.electrolux.com 6. CLOCK FUNCTIONS 6.1 Clock functions table Clock function 00:00 Application TIME OF DAY To show or change the time of day. You can change the time of day only when the appliance is off. DURATION To set how long the appliance operates. Use only when an oven function is set. END To set when the appliance deactivates. Use only when an oven function is set. TIME DELAY Combination of DURATION and END function. MINUTE MINDER Use to set a countdown time.
ENGLISH the display. The appliance deactivates automatically. 5. Press any button to stop the acoustic signal. 6. Turn the knob for the oven functions to the off position. 6.5 Setting the TIME DELAY function 1. Set an oven function. 2. Press again and again until starts to flash. 3. Press or to set the minutes and the hours for DURATION time. 4. Press to confirm. The display shows flashing . 5. Press or to set the hours and the minutes for END time. to confirm. 6.
www.electrolux.com Wire shelf and baking tray together: Push the baking tray between the guide bars of the shelf support and the wire shelf on the guide bars above. Small indentation at the top increase safety. The indentations are also anti-tip devices. The high rim around the shelf prevents cookware from slipping of the shelf. 8. ADDITIONAL FUNCTIONS 8.1 Using the Child Lock When the Child Lock is on, the door is locked and the appliance cannot be activated accidentally. 1.
ENGLISH 13 9. HINTS AND TIPS WARNING! Refer to Safety chapters. The temperature and baking times in the tables are guidelines only. They depend on the recipes and the quality and quantity of the ingredients used. 9.1 Baking • Your oven may bake or roast differently to the appliance you had before. Adapt your usual settings such as temperature, cooking time and shelf position to the values in the tables. • Use the lower temperature the first time.
www.electrolux.com Baking results Possible cause Remedy The cake is not ready in the The oven temperature is too The next time you bake, set baking time given. low. a slightly higher oven temperature. 9.
ENGLISH 15 Food Function Temperature (°C) Time (min) Shelf position Fruit flans (made with yeast dough / sponge mixture)2) True Fan Cooking 150 35 - 55 3 Fruit flans (made with yeast dough / sponge mixture)2) Top / Bottom Heat 170 35 - 55 3 Fruit flans made with short pastry True Fan Cooking 160 - 170 40 - 80 3 Yeast cakes with delicate toppings (e.g. quark, cream, custard) Top / Bottom Heat 160 - 1801) 40 - 80 3 1) Preheat the oven. 2) Use a deep pan.
www.electrolux.com 9.
ENGLISH Food Temperature (°C) Time (min) Biscuits made with egg white, meringues 80 - 100 Macaroons Shelf position 2 positions 3 positions 130 - 170 1/4 - 100 - 120 40 - 80 1/4 - Biscuits made with yeast dough 160 - 170 30 - 60 1/4 - Puff pastries 170 - 1801) 30 - 50 1/4 - Rolls 180 20 - 30 1/4 - 1) Preheat the oven. 9.
www.electrolux.com 9.7 Roasting • Use heat-resistant ovenware to roast. Refer to the instructions of the ovenware manufacturer. • All types of meat that can be browned or have crackling can be roasted in the roasting tin without the lid. • If necessary, turn the roast after 1/2 to 2/3 of the cooking time. • To keep meat more succulent: – roast lean meat in the roasting tin with the lid or use roasting bag. – roast meat and fish in pieces weighting minimum 1 kg.
ENGLISH Lamb Food Quantity (kg) Function Temperature (°C) Time (min) Shelf position Leg of lamb / 1 - 1.5 Roast lamb Turbo Grilling 150 - 170 100 - 120 1 Saddle of lamb 1 - 1.5 Turbo Grilling 160 - 180 40 - 60 1 Quantity (kg) Function Temperature (°C) Time (min) Shelf position Saddle / Leg up to 1 of hare Top / Bottom Heat 2301) 30 - 40 1 Saddle of venison 1.5 - 2 Top / Bottom Heat 210 - 220 35 - 40 1 Haunch of venison 1.
www.electrolux.com • Always preheat the empty oven with the grill functions for 5 minutes. CAUTION! Always grill with the oven door closed.
ENGLISH Food Temperature (°C) Time (min) Shelf position Wedges / Croquettes 220 - 230 20 - 35 3 Hash Browns 210 - 230 20 - 30 3 Lasagne / Cannello- 170 - 190 ni, fresh 35 - 45 2 Lasagne / Cannello- 160 - 180 ni, frozen 40 - 60 2 Oven baked cheese 170 - 190 20 - 30 3 Chicken Wings 20 - 30 2 190 - 210 9.11 Defrost • Remove the food packaging and put the food on a plate. • Use the first shelf position from the bottom.
www.electrolux.com • The jars cannot touch each other. • Put approximately 1/2 litre of water into the baking tray to give sufficient moisture in the oven. • When the liquid in the jars starts to simmer (after approximately 35 - 60 minutes with one-litre jars), stop the oven or decrease the temperature to 100 °C (see the table).
ENGLISH Food Temperature (°C) Time (h) Vegetables for sour 60 - 70 Mushrooms Herbs Shelf position 1 position 2 positions 5-6 3 1/4 50 - 60 6-8 3 1/4 40 - 50 2-3 3 1/4 Temperature (°C) Time (h) Shelf position Plums 60 - 70 Apricots Fruit Food 1 position 2 positions 8 - 10 3 1/4 60 - 70 8 - 10 3 1/4 Apple slices 60 - 70 6-8 3 1/4 Pears 60 - 70 6-9 3 1/4 9.14 Information for test institutes Tests according to EN 60350-1:2013 and IEC 60350-1:2011.
www.electrolux.com Baking on one level. Biscuits Food Function Temperature (°C) Time (min) Shelf position Short bread / Short True Fan Cooking bread / Pastry stripes 140 25 - 40 3 Short bread / Short Top / Bottom bread / Pastry stripes Heat 1601) 20 - 30 3 Small cakes / Small cakes (20 per tray) True Fan Cooking 1501) 20 - 35 3 Small cakes / Small cakes (20 per tray) Top / Bottom Heat 1701) 20 - 30 3 1) Preheat the oven. Multilevel Baking.
ENGLISH • Clean all accessories after each use and let them dry. Use a soft cloth with warm water and a cleaning agent. • If you have nonstick accessories, do not clean them using aggressive agents, sharp-edged objects or a dishwasher. It can cause damage to the nonstick coating. CAUTION! If there are other appliances installed in the same cabinet, do not use them when the Pyrolysis function operates. It can cause damage to the appliance. To clean the oven, remove the shelf supports. 1.
www.electrolux.com 10.4 Cleaning reminder To remind you that the Pyrolysis is necessary, PYR flashes in the display for 10 seconds after each activation and deactivation of the appliance. The cleaning reminder goes out: • after the end of the Pyrolysis function. • if you press and at the same time while PYR flashes in the display. 2 B 1 7. Pull the door trim to the front to remove it. 8. Hold the door glass panels on their top edge one by one and pull them up out of the guide. 10.
ENGLISH 27 1. Deactivate the appliance. 2. Remove the fuses from the fuse box or deactivate the circuit breaker. ABC The top lamp 1. Turn the lamp glass cover counterclockwise to remove it. 10.6 Replacing the lamp 2. Clean the glass cover. 3. Replace the lamp with a halogen, 230 V, 40 W, 300 °C heat resistant lamp. 4. Install the glass cover. Put a cloth on the bottom of the interior of the appliance. It prevents damage to the lamp glass cover and the cavity.
www.electrolux.com Problem Possible cause Remedy The oven does not heat up. The automatic switch-off is activated. Refer to "Automatic switchoff". The oven does not heat up. The Child Lock is on. Refer to "Using the Child Lock". The oven does not heat up. The fuse is blown. Make sure that the fuse is the cause of the malfunction. If the fuse is blown again and again, contact a qualified electrician. The lamp does not operate. The lamp is defective. Replace the lamp.
ENGLISH 29 We recommend that you write the data here: Model (MOD.) ......................................... Product number (PNC) ......................................... Serial number (S.N.) ......................................... 12. INSTALLATION WARNING! Refer to Safety chapters. 12.1 Lifting the appliance To lift the appliance, do not use the door handle. min. 3 mm 12.
www.electrolux.com B B 180 mm A A ~50 mm A A ~50 mm A N 600 mm A 595 mm 180 mm A 595 N mm 585-592 mm 442 mm 115 mm 442 mm N min. 550 mm A 567 mm 20 mm 115 mm 20 mm N min. 550 mm A 567 mm N 560-568 mm A 592 mm 3. Use a minimum of 2 screws to attach the oven on the 2 sides (A). N 560-568 mm A 592 mm 3. Use a minimum of 2 screws to attach the oven on the 2 sides (A).
ENGLISH 31 electrical connection that is accessible and outside the coordination room. The length of the connection cable must be approximately 120 cm with lines connected directly to the mains. Only a qualified person can connect the appliance to the electricity supply. 3 1. Do the electrical connections as in the connection illustration. Phase definitions: L1, L2 (or R, S). 400V 400V 2 ~ 4 PE L1 L2 1 2 3 5 4 1 = 45 mm 2 = 45 mm 3 = 60 mm 4 = 60 mm 2. Secure the cable grip.
www.electrolux.com Energy efficiency class A Energy consumption with a standard load, conventional mode 0.99 kWh/cycle Energy consumption with a standard load, fanforced mode 0.88 kWh/cycle Number of cavities 1 Heat source Electricity Volume 71 l Type of oven Built-In Oven Mass 39.2 kg EN 60350-1 - Household electric cooking appliances - Part 1: Ranges, ovens, steam ovens and grills - Methods for measuring performance. 13.
ENGLISH 33 Point of Service Morgenstrasse 131 3018 Bern Zürcherstrasse 204E 9000 St. Gallen Seetalstrasse 11 6020 Emmenbrücke Schlossstrasse 1 4133 Pratteln Comercialstrasse 19 7000 Chur Spare parts service Industriestrasse 10, 5506 Mägenwil, Tel. 0848 848 111 Specialist advice/Sale Badenerstrasse 587, 8048 Zürich, Tel.
www.electrolux.
ENGLISH 35
867314506-C-132017 www.electrolux.