EBSL7CN EBSL7SP EN STEAM OVEN USER MANUAL
www.electrolux.com CONTENTS 1. SAFETY INFORMATION...................................................................................... 3 2. SAFETY INSTRUCTIONS.....................................................................................4 3. PRODUCT DESCRIPTION................................................................................... 7 4. CONTROL PANEL............................................................................................... 8 5. BEFORE FIRST USE....................
ENGLISH 1. 3 SAFETY INFORMATION Before the installation and use of the appliance, carefully read the supplied instructions. The manufacturer is not responsible for any injuries or damages that are the result of incorrect installation or usage. Always keep the instructions in a safe and accessible location for future reference. 1.
www.electrolux.com • • • • • • • • Before carrying out any maintenance, disconnect the appliance from the power supply. Ensure that the appliance is switched off before replacing the lamp to avoid the possibility of electric shock. Do not use a steam cleaner to clean the appliance. Do not use harsh abrasive cleaners or sharp metal scrapers to clean the glass door since they can scratch the surface, which may result in shattering of the glass.
ENGLISH • Make sure not to cause damage to the mains plug and to the mains cable. Should the mains cable need to be replaced, this must be carried out by our Authorised Service Centre. • Do not let mains cables touch or come near the appliance door, especially when the door is hot. • The shock protection of live and insulated parts must be fastened in such a way that it cannot be removed without tools. • Connect the mains plug to the mains socket only at the end of the installation.
www.electrolux.com furniture panel until the appliance has cooled down completely after use. 2.4 Steam Cooking WARNING! Risk of burns and damage to the appliance. • Released Steam can cause burns: – Be careful when you open the appliance door when the function is activated. Steam can release. – Open the appliance door with care after the steam cooking operation. 2.5 Heated drawer WARNING! Risk of fire and burns. • The heated drawer becomes hot, when you activate it.
ENGLISH 3. PRODUCT DESCRIPTION 3.1 General overview 1 2 3 4 1 2 3 4 5 5 6 4 11 3 7 2 8 1 10 5 6 7 8 9 10 11 Control panel Electronic programmer Water drawer Socket for the core temperature sensor Heating element Lamp Fan Descaling pipe outlet Shelf support, removable Drawer Shelf positions 9 3.2 Accessories Grill- / Roasting pan Wire shelf For cookware, cake tins, roasts. Baking tray For cakes and biscuits. To bake and roast or as a pan to collect fat.
www.electrolux.com The steam set drains the condensing water away from the food during steam cooking. Use it to prepare food that should not be in the water during the cooking e.g. vegetables, pieces of fish, chicken breast. The set is not suitable for food that needs to soak in the water e.g. rice, polenta, pasta. Steam set One unperforated and one perforated food container. Heated drawer The heated drawer is below the oven cavity. You can preheat the cookware in the drawer. 4. CONTROL PANEL 4.
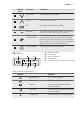
ENGLISH Sensor field 6 7 8 9 10 11 Function Comment Down key To move down in the menu. Up key To move up in the menu. OK To confirm the selection or setting. Back key To go back one level in the menu. To show the main menu, touch the field for 3 seconds. Time and additional functions To set different functions. When a heating function operates, touch the sensor field to set the timer or the functions: Function Lock, Favourites, Heat + Hold, Set + Go.
www.electrolux.com Symbol Function Time Indication The display shows how long the heating function operates. Press and time. at the same time to reset the Calculation The appliance calculates the time for cooking. Heat-up Indicator The display shows the temperature in the appliance. Fast Heat Up Indicator The function is active. It decreases the heat up time. Weight Automatic The display shows that the automatic weight system is active or that weight can be changed.
ENGLISH Water hardness 11 Calcium deposit (mmol/l) Calcium deposit (mg/l) Water classification Class dH 1 0-7 0 - 1.3 0 - 50 Soft 2 7 - 14 1.3 - 2.5 50 - 100 Moderately hard 3 14 - 21 2.5 - 3.8 100 - 150 Hard 4 over 21 over 3.8 over 150 Very hard When the water hardness exceeds the values in the table, fill the water drawer with bottled water. 1. Take the four colour change strip supplied with the steam set in the oven. 2.
www.electrolux.com 6.2 The menus in overview Main menu Symbol Menu item Application Heating Functions Contains a list of heating functions. SousVide Cooking Contains a heating function and a list of automatic programmes. Recipes Contains a list of automatic programmes. Favourites Contains a list of favourite cooking programmes created by the user. Cleaning Contains a list of cleaning programmes. Basic Settings Used to set the appliance configuration.
ENGLISH Symbol 13 Submenu Description Buzzer Volume Adjusts the volume of press-tones and signals by degrees. Key Tones Activates and deactivates the tone of the touch fields. It is not possible to deactivate the tone of the ON / OFF touch field. Alarm/Error Tones Activates and deactivates the alarm tones. Water hardness To sets the water hardness level (1 - 4). Cleaning Reminder Reminds you when to clean the appliance.
www.electrolux.com Symbol Menu item Description Descaling Procedure for cleaning the steam generation circuit from residual limestone. Rinsing Procedure for rinsing and cleaning the steam generation circuit after frequent use of the steam functions. Steam Cleaning Plus Procedure for cleaning stubborn dirt with the support of an oven cleaner. 6.5 Heating Functions Heating function Application True Fan Cooking To bake on up to three shelf positions at the same time and to dry food.
ENGLISH Heating function 15 Application Moist Fan Baking To bake breads, cakes and cookies. To save energy during cooking. This function must be used in accordance with the Moist Fan Baking table in order to achieve the desired cooking result. To get more information about the recommended settings, refer to the Hints and Tips chapter, Moist Fan Baking table. This function was used to define the energy efficiency class acc. to EN 60350-1. Au Gratin For dishes such as lasagna or potato gratin.
www.electrolux.com 6.6 Specials Heating function Application Keep Warm To keep food warm. Plate Warming To preheat plates for serving. Preserving To make vegetable preserves such as pickles. Drying To dry sliced fruit (e.g. apples, plums, peaches) and vegetables (e.g. tomatoes, zucchini, mushrooms). Yogurt Function Use this function to prepare yoghurt. The lamp in this function is off.
ENGLISH 6.
www.electrolux.
ENGLISH Dish Dish Swiss Tarte, savou- ry Swiss Roll - Yeast Cake - Crumble Cake - Sugar Cake - Quiche Lorraine - Savory Flan - Food Category: Cake/Pastry Dish Flan Base 19 Short Pastry Flan Base Sponge Mixture Flan Base Ring Cake - Apple Cake, covered - Sponge Cake - Apple Pie - Cheese Cake, Tin - Brioche - Madeira Cake - Tarte - Swiss Tarte, sweet - Almond Cake - Muffins - Pastry - Pastry Stripes - Cream Puffs - Baguette, frozen Puff Pastry - Bread Crown
www.electrolux.
ENGLISH 6.
www.electrolux.com 6.10 Water drawer MAX A F MAX B MA X C E D When you fill the water drawer, insert it in the same position. Push the front button until the water drawer is inside the appliance. Empty the water drawer after each use. A. Lid B. Wave-breaker C. Drawer body D. Water-filling hole E. Scale F. Front button You can remove the water drawer from the appliance. Push it gently on the front button. After you push the water drawer, it will self-extract from the appliance.
ENGLISH The steam appears after approximately 2 minutes. When the appliance reaches the set temperature, the signal sounds. When the water drawer is running out of water, the signal sounds and the water drawer needs to be refilled to continue the steam cooking as described above. The signal sounds at the end of the cooking time. 7. Turn off the appliance. 8. Empty the water drawer after the steam cooking is completed. CAUTION! The appliance is hot. There is a risk of burns.
www.electrolux.com 6.13 Heat-up indicator Do not put food in the oven when the Fast heat up function operates. When you activate a heating function, the bar on the display comes on. The bar shows that the temperature increases. When temperature is reached the buzzer sounds 3 times and the bar flashes and then disappears. To activate the function, hold for 3 seconds. The heat-up indicator alternates. 6.15 Residual heat 6.
ENGLISH 2. Press again and again until the display shows the necessary clock function and the related symbol. 3. Set the temperature above 80 °C. 3. Press time. to confirm. 5. Press When the function ends, an acoustic signal sounds. The function stays on if you change the heating functions. or to set the necessary to confirm. 4. Press When the time ends, an acoustic signal sounds. The appliance deactivates. The display shows a message. 5. Press any symbol to stop the signal. 7.
www.electrolux.com The core temperature sensor must stay in the meat and in the socket during the cooking. 1. Turn on the appliance. 2. Put the tip of the core temperature sensor into the centre of the meat. 3. Put the plug of the core temperature sensor into the socket at the front of the appliance. 9.2 Inserting the accessories Wire shelf: Push the shelf between the guide bars of the shelf support and make sure that the feet point down.
ENGLISH 9.3 Heated drawer You can preheat a cookware in the drawer. WARNING! The cookware becomes hot. The temperature is automatic. 27 If the heated drawer is activated, the heated drawer indicator in the control panel comes on. 2. Put the cookware equally in the drawer. 3. Rearrange the cookware after half of the warming time (swap top and bottom). 1. To activate or deactivate the heated drawer, use the switch that is on the left side of the drawer housing. 10. ADDITIONAL FUNCTIONS 10.
www.electrolux.com When you deactivate the appliance, the function also deactivates. 10.4 Set + Go The function lets you set a heating function (or a programme) and use it later with one press of any symbol. 1. Activate the appliance. 2. Set a heating function. again and again until the 3. Press display shows: Duration. 4. Set the time. 5. Press again and again until the display shows: Set + Go. 6. Press to confirm. Press any symbol (except for ) to start the function: Set + Go.
ENGLISH 29 • To clean the bottom side in case of limestone residual, use some drops of vinegar. • Clean the appliance interior after each use. Fat accumulation or other food remains may result in a fire. The risk is higher for the grill pan. • Clean stubborn dirt with a special oven cleaner. • Clean all accessories after each use and let them dry. Use a soft cloth with warm water and a cleaning agent.
www.electrolux.com d) Wipe the internal surface of the appliance with a non-abrasive surface care sponge. You can use warm water or oven detergents to clean the cavity. e) Press . The final part of the procedure starts. The duration of this stage is around 25 minutes. 3. Wipe the internal surface of the appliance with a non-abrasive sponge. You can use warm water to clean the cavity. 4. Remove the remaining water from the water drawer.
ENGLISH 1. Put the grill- / roasting pan on the first shelf position. 2. Press . 3. Put 250 ml of the descaling agent in the water drawer. 4. Fill the remaining part of the water drawer with water to the maximum level. 5. Fit the water drawer in the appliance. 6. Press . This activates the first part of the procedure: Descaling. The duration of this part is around 1 hour 40 minutes. 7. After the end of the first part, empty the grill- / roasting pan and put it on the first shelf position again. 8. Press .
www.electrolux.com 1. Deactivate the appliance. 2. Remove the fuses from the fuse box or deactivate the circuit breaker. The top lamp 1. Turn the lamp glass cover counterclockwise to remove it. 45° 4. Hold the door with one hand on each side and pull it away from the appliance at an upwards angle. 5. Put the door with the outer side down on a soft cloth on a stable surface. This is to prevent scratches. 6. Clean the glass panel with water and soap. Dry the glass panel carefully.
ENGLISH Problem Possible cause 33 Remedy The oven does not heat up. The clock is not set. Set the clock. The oven does not heat up. The necessary settings are not set. Make sure that the settings are correct. The oven does not heat up. The automatic switch-off is activated. Refer to "Automatic switchoff". The oven does not heat up. The Child Lock is on. Refer to "Using the Child Lock". The oven does not heat up. The door is not closed correctly. Fully close the door.
www.electrolux.com Problem Possible cause Remedy The appliance does not retain the water drawer after you push it on the cover. You did not fully press the water drawer body. Insert the water drawer body in the appliance by pushing it until it reaches to the end. The water drawer is difficult to clean. You did not remove the lid and the wave-breaker. Refer to "Cleaning the water drawer". The descaling procedure is interrupted before it finishes. There was a power cut. Repeat the procedure.
ENGLISH Problem Possible cause There is no good performance of the cleaning procedure. You did not remove the ac- Remove the accessories cessories from the applifrom the appliance and reance before the start of the peat the function. cleaning procedure. They can compromise the steam cycle and decrease the performance. 12.2 Service data If you cannot find a solution to the problem yourself, contact your dealer or an Authorised Service Centre. Remedy the front frame of the appliance cavity.
www.electrolux.com of the appliance and at least 30 cm deep. A min. 20 mm A B 10 mm 13.2 Installing the oven under a work surface Before the installation, connect the oven to the electrical supply. Refer to "Electrical connection". During installation in combustible matter, NIN SEV 1000 and fire protection guidelines and regulations of the Association of Cantonal Fire Insurance shall be strictly adhered to. A A A A 160 mm A A 13.
ENGLISH D E 3. 4. 5. 6. 7. F This is to prevent the cable from rubbing against the drawer. The connection cable is on the housing side. Install the cable grip (F). Connect the terminal as in the illustration. Put the cable into the strain relief clamp. Close the mains terminal cover. Do the electrical connections as in the connection illustration. Voltage: 400V 400V3N 400V2N 8. Secure the cable grip. 2. Put the connection cable into the supplied rings (E). 14. ENERGY EFFICIENCY 14.
www.electrolux.com 14.2 Energy saving The appliance contains features which help you save energy during everyday cooking. General hints Make sure that the oven door is closed properly when the appliance operates and keep it closed as much as possible during the cooking. Use metal dishes to improve energy saving. When possible, do not preheat the oven before you put the food inside.
ENGLISH Spare parts service Industriestrasse 10, 5506 Mägenwil, Tel. 0848 848 111 Specialist advice/Sale Badenerstrasse 587, 8048 Zürich, Tel. 044 405 81 11 Warranty For each product we provide a two-year guarantee from the date of purchase or delivery to the consumer (with a guarantee certificate, invoice or sales receipt serving as proof). The guarantee covers the costs of materials, labour and travel.
867326181-D-132017 www.electrolux.