
User manual

27
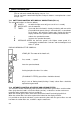
• fit the screws in the plateholes and in the plugs;
• tighten the screws with a screwdriver.
3.3.2 FIXING TO THE WALL
To fix the hood to the wall, proceed as follows:
• based on the technical drawing, mark the position of the support and safety fixing holes on
the wall with a pencil, in such a way that the base of the hood is at the distance from the
cooker hob, as indicated in par. (2.1) and that it is horizontal. Mark the position of the
holes with a pencil making a small cross on the wall.
• drill the support and safety fixing holes in the positions marked;
• fit the metal hooks to the support holes (see FIG.8) complete with plug and screws,
completely inserting the plastic plug and keeping the curved part on the outside and facing
downwards; in the safety fixing holes only insert the plastic plug;
• tighten the support screws;
• rest the back of the hood on the wall and insert the hooks into the corresponding slots;
• make sure the hood is stable;
• holding the cross notched screwdriver in your hand; slowly tighten the horizontal alignment
screws one at a time, until the hood is perfectly horizontal above the cooker hob. The use
of a level will help in this operation;
• insert the screws into the safety holes;
• tighten the safety holes with the screwdriver.
3.3.3 MOUNTING OF THE SCAVENGING PIPE
If the hood is to be used as a suction hood, to apply the pipe proceed as follows:
• measure the distance to be covered by the pipe and obtain parts of the right size;
• insert the hood outlet mouthpiece into the pipe and block it;
• connect the lengths of pipe up to the hole towards the outside;
• connect the pipe to the end which goes outside;
• make electrical connection (see par.4).
3.3.4 MOUNTING OF THE DECORATIVE CHIMNEY
The decorative chimney shown in FIG. 7 is composed of 2 parts of metal sheet which slide
one inside the other. To mount the chimney please proceed as follows:
• the 2 parts of the chimney are mounted as shown in FIG.7;
• position the base part of the chimney with holes matching the ones on the hood;
• insert the screws if available, on the bottom of the chimey and fix them;
• let the telescopic part of the chimney slide to the height necessary to touch the ceiling and
come into contact with the chimney bracket;
• tighten the screws on the chimney bracket to the ceiling.
3.4 GENERAL WARNING
The pipe must be heat, flame and corrosionproof. The producer strongly advises against the
use of reducers or pipes with smaller diameter than the hood outlet pipe, and pipes made of
flexible aluminium because performance is diminished.
The end part of the pipe, on the outside of the hole on the wall, must be of such a shape to
avoid rain, gusts of wind or other foreign bodies getting into the pipe. Should there be any
doubt, contact anyone specialising in the installation of gas or ventilation system.