EGC3322 EN Hob User Manual
www.electrolux.com CONTENTS 1. SAFETY INFORMATION....................................................................................2 2. SAFETY INSTRUCTIONS..................................................................................5 3. PRODUCT DESCRIPTION................................................................................ 7 4. DAILY USE......................................................................................................... 8 5. HINTS AND TIPS.........................
ENGLISH 3 result of incorrect installation or usage. Always keep the instructions in a safe and accessible location for future reference. 1.1 Children and vulnerable people safety • • • • • • • This appliance can be used by children aged 8 years and above and by persons with reduced capabilities provided that they have been given instruction and/or supervision regarding the safe use of the appliance and understand the potential hazards involved. Do not let children play with the appliance.
www.electrolux.com • • • • • • • • • • CAUTION: The cooking process has to be supervised. A short term cooking process has to be supervised continuously. WARNING: Danger of fire: Do not store items on the cooking surfaces. Metallic objects such as knives, forks, spoons and lids should not be placed on the hob surface since they can get hot. Do not use a steam cleaner to clean the appliance.
ENGLISH 5 appliance. The use of inappropriate guards can cause accidents. 2. SAFETY INSTRUCTIONS This appliance is suitable for the following markets: GB IE 2.2 Electrical Connection WARNING! Risk of fire and electrical shock. 2.1 Installation WARNING! Only a qualified person must install this appliance. • • • • • • • • • • • • Remove all the packaging. Do not install or use a damaged appliance. Follow the installation instruction supplied with the appliance.
www.electrolux.com • • • • access to the mains plug after the installation. If the mains socket is loose, do not connect the mains plug. Do not pull the mains cable to disconnect the appliance. Always pull the mains plug. Use only correct isolation devices: line protecting cut-outs, fuses (screw type fuses removed from the holder), earth leakage trips and contactors. The electrical installation must have an isolation device which lets you disconnect the appliance from the mains at all poles.
ENGLISH • • • • • • • • • Make sure cookware is centrally positioned on the burners. Make sure the flame does not go out when you quickly turn the knob from the maximum to the minimum position. Use only the accessories supplied with the appliance. Do not install a flame diffuser on the burner. The use of a gas cooking appliance results in the production of heat and moisture. Provide good ventilation in the room where the appliance is installed.
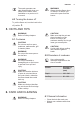
www.electrolux.com 3.2 Control knob Symbol Symbol Description no gas supply / off posi‐ tion Description ignition position / maxi‐ mum gas supply minimum gas supply 4. DAILY USE 2. Keep the control knob pushed for equal or less than 10 seconds. This lets the thermocouple warm up. If not, the gas supply is interrupted. 3. Adjust the flame after it is regular. WARNING! Refer to Safety chapters. 4.
ENGLISH The spark generator can start automatically when you switch on the mains, after installation or a power cut. It is normal. WARNING! Always turn the flame down or switch it off before you remove the pans from the burner. 4.3 Turning the burner off To put the flame out, turn the knob to the off position . 5. HINTS AND TIPS WARNING! Refer to Safety chapters. CAUTION! Make sure that the pots are placed centrally on the burner in order to get maximum stability and to get lower gas consumption. 5.
www.electrolux.com • • Scratches or dark stains on the surface have no effect on how the hob operates. Use a special cleaner applicable for the surface of the hob. WARNING! Do not use knives, scrapers or similar instruments to clean the surface of the glass or between the rims of the burners and the frame (if applicable). • 4. For the burner to operate correctly, make sure that the arms of the pan supports are aligned with the centre of the burner. 6.
ENGLISH Problem 11 Possible cause Remedy The fuse is blown. Make sure that the fuse is the cause of the malfunc‐ tion. If the fuse is blown again and again, contact a qualified electrician. Burner cap and crown are placed incorrectly. Place the burner cap and crown correctly. The flame extinguishes im‐ Thermocouple is not heat‐ mediately after ignition. ed up sufficiently. After lightning the flame, keep the knob pushed for equal or less than 10 sec‐ onds. The flame ring is uneven.
www.electrolux.com C. Stick it on instruction booklet. 8. INSTALLATION WARNING! Refer to Safety chapters. 8.1 Before the installation Before you install the hob, write down the information bellow from the rating plate. The rating plate is on the bottom of the hob. Model ....................................... PNC ......................................... Serial number ........................... 8.
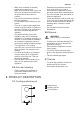
ENGLISH 13 8.4 Injectors replacement A B A. End of shaft with nut B. Elbow Connection to the gas supply should be with either rigid or semi-rigid pipe, i.e. steel or copper. The connection should be suitable for connecting to R 1/2 (1/2 BSP male thread). When the final connection has been made, it is essential that a thorough leak test is carried out on the hob and installation. Make sure that the main connection pipe does not exert any strain on the hob.
www.electrolux.com WARNING! Make sure the flame does not go out when you quickly turn the knob from the maximum position to the minimum position. 8.6 Electrical connection • • • • Do not pull the mains cable to disconnect the appliance. Always pull the mains plug (if applicable). The appliance must not be connected with an extension cable, an adapter or a multiple socket. There is a risk of fire. Do not let the power cable to heat up to a temperature of more than 90° C.
ENGLISH 3. A B min. 600 mm min. 650 mm min. 450 mm 40-50 mm 490 mm 55 mm 30 mm 270 mm 4. 1. Connect the green and yellow (earth) wire to the terminal which is marked with the letter 'E', or the earth symbol , or coloured green and yellow. 2. Connect the blue (neutral) wire to the terminal which is marked with the letter 'N' or coloured blue. 3. Connect the brown (live) wire to the terminal which is marked with the letter 'L'. It must always be connected to the network phase.
www.electrolux.com 6. kit including a support side bracket and supplementary seals is available at our Authorised Service Centres. The relevant installation instructions are supplied within the kit package. 8.10 Possibilities for insertion The panel installed below the hob must be easy to remove and let an easy access in case a technical assistance intervention is necessary. Kitchen unit with door or drawer 7. A min 6 mm B a 8. b min 30 mm min 5 mm (max 150 mm) 60 mm A. Removable panel B.
ENGLISH 17 9.2 Bypass diameters BURNER Ø BYPASS 1/100 mm Rapid 52 Auxiliary 28 9.3 Other technical data Gas original: G20 (2H) 20 mbar = 2,9 kW TOTAL POWER: Gas replacement: G30 (3+) 28-30 mbar = 269 g/h G31 (3+) 37 mbar = 264 g/h Electric supply: 220-240 V ~ 50/60 Hz Appliance category: II2H3+ Gas connection: R 1/2" Appliance class: 3 9.
www.electrolux.com Energy efficiency for the gas hob (EE gas hob) 59.4% EN 30-2-1: Domestic cooking appliances burning gas - Part 2-1 : Rational use of energy - General 10.2 Energy saving • • • • • • • Before use, make sure that the burners and pan supports are assembled correctly. Use cookware with diameters applicable to the size of burners. Center the pot on the burner. When you heat up water, use only the amount you need. If it is possible, always put the lids on the cookware.
ENGLISH 19
867329044-A-522015 www.electrolux.