EHL7640FOK EN FR DE Hob Table de cuisson Kochfeld User Manual Notice d'utilisation Benutzerinformation 2 23 46
www.electrolux.com CONTENTS 1. SAFETY INFORMATION....................................................................................3 2. SAFETY INSTRUCTIONS..................................................................................4 3. PRODUCT DESCRIPTION................................................................................ 7 4. DAILY USE......................................................................................................... 9 5. HINTS AND TIPS.........................
ENGLISH 1. 3 SAFETY INFORMATION Before the installation and use of the appliance, carefully read the supplied instructions. The manufacturer is not responsible for any injuries or damages that are the result of incorrect installation or usage. Always keep the instructions in a safe and accessible location for future reference. 1.
www.electrolux.com • • • • • • • • • • WARNING: Unattended cooking on a hob with fat or oil can be dangerous and may result in fire. NEVER try to extinguish a fire with water, but switch off the appliance and then cover flame e.g. with a lid or a fire blanket. CAUTION: The cooking process has to be supervised. A short term cooking process has to be supervised continuously. WARNING: Danger of fire: Do not store items on the cooking surfaces.
ENGLISH • • • • Do not install the appliance adjacent to a door or under a window. This prevents hot cookware to fall from the appliance when the door or the window is opened. If the appliance is installed above drawers make sure that the space, between the bottom of the appliance and the upper drawer, is sufficient for air circulation. The bottom of the appliance can get hot. Make sure to install a noncombustible separation panel under the appliance to prevent access to the bottom.
www.electrolux.com • • • • • • Do not put cutlery or saucepan lids on the cooking zones. They can become hot. Do not operate the appliance with wet hands or when it has contact with water. Do not use the appliance as a work surface or as a storage surface. If the surface of the appliance is cracked, disconnect immediately the appliance from the power supply. This to prevent an electrical shock.
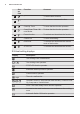
ENGLISH 3. PRODUCT DESCRIPTION 3.1 Cooking surface layout 1 1 Induction cooking zone 2 Control panel 1 1 1 2 2 3.2 Control panel layout 1 2 3 4 5 6 7 8 9 10 11 12 Use the sensor fields to operate the appliance. The displays, indicators and sounds tell which functions operate. Sen‐ sor field Function Comment 1 ON / OFF To activate and deactivate the hob. 2 Lock / The Child Safety Device To lock / unlock the control panel. 3 Bridge To activate and deactivate the function.
www.electrolux.com Sen‐ sor field Function Comment - To set the timer function. - To increase or decrease the time. 7 CountUp Timer To show that the function operates. 8 Count Down Timer / Mi‐ nute Minder To show that the function operates. 9 Power function To activate and deactivate the function. Control bar To set a heat setting. Hob²Hood To activate and deactivate the manual mode of the function. STOP+GO To activate and deactivate the function. 5 / 6 10 - 11 12 3.
ENGLISH 3.4 OptiHeat Control (3 step Residual heat indicator) WARNING! / / There is a risk of burns from residual heat. The indicator shows the level of the residual heat. The induction cooking zones make the heat necessary for cooking process directly in the bottom of the cookware. The glass ceramic is heated by the heat of the cookware. 4. DAILY USE WARNING! Refer to Safety chapters. 4.1 Activating and deactivating Touch for 1 second to activate or deactivate the hob. 4.
www.electrolux.com The function can be activated for the induction cooking zone only for a limited period of time. After this time the induction cooking zone automatically sets back to the highest heat setting. Refer to “Technical information” chapter. max. Refer to “Technical information” chapter. . zone: touch comes on. To deactivate the function: change the heat setting. 4.5 Bridge function The function operates when the pot covers the centres of the two zones. 4.
ENGLISH CountUp Timer (The count up timer) You can use this function to monitor how long a cooking zone operates. To activate the function: for the first zone in a pair touch twice quickly. The function starts automatically when lights up. To activate the function for the second zone in a pair touch times quickly. 4 To see how long the cooking zone operates: touch . The display shows the time, at first in seconds then in minutes. To deactivate the function: touch . The previous heat setting comes on.
www.electrolux.com comes on. Touch of the timer to choose one of the following: • - the sounds are off • - the sounds are on To confirm your selection wait until the hob deactivates automatically. When the function is set to hear the sounds only when: • • • • you can you touch Minute Minder comes down Count Down Timer comes down you put something on the control panel. 4.
ENGLISH Mode H6 Auto‐ matic light Boil‐ ing1) Frying2) On Fan speed 2 Fan speed 3 1) The hob detects the boiling process and activates fan speed in accordance with au‐ tomatic mode. 2) The hob detects the frying process and activates fan speed in accordance with au‐ tomatic mode. 3) This mode activates the fan and the light and does not rely on the temperature. Changing the automatic mode 1. Deactivate the appliance. 2. Touch for 3 seconds. The display comes on and goes off 3. Touch for 3 seconds.
www.electrolux.com Use the induction cooking zones with correct cookware. • • Cookware material • • correct: cast iron, steel, enamelled steel, stainless steel, the bottom made of multi-layer (with correct mark from a manufacturer). not correct: aluminium, copper, brass, glass, ceramic, porcelain. Cookware is correct for an induction hob if: • • some water boils very quickly on a zone set to the highest heat setting. a magnet pulls on to the bottom of the cookware.
ENGLISH 15 Heat setting Use to: Time (min) Hints 3-5 Simmer rice and milkbased dishes, heating up readycooked meals. 25 - 50 Add the minimum twice as much liquid as rice, mix milk dishes part procedure through. 5-7 Steam vegetables, fish, meat. 20 - 45 Add some tablespoons of liquid. 7-9 Steam potatoes. 20 - 60 Use max. ¼ l water for 750 g of potatoes. 7-9 Cook larger quantities of food, stews and soups. 60 150 Up to 3 l liquid plus ingredi‐ ents.
www.electrolux.com To find the full range of cooker hoods which work with this function refer to our consumer website. The Electrolux cooker hoods that work with this function must have the symbol . 6. CARE AND CLEANING WARNING! Refer to Safety chapters. 6.1 General information • • • • • Clean the hob after each use. Always use cookware with clean bottom. Scratches or dark stains on the surface have no effect on how the hob operates. Use a special cleaner applicable for the surface of the hob.
ENGLISH Problem Possible cause Remedy STOP+GO function oper‐ ates. Refer to "Daily use" chap‐ ter. There is water or fat stains on the control panel. Clean the control panel. An acoustic signal sounds and the hob deactivates. An acoustic signal sounds when the hob is deactiva‐ ted. You put something on one or more sensor fields. Remove the object from the sensor fields. The hob deactivates. You put something on the Remove the object from the sensor field. sensor field .
www.electrolux.com Problem Possible cause Remedy The diameter of the bottom Use cookware with correct of the cookware is too dimensions. small for the zone. Refer to “Technical infor‐ mation” chapter. and a number come on. There is an error in the hob. Disconnect the hob from the electrical supply for some time. Disconnect the fuse from the electrical system of the house. Con‐ nect it again. If comes on again, speak to an Au‐ thorised Service Centre. comes on.
ENGLISH • To replace the damaged mains cable use the following (or higher) mains cable type: H05V2V2-F T min 90°C. Speak to your local Service Centre. 8.4 Assembly min. 500mm min. 50mm min. 2mm min. 2 mm A min. 2 mm B < 20 mm B > 20 mm min. 500 mm B 57 mm 41 mm 31 mm A 12 mm 28 mm 38 mm A min 30 mm min. 500 mm A 12 mm 28 mm 38 mm B 57 mm 41 mm 31 mm min. 38 mm min. 2 mm R 5mm min.
www.electrolux.com min. 12 mm min. 2 mm 8.5 Protection box If you use a protection box (an additional accessory), the front airflow space of 2 mm and the protective floor directly below the hob are not necessary. The protection box accessory may not be available in some countries. Please contact your local supplier. You can not use the protection box if you install the hob above an oven. 9. TECHNICAL DATA 9.1 Rating plate Model EHL7640FOK Typ 60 GDD D4 AU Induction 7.4 kW Ser.Nr. .................
ENGLISH 21 9.2 Cooking zones specification Cooking zone Nominal pow‐ er (maximum heat setting) [W] Power func‐ tion [W] Power func‐ Cookware di‐ tion maximum ameter [mm] duration [min] Left front 2300 3200 10 125 - 210 Left rear 2300 3200 10 125 - 210 Right front 2300 3200 10 125 - 210 Right rear 2300 3200 10 125 - 210 The power of the cooking zones can be different in some small range from the data in the table. It changes with the material and dimensions of the cookware.
www.electrolux.com • Use the residual heat to keep the food warm or to melt it. 11. ENVIRONMENTAL CONCERNS Recycle the materials with the symbol . Put the packaging in applicable containers to recycle it. Help protect the environment and human health and to recycle waste of electrical and electronic appliances. Do not dispose appliances marked with the symbol with the household waste. Return the product to your local recycling facility or contact your municipal office.
FRANÇAIS 23 TABLE DES MATIÈRES 1. INFORMATIONS DE SÉCURITÉ..................................................................... 24 2. CONSIGNES DE SÉCURITÉ........................................................................... 26 3. DESCRIPTION DE L'APPAREIL...................................................................... 28 4. UTILISATION QUOTIDIENNE..........................................................................30 5. CONSEILS............................................................
1. www.electrolux.com INFORMATIONS DE SÉCURITÉ Avant d'installer et d'utiliser cet appareil, lisez soigneusement les instructions fournies. Le fabricant ne pourra être tenu pour responsable des blessures et dégâts résultant d'une mauvaise installation ou utilisation. Conservez toujours les instructions dans un lieu sûr et accessible pour vous y référer ultérieurement. 1.
FRANÇAIS • • • • • • • • • • • 25 fonctionnement. Veillez à ne pas toucher les éléments chauffants. Les enfants de moins de 8 ans doivent être tenus à l'écart, à moins d'être surveillés en permanence. Ne faites pas fonctionner l'appareil avec un minuteur externe ou un système de commande à distance. AVERTISSEMENT : Il peut être dangereux de laisser chauffer de la graisse ou de l'huile sans surveillance sur une table de cuisson car cela pourrait provoquer un incendie.
www.electrolux.com ou les dispositifs de protection pour table de cuisson intégrés à l'appareil. L'utilisation de dispositifs de protection non adaptés peut entraîner des accidents. 2. CONSIGNES DE SÉCURITÉ 2.1 Installation AVERTISSEMENT! L'appareil doit être installé uniquement par un professionnel qualifié. • • • • • • • • • • • Retirez l'intégralité de l'emballage. N'installez pas et ne branchez pas un appareil endommagé.
FRANÇAIS • • • • • être fixée de telle manière qu'elle ne peut pas être enlevée sans outils. Ne branchez la fiche d'alimentation à la prise de courant qu'à la fin de l'installation. Assurez-vous que la prise de courant est accessible une fois l'appareil installé. Si la prise de courant est lâche, ne branchez pas la fiche d'alimentation secteur. Ne tirez jamais sur le câble d'alimentation pour débrancher l'appareil. Tirez toujours sur la fiche.
www.electrolux.com • Ne faites jamais fonctionner les zones de cuisson avec des récipients de cuisson vides ou sans aucun récipient de cuisson. Ne placez jamais de papier aluminium sur l'appareil. N'utilisez pas de récipients en fonte ou en aluminium, ni de récipients dont le fond est endommagé et rugueux. Ils risqueraient de rayer le verre ou la surface vitrocéramique. Soulevez toujours ces objets lorsque vous devez les déplacer sur la surface de cuisson.
FRANÇAIS 29 3.2 Description du bandeau de commande 1 2 3 4 5 6 7 8 9 10 11 12 Les touches sensitives permettent de faire fonctionner l'appareil. Les affichages, les voyants et les signaux sonores indiquent les fonctions activées. Tou‐ Fonction che sensi‐ tive Commentaire MARCHE/ARRÊT Pour allumer et éteindre la table de cuis‐ son. 2 Verrouillage / Dispositif de sécurité enfants Pour verrouiller ou déverrouiller le ban‐ deau de commande. 3 Bridge Pour activer et désactiver la fonction.
www.electrolux.com Tou‐ Fonction che sensi‐ tive STOP+GO 12 Commentaire Pour activer et désactiver la fonction. 3.3 Indicateurs de niveau de cuisson Affichage Description La zone de cuisson est désactivée. La zone de cuisson est activée. - La fonction STOP+GO est activée. La fonction Démarrage automatique de la cuisson est activée. Fonction Booster est activée. + chiffre Une anomalie de fonctionnement s'est produite.
FRANÇAIS 4.2 Arrêt automatique Cette fonction arrête la table de cuisson automatiquement si : • • • • • • toutes les zones de cuisson sont désactivées, vous ne réglez pas le niveau de cuisson après avoir allumé la table de cuisson, vous avez renversé quelque chose ou placé un objet sur le bandeau de commande pendant plus de 10 secondes (une casserole, un torchon, etc.). Un signal sonore retentit et la table de cuisson s'éteint. Retirez l'objet du bandeau de commande ou nettoyez celui-ci.
www.electrolux.com fonctionnent de nouveau de manière indépendante. minuteur sur les zones de droite, utilisez le minuteur de droite. 4.6 Démarrage automatique de la cuisson Minuteur dégressif Utilisez cette fonction pour régler la durée de fonctionnement d'une zone de cuisson, uniquement pour une session. Activez cette fonction pour obtenir le niveau de cuisson souhaité plus rapidement.
FRANÇAIS Pour contrôler la durée de fonctionnement de la zone de cuisson sélectionnée : appuyez sur . La durée s'affiche, d'abord en secondes, puis en minutes. Pour désactiver la fonction : sélectionnez la zone de cuisson souhaitée en appuyant sur appuyez sur disparaît. et . Le symbole Pour activer la fonction : appuyez à plusieurs reprises jusqu'à ce que le voyant de la zone souhaitée s'allume. Appuyez sur la touche ou pour régler la durée. La fonction démarre automatiquement au bout de 4 secondes.
www.electrolux.com 4.12 OffSound Control (Activation et désactivation des signaux sonores) Éteignez la table de cuisson. Appuyez sur pendant 3 secondes. L'affichage s'allume, puis s'éteint. Appuyez sur pendant 3 secondes ; ou s'allume. du minuteur Appuyez sur la touche pour choisir l'une des options suivantes : • • - les signaux sonores sont désactivés - les signaux sonores sont activés Pour confirmer le réglage, attendez que la table de cuisson s'éteigne automatiquement.
FRANÇAIS Modes automatiques Éclaira‐ Faire ge auto‐ bouil‐ matique lir1) Faire frire2) Mode H0 Désac. Désac. Mode H1 On Désac. Mode H2 3) On Vitesse Vitesse du venti‐ du venti‐ lateur 1 lateur 1 Mode H3 On Désac. Mode H4 On Vitesse Vitesse du venti‐ du venti‐ lateur 1 lateur 1 Mode H5 On Vitesse Vitesse du venti‐ du venti‐ lateur 1 lateur 2 Mode H6 On Vitesse Vitesse du venti‐ du venti‐ lateur 2 lateur 3 Désac. 2. Appuyez sur pendant 3 secondes. L'affichage s'allume, puis s'éteint.
www.electrolux.com L'éclairage de la hotte s'éteint 2 minutes après avoir éteint la table de cuisson. 5. CONSEILS AVERTISSEMENT! Reportez-vous aux chapitres concernant la sécurité. partie de la puissance générée par la zone de cuisson. Reportez-vous au chapitre « Caractéristiques techniques ». 5.1 Ustensiles de cuisson Sur les zones de cuisson à induction, un champ électromagnétique puissant chauffe les récipients très rapidement. Utilisez des récipients adaptés aux zones de cuisson à induction. 5.
FRANÇAIS un niveau de cuisson moyen utilise moins de la moitié de sa puissance. Niveau de cuisson -1 37 Les valeurs figurant dans le tableau suivant sont fournies à titre indicatif. Utilisation : Durée (min) Conseils Conservez les aliments cuits au chaud. au be‐ soin Placez un couvercle sur le récipient. 1-3 Sauce hollandaise, faire fon‐ 5 - 25 dre : beurre, chocolat, gélati‐ ne. Mélangez de temps en temps. 1-3 Solidifier : omelettes, œufs cocotte. 10 - 40 Couvrez pendant la cuisson.
www.electrolux.com • N'interrompez pas le signal entre la table de cuisson et la hotte (par exemple avec une main ou une poignée d'ustensile de cuisine). Observez l'image. La hotte de l'illustration n'est donnée qu'à titre d'exemple. Il peut arriver que d'autres appareils contrôlés à distance bloquent le signal. Pour éviter cela, ne faites pas fonctionner la commande à distance des autres appareils et la table de cuisson en même temps.
FRANÇAIS 39 7. EN CAS D'ANOMALIE DE FONCTIONNEMENT AVERTISSEMENT! Reportez-vous aux chapitres concernant la sécurité. 7.1 En cas d'anomalie de fonctionnement Problème Cause probable Solution Vous ne pouvez pas allu‐ mer la table de cuisson ni la faire fonctionner. La table de cuisson n'est pas connectée à une sour‐ ce d'alimentation électrique ou le branchement est in‐ correct. Vérifiez que la table de cuisson est correctement branchée à une source d'alimentation électrique.
www.electrolux.com Problème Cause probable Solution La fonction Hob²Hood ne fonctionne pas. Vous avez couvert le ban‐ deau de commande. Retirez l'objet du bandeau de commande. La fonction de démarrage automatique de la cuisson ne fonctionne pas. La zone est chaude. Laissez la zone de cuisson refroidir. Le niveau de cuisson le plus élevé est réglé. Le niveau de cuisson le plus élevé est identique à la fonction. Le niveau de cuisson oscil‐ Le dispositif de gestion de le entre deux niveaux.
FRANÇAIS Problème et un chiffre s'affichent. Cause probable Solution Une erreur s'est produite dans la table de cuisson. Débranchez la table de cuisson de l'alimentation électrique pendant quel‐ ques minutes. Déconnec‐ tez le fusible de l'installa‐ tion domestique. Rebran‐ 41 chez l'appareil. Si s'affi‐ che à nouveau, faites ap‐ pel au service après-vente agréé. s'allume. Une erreur s'est produite dans la table de cuisson car un récipient a chauffé à vide.
www.electrolux.com 8.2 Tables de cuisson intégrées Les tables de cuisson encastrables ne peuvent être mises en fonctionnement qu'après avoir été installées dans des meubles et sur des plans de travail homologués et adaptés. • Pour remplacer le câble d'alimentation endommagé, utilisez le type de câble suivant (ou supérieur) : H05V2V2-F T min. 90 °C. Contactez votre service après-vente. 8.3 Câble d'alimentation • La table de cuisson est fournie avec un câble d'alimentation. 8.4 Montage min.
FRANÇAIS 43 min. 38 mm min. 2 mm R 5mm min. 55mm +1 490+1mm 680 mm min. 12 mm min. 2 mm 8.5 Enceinte de protection Si vous utilisez une enceinte de protection (accessoire supplémentaire), l'espace de circulation d'air de 2 mm et le fond de protection installé directement sous la table de cuisson ne sont plus nécessaires. L'enceinte de protection n'est pas disponible dans tous les pays. Veuillez contacter votre revendeur local.
www.electrolux.com 9. CARACTÉRISTIQUES TECHNIQUES 9.1 Plaque signalétique Modèle EHL7640FOK Type 60 GDD D4 AU Induction 7.4 kW Numéro de série .......... ELECTROLUX PNC 949 596 020 03 220 - 240 V 50 - 60 Hz Fabriqué en Allemagne 7.4 kW 9.2 Caractéristiques des zones de cuisson Zone de cuis‐ son Puissance no‐ Fonction minale (ni‐ Booster [W] veau de cuis‐ son max.
FRANÇAIS Consommation d'énergie de la table de cuisson (EC electric hob) EN 60350-2 - Appareils de cuisson domestiques électriques - Partie 2 : Tables de cuisson - Méthodes de mesure des performances Les mesures d'énergie se rapportant à la zone de cuisson sont identifiées par les croix des zones de cuisson correspondantes. 10.2 Économie d'énergie Vous pouvez économiser de l'énergie au quotidien en suivant les conseils suivants.
www.electrolux.com INHALTSVERZEICHNIS 1. SICHERHEITSHINWEISE................................................................................47 2. SICHERHEITSANWEISUNGEN...................................................................... 49 3. GERÄTEBESCHREIBUNG.............................................................................. 52 4. TÄGLICHER GEBRAUCH................................................................................54 5. TIPPS UND HINWEISE.....................................
DEUTSCH 1. 47 SICHERHEITSHINWEISE Lesen Sie die mitgelieferte Gebrauchsanleitung sorgfältig vor Montage und Inbetriebnahme des Geräts. Bei Verletzungen oder Schäden infolge nicht ordnungsgemäßer Montage oder Verwendung des Geräts übernimmt der Hersteller keine Haftung. Bewahren Sie die Anleitung immer an einem sicheren und zugänglichen Ort zum späteren Nachschlagen auf. 1.
www.electrolux.com 1.2 Allgemeine Sicherheit • • • • • • • • • • • WARNUNG: Das Gerät und die zugänglichen Geräteteile werden während des Betriebs heiß. Seien Sie vorsichtig und berühren Sie niemals die Heizelemente. Halten Sie Kinder unter 8 Jahren vom Gerät fern, wenn sie nicht ständig beaufsichtigt werden. Schalten Sie das Gerät nicht über eine externe Zeitschaltuhr oder eine separate Fernsteuerung ein.
DEUTSCH • 49 WARNUNG: Verwenden Sie nur Schutzabdeckungen des Herstellers des Kochgeräts, von ihm in der Bedienungsanleitung als geeignete und empfohlene Schutzabdeckungen oder die im Gerät enthaltene Schutzabdeckung. Es besteht Unfallgefahr durch die Verwendung ungeeigneter Schutzabdeckungen. 2. SICHERHEITSANWEISUNGEN 2.1 Montage WARNUNG! Nur eine qualifizierte Fachkraft darf die Montage des Geräts vornehmen. • • • • • • • • • • Entfernen Sie das gesamte Verpackungsmaterial.
www.electrolux.com • • • • • • • • • • • Sorgen Sie dafür, dass ein Berührungsschutz installiert wird. Verwenden Sie die Zugentlastung für das Kabel. Stellen Sie beim elektrischen Anschluss des Gerätes sicher, dass das Netzkabel oder ggf. der Netzstecker nicht mit dem heißen Gerät oder heißem Kochgeschirr in Berührung kommt. Verwenden Sie keine Mehrfachsteckdosen oder Verlängerungskabel. Achten Sie darauf, Netzstecker (falls vorhanden) und Netzkabel nicht zu beschädigen.
DEUTSCH • Platzieren Sie keine entflammbaren Produkte oder Gegenstände, die mit entflammbaren Produkten benetzt sind, im Gerät, auf dem Gerät oder in der Nähe des Geräts. WARNUNG! Das Gerät könnte beschädigt werden. • • • • • • • • Stellen Sie kein heißes Kochgeschirr auf das Bedienfeld. Legen Sie keine heißen Topfdeckel auf die Glasoberfläche des Kochfeldes. Lassen Sie das Kochgeschirr nicht leerkochen. Lassen Sie keine Gegenstände oder Kochgeschirr auf das Gerät fallen.
www.electrolux.com 3. GERÄTEBESCHREIBUNG 3.1 Kochfeldanordnung 1 1 Induktionskochzone 2 Bedienfeld 1 1 1 2 2 3.2 Bedienfeldanordnung 1 2 3 4 5 6 7 8 9 10 11 12 Bedienen Sie das Gerät über die Sensorfelder. Die Anzeigen, Kontrolllampen und akustischen Signale informieren Sie über die aktiven Funktionen. Sen‐ sor‐ feld Funktion Kommentar 1 EIN/AUS Ein- und Ausschalten des Kochfeldes. 2 Verriegeln / Kindersiche‐ rung Verriegeln/Entriegeln des Bedienfelds.
DEUTSCH Sen‐ sor‐ feld 53 Funktion Kommentar - Einstellen der Timer-Funktion. - Erhöhen oder Verringern der Zeit. CountUp Timer Anzeige, dass die Funktion eingeschaltet ist. 8 Kurzzeitmesser / Kurz‐ zeit-Wecker Anzeige, dass die Funktion eingeschaltet ist. 9 Power-Funktion Ein- und Ausschalten der Funktion. Einstellskala Einstellen der Kochstufe. Hob²Hood Ein- und Ausschalten des manuellen Mo‐ dus der Funktion. STOP+GO Ein- und Ausschalten der Funktion. 5 / 6 7 10 - 11 12 3.
www.electrolux.com 3.4 OptiHeat Control (Restwärmeanzeige, 3-stufig) WARNUNG! / / Es besteht Verbrennungsgefahr durch Restwärme. Die Anzeige zeigt die Restwärmestufe an. Die Induktionskochzonen erzeugen die erforderliche Hitze zum Kochen direkt im Boden des Kochgeschirrs. Die Glaskeramik wird nur durch die Wärme des Kochgeschirrs erhitzt. 4. TÄGLICHER GEBRAUCH WARNUNG! Siehe Kapitel "Sicherheitshinweise". 4.1 Ein- und Ausschalten Berühren Sie 1 Sekunde lang, um das Kochfeld ein- oder auszuschalten.
DEUTSCH 55 4.7 Power-Funktion max. Siehe Kapitel „Technische Daten“. 4.5 Funktion Bridge Die Funktion wird eingeschaltet, wenn der Topf die Mitten beider Kochzonen bedeckt. Diese Funktion verbindet zwei Kochzonen, sie funktionieren dann wie eine Kochzone. Stellen Sie zuerst die Kochstufe für eine der Kochzonen ein. Einschalten der Funktion für die linken/rechten Kochzonen: Berühren Sie / . Zum Einstellen oder Ändern der Kochstufe berühren Sie die rechte oder linke Einstellskala.
www.electrolux.com Berühren Sie , um das akustische Signal auszuschalten. Diese Funktion hat keine Auswirkung auf den Kochzonenbetrieb. So wird die Restzeit angezeigt: Berühren Sie . Ausschalten der Funktion: Wählen Sie die gewünschte Kochzone mit berühren Sie und . Die Restzeit wird auf 00 heruntergezählt. Das Symbol erlischt. CountUp Timer (Garzeitmesser) Mit dieser Funktion können Sie feststellen, wie lange eine Kochzone bereits in Betrieb ist. 4.
DEUTSCH Ausschalten der Funktion: Schalten Sie das Kochfeld mit ein. Stellen Sie keine Kochstufe ein. Berühren Sie Sekunden lang. 4 • leuchtet auf. Schalten Sie das Kochfeld mit aus. Vorübergehendes Ausschalten der Funktion für einen einzelnen Kochvorgang: Schalten Sie das Kochfeld mit • ein. leuchtet auf. Berühren Sie 4 Sekunden lang. Stellen Sie die Kochstufe innerhalb von 10 Sekunden ein. Das Kochfeld kann jetzt benutzt werden.
www.electrolux.com Bei den meisten Dunstabzugshauben ist das Fernsteuerungssystem werkseitig ausgeschaltet. Schalten Sie es ein, bevor Sie die Funktion nutzen. Weitere Informationen finden Sie in der Anleitung der Dunstabzugshaube. Automatikbetrieb der Funktion Stellen Sie für den automatischen Betrieb den Modus auf H1 – H6. Das Kochfeld ist standardmäßig auf H5 gestellt.Die Dunstabzugshaube schaltet sich ein, wenn Sie das Kochfeld bedienen.
DEUTSCH Wenn Sie nach Kochende das Kochfeld ausschalten, kann die Dunstabzugshaube noch eine gewisse Zeit in Betrieb sein. Nach dieser Zeit schaltet das System den Lüfter automatisch aus. Während der folgenden 30 Sekunden kann der Lüfter nicht wieder eingeschaltet werden. Manuelles Einstellen der Lüftergeschwindigkeit Sie können den Lüfter auch manuell einstellen. Berühren Sie hierzu , wenn das Kochfeld eingeschaltet ist.
www.electrolux.com 5.2 Betriebsgeräusche Es gibt verschiedene Betriebsgeräusche: • • • • • Knacken: Das Kochgeschirr besteht aus unterschiedlichen Materialien (Sandwichkonstruktion). Pfeifen: Sie haben die Kochzone auf eine hohe Stufe geschaltet und das Kochgeschirr besteht aus unterschiedlichen Materialien (Sandwichkonstruktion). Summen: Sie haben die Kochzone auf eine hohe Stufe geschaltet. Klicken: Bei elektronischen Schaltvorgängen. Zischen, Surren: Der Ventilator läuft. Kurzzeitmessers ab.
DEUTSCH Kochstufe Verwendung: Dauer (Min.) 9 - 12 Bei geringer Hitze anbraten: Nach Schnitzel, Cordon bleu, Kote‐ Bedarf lett, Frikadellen, Bratwürste, Leber, Mehlschwitze, Eier, Pfannkuchen, Donuts. Nach der Hälfte der Zeit wenden. 12 - 13 Braten bei starker Hitze: 5 - 15 Rösti, Lendenstücke, Steaks. Nach der Hälfte der Zeit wenden. 14 Aufkochen von Wasser, Nudeln kochen, Anbraten von Fleisch (Gu‐ lasch, Schmorbraten), Frittieren von Pommes frites. 61 Hinweise Aufkochen großer Mengen Wasser.
www.electrolux.com 6. REINIGUNG UND PFLEGE WARNUNG! Siehe Kapitel "Sicherheitshinweise". 6.1 Allgemeine Informationen • • • • • Reinigen Sie das Kochfeld nach jedem Gebrauch. Achten Sie immer darauf, dass der Boden des Kochgeschirrs sauber ist. Kratzer oder dunkle Flecken auf der Oberfläche beeinträchtigen die Funktionsfähigkeit des Kochfelds nicht. Verwenden Sie einen Spezialreiniger zur Reinigung der Kochfeldoberfläche. Verwenden Sie einen speziellen Reinigungsschaber für Glas. 6.
DEUTSCH Störung Mögliche Ursache 63 Abhilfe Schalten Sie das Kochfeld erneut ein und stellen Sie innerhalb von 10 Sekun‐ den die Kochstufe ein. Zwei oder mehr Sensorfel‐ Berühren Sie nur ein Sen‐ der wurden gleichzeitig be‐ sorfeld. rührt. Die Funktion STOP+GO ist Siehe Kapitel „Täglicher in Betrieb. Gebrauch“. Auf dem Bedienfeld befin‐ den sich Wasser- oder Fettspritzer. Wischen Sie das Bedien‐ feld ab. Ein akustisches Signal er‐ Mindestens ein Sensorfeld tönt und das Kochfeld wurde bedeckt.
www.electrolux.com Störung Mögliche Ursache Abhilfe leuchtet auf. Die Abschaltautomatik hat ausgelöst. Schalten Sie das Kochfeld aus und wieder ein. leuchtet auf. Die Kindersicherung oder Siehe Kapitel „Täglicher die Tastensperre ist einge‐ Gebrauch“. schaltet. leuchtet auf. Es wurde kein Kochge‐ schirr auf die Kochzone gestellt. Stellen Sie Kochgeschirr auf die Kochzone. Sie verwenden ungeeigne‐ Geeignetes Kochgeschirr tes Kochgeschirr. benutzen. Siehe Kapitel „Tipps und Hinweise“.
DEUTSCH 7.2 Wenn Sie das Problem nicht lösen können... Wenn Sie das Problem nicht selbst lösen können, wenden Sie sich an Ihren Händler oder einen autorisierten Kundendienst. Geben Sie die Daten, die Sie auf dem Typenschild finden, an. Geben Sie dabei den dreistelligen Buchstaben-Code für die Glaskeramik (befindet sich in der Ecke der Glasfläche) 65 und die angezeigte Fehlermeldung an. Vergewissern Sie sich, dass Sie das Kochfeld korrekt bedient haben.
www.electrolux.com min. 2 mm A min. 2 mm B < 20 mm B > 20 mm min. 500 mm min 30 mm B 57 mm 41 mm 31 mm A 12 mm 28 mm 38 mm A min. 500 mm A 12 mm 28 mm 38 mm B 57 mm 41 mm 31 mm min. 38 mm min. 2 mm R 5mm min. 55mm +1 490+1mm 680 mm min. 12 mm min.
DEUTSCH 8.5 Schutzboden 67 Falls Sie einen Schutzboden (optionales Zubehör) verwenden, ist die Einhaltung des vorderen Belüftungsabstands von 2 mm und die Schutzmatte direkt unter dem Gerät nicht nötig. Der Schutzboden ist möglicherweise in einigen Ländern nicht erhältlich. Wenden Sie sich an Ihren Händler vor Ort. Wenn Sie das Kochfeld über einem Backofen einsetzen, können Sie den Schutzboden nicht verwenden. 9. TECHNISCHE DATEN 9.1 Typenschild Modell EHL7640FOK Typ 60 GDD D4 AU Induktion 7.4 kW Ser.
www.electrolux.com 10. ENERGIEEFFIZIENZ 10.
DEUTSCH 69
www.electrolux.
DEUTSCH 71
867331167-B-272016 www.electrolux.