FINDING INFORMATION Please read and save this guide Thank you for choosing Electrolyte, the new premium brand in home appliances. This Use & Care Guide is part of our commitment to customer satisfaction and product quality throughout the service life of your view appliance. We view your purchase as the beginning of a relationship. To ensure our ability to continue serving you, please use this page to record important product information.
FINDING INFORMATION... PRECAUTIONS TO AVOID POSSIBLE EXPOSURE TO EXCESSIVE MICROWAVE ENERGY TABLE OF CONTENTS IMPORTANT SAFETY INSTRUCTIONS UNPACKING AND EXAMINE YOUR OVEN... GROUNDING INSTRUCTIONS INFORMATION YOU NEED TO KNOW About Your Oven... About Microwave Cooking... About Safety About Children and the Microwave... About Door About Utensils and Coverings PART NAMES CONTROL PANEL... BEFORE OPERATING To Set the Clock. Stop/Clear MANUAL Time Cooking.com.
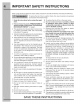
. IMPORTANT SAFETY INSTRUCTIONS When using electrical appliances basic safety precautions should be followed, including the following: aN Anshan To reduce the risk of bums, electric shock, fire, injury to persons of exposure | to excessive microwave energy: 1. Read all instructions before using the appliance. 2. Read and follow the specific “PRECAUTIONS TO AVOID POSSIBLE EXPOSURE TO EXCESSIVE MICROWAVE ENERGY” on page 2. 3.
Open the bottom of the carton, bend the carton flaps back and tilt the oven over to rest on plastic foam pad. Lift carton off oven and remove all packing materials, WALL and TOP CABINET TEMPLATES. SAVE THE CARTON AS IT MAY MAKE INSTALLATION EASIER. 1. Remove the feature sticker from the outside of the door, if there is one. 2. Check to see that there Is a WALL TEMPLATE and TOP CABINET TEMPLATE. Read enclosures and SAVE the Use and Care Guide.
Electrical Requirements The oven is equipped with a 3-prong grounding plug. DO NOT UNDER ANY CIRCUMSTANCES CUT OR REMOVE THE GROUNDING PIN FROM THE PLUG. DO NOT USE AN EXTENSION CORD. if the power supply cord is too short, have a qualified electrician or serviceman install an outlet near the appliance. The Power Supply Cord and plug must be connected to a separate 120 Volt Amp, or more branch circuit, single grounded receptacle.
About Your Oven This Use and Care Guide is valuable: read it carefully and always save it for reference. NEVER use the oven without the turntable and support nor turn the turntable over so that a large dish could be placed in the oven. The turntable will turn both clockwise and counterclockwise. ALWAYS have food in the Microwave Oven when absorb the microwave energy. When using the oven at power levels below 100%, you may hear the magneto cycling on and off.
About Safety INFORMATION YOU NEED TO KNOW = Check foods to see that they are cooked to the United States Department of Agriculture's recommended temperatures. Tt Forehead amb ol veal cit steel chops or oasis MEDIUM RARE : For fresh pork; ground meat, fish, seafood, egg dishes, frozen prepared food and beef, lamb or veal cut into steaks, chops or roasts cooked to MEDIUM Toe end ate deli and can ou ; whole ¢ . To test for oneness, insert a meat thermometer in thick or dense area away from fat or bone.
INFORMATION YOU NEED TO KNOW About Food General Pcs s fol dogs and sausage a se Chan {se specially bagged popcorn for microwave. cooking. Listen. while ‘popping corn for the popping to slow forlorn 2. seconds or use special popcorn pad. L Cut baked goods. with filling after heating to release steam and avoid burns. Stir liquids: briskly before and after heating to avoid “eruption”, Use deep bowl, when cooking liquids. or cereals, fo prevent boil overs, Pop popcorn in regular brown.
. INFORMATION YOU NEED TO KNOW About Utensils and Coverings {tis not necessary to buy all new cookware. Many pieces already in your kitchen can be used successfully in your new Over the Range Microwave Oven. Make sure the utensil does not touch the interior walls during cooking. Use these utensils for safe microwave cooking and reheating: s glass ceramic Corningware®.
10 FRONT VIEW PART NAMES = 11 {Front of microwave oven} 8 Microwave oven door with see-through window Door hinges Wave guide cover: DO NOT REMOVE. Turntable motor shaft Microwave oven light it will it when microwave oven Is operating or door Is open. Rack holders Safety door latches The microwave oven will not operate unless the door is securely closed. Handle Light pad Touch the light pad once for high, twice for medium, three times for low and four times to turn off the light.
CONTROL PANEL Words in the lower portion of the display will fight to indicate what function is in progress. 16 18 18-19 20-21 22 23 Number next to the control panel illustration indicates pages on which there are feature descriptions and usage information.
Before operating your new oven make sure you read and understand this Use and Care Guide completely. » Before the Over the Range Microwave Oven can be used, follow these procedures: 1. Plug in the oven, Close the door. The oven display will show ENJOY YOUR OVEN TOUCH CLEAR AND TOUCH CLOCK. . Touch the STOP/CLEAR pad. | appear. 3. Set clock. See below. To Set the Clock «Suppose you want to enter the correct time of day 12:30 (AM or PM). ra 1 will Hee Step Touch: set 1. Touch the set clock pad. clock 2.
Time Cooking Your Over the Range Microwave Oven can be programmed for 99 minutes 99 seconds (99.99). Always enter the seconds after the minutes, even if they are both zeros. «= Suppose you want fo cook for 5 minutes at 100%. Step Touch 1. Enter cooking time. (5) 2. Touch the START START add 30 sec pad. add 30 sec To Set Power Level There are eleven preset power levels, Using lower power levels increases the cooking time which Is recommended for foods such as cheese, mite and long slow cooking of meats.
Manual Defrost If the food that you wish to defrost is not listed on the Defrost chart or is above or below the limits in the Amount column on the Defrost chart (see page 26), you reed to defrost manually. You can defrost any frozen food, either raw or previously cooked, by using Power Level for 30% Follow the exact 3-step procedure found under To set power level. Estimate defrosting time and touch power level pad eight times for 30% power.
SENSOR MODES SENSOR MODES has 6 functions, such as Sensor Cook, pop com, fresh veggies, frozen veggies, baked potato and sensor reheat. Sensor Cook There are 5 foods (frozen entrees, ground meat, rice, flash/seafood, and chicken breast) under the SENSOR COOK that uses the sensor. You can cook many foods by touching the sensor cook pad and the food number. You don’t need to calculate cooking teems or power level. + Suppose you want to cook Frozen Entrees. Procedure pert pay wen L ds Step Touch nipped 1.
SENSOR MODES = 17 Sensor Cook chart ee ul een itg Li tel weapon ny and follow SE i=l ons for curing, Allen cooking, et stand, covered 0h 103 minted . . 2: Ground Meat” 0.25: 2.01. Use this setting to cook ground before turkey as patties 0.2 -08kg ordinal casserole to be added to-other ingredients. Place patties ona microwave-safe rack and cover with wax paper. Place ground meat ira casserole and cover with-wax paper or plastic wrap.
SENSOR MODES Popcorn/Fresh Veggies/Frozen Veggies/Baked Potato/ Sensor Reheat + Suppose you want to cook popcorn. «Suppose you want to reheat soup. : Hie elev Step Touch Step Touch pop Touch the sensor reheat pad sensor Touch the popcorn pad once. com for soup. reheat knack } pop yo Touch the popcorn pad twice. corm ne So sane a Tor tan be hy ens: non ones wis petard ing on Soa Fresh = : ic hee Verna. be bon .
SENSOR MODES 19 Fresh Veggies chart ie eae Darneder | 0 dna Fresh Vegetables, hard 0.25 20 Place in casserole, Add 1-4 tsp water. Cover with Carrots, sliced 0.25.157b,0.2 lid for tender vegetables, Use plastic wrap cover for Common cob tender-crisp vegetables, Touch the fresh veggies Green beans 0.25 pad twice. After cooking, stir, it possible. Let stand, Winter squash covered, for 2 10 5 minutes.
AUTO MODES AUTO MODES has 6 functions, such as auto cook, keep 2, Repeat touching same warm, melt/soften, snacks, auto reheat and auto defrost, number pad at Step increase quantity. Ex: 1 serving. 3. Touch the power level pad vice for Less Time Ravel x2 ed with More orl [eee Ti Toni Adi so Adjustment. He Dower level Dolores Conn Is started See page 08 4. Touch the START add START Ea hi food has a cooking hint. Touch the user 30 sec pad.
Dinner recipes recipes serve 6) AUTO MODES | 21 5. YELLOW RICE AND CHICKEN Place in a 3 quart casserole: 1 package (5 8 ounces) yellow rice mix with flavor packet 2 cups chicken broth Stir well and cover. Touch the auto cook pad, number 5 and touch the START add 30 sec pad. Af pause, stir well and add: 1 cup frozen peas 1 red pepper, diced 1/4 pounds boneless chicken cutlets, sliced into thin strips Re-cover. Touch the START add 30 sec pad. At end, garish with parsley. &.
Keep Warm Keep warm allows you to keep food warm for With manual cooking 30 minutes at the maximum. = Suppose you want to cook a cup of soup for Direct use 2 minutes at 70% and keep the soup warm for + Suppose you want to keep a cup of Soup warm 16 minutes. Step Touch 1. Enter cooking time. Touch the keep warm keep pad. warm 2. Touch the power level ; power (3) (0) pad ¢ times for 70% level 1x4 2. Enter the desired time. power. Ex: 30 minutes. 3. Touch the keep warm keep pad. warm 3.
AUTO MODES = 23 Melt, Soften Melt, soften automatically compute the correct heating time and microwave power level for melting and softening foods shown in the chart. There are 4 foods (butter, chocolate, ice cream and cream cheese} under the melt, soften. » Suppose you want to melt 1 square of chocolate with More Time Adjustment. Step Touch 1. Touch the melt, soften melt pad once, number 2 for soften (2) chocolate. 2. Repeat touching same number pad at Step 110 select quantity.
94 AUTO MODES Snacks ¢ Suppose you want to heat 0.3 pound or 0.3 kilogram chicken nuggets with snacks, Snacks are for cooking/heating foods that take a short amount of ime! There are 7 foods {frozen mw pizza, hand held snacks Step Touch (3-4 0z / kg), hand held snacks (5-6 oz / 0342-037 kg), chicken nuggets, hot dogs, frozen kind's 1. Touch the snacks @ meal and pizza) under the snacks. pad and number 4 for snacks + Suppose you want to reheat a slice of pizza with snacks. chicken nuggets. ing the number 3.
AUTO MODES = 25 Auto Reheat There are 4 foods {fresh ragamuffin, frozen rolls/muffins, pasta and beverage) under the auto reheat. © Suppose you want to reheat 2 fresh muffins with auto reheat, Leos es Step Touch 1. Touch the auto auto reheat pad and numb ber 1 for fresh muffin, reheat 2. Repeat touching same number pad at Step 1 1 Veo to increase quantity. Ex: 2 muffins. 3. Touch the START add START 30 sec pad. add 30 sec Auto Reheat chart een eer eo ey paper towel Eat refrigerate | START addaosecpad 2.
96 AUTO MODES Auto Defrost There are 6 foods {ground meat, stakes/chops/fish, chicken pieces, roast, casserole and soup) under the auto defrost. Auto defrost automatically defrosts all the foods found in the Defrost chart below. + Suppose you want to defrost a 1.8 pound or 1.8 kilogram steak. Procedure Step Touch a dolloped on the An Use time and 0% poker on mania Gain bee SEER icon 1. Touch the auto defrost pad auto Continue Haw mo Lo Roche and number 2 for steak. defrost ta . 2.
User Pref User pref provides 4 features that make using your oven easy because specific instructions are provided in the interactive display. 1. Child Lock The Child Lock prevents unwanted oven operation such as by small children. The oven can be set so that the control panel is deactivated or locked. To set, touch the user pref pad, the number 1 and then touch the START add 30 sec pad. Should a pad be touched, LOCKED will appear in the display.
4. Language Selection The oven comes set for English and U.S, Customary Unit pounds. Your oven can be selected 3 Languages, English, Spanish of French, and 2 units, pounds or kilograms for each language. To change, touch the user pref pad and number 4. Continue to touch the number 4 until your choice is selected from the table below. Then, touch the START add 30 sec pad.
CONVENIENT FEATURES 29 Timer You can easily uss Timer function as independent kitchen timer or white using microwave for cooking + Suppose you want fo time a 3-minute long distance phone call, Procedure Step “Tough 1. Touch the timer on-off pad timer on-off — 000 3. Taus the tier on-off pad timer The timer will count down on-off 4. At end of timer, 3 Lang beeps will sound and words Timer / Bnd wil flash in the display. This tells you the timer is completed. To cancel, just catholic any key pad.
EXTERIOR The outside surface is deprecated steel and plastic. Clean the outside with mild soap and water; rinse and dry with a soft cloth. Do not use any type of household or abrasive cleaner. DOOR Disconnect the power cord or deactivate the oven with setting Child Lock before cleaning to prevent unexpected manipulation. See Child Lock on page 27. Wipe the window on both sides with a soft cloth to remove any spills or spatters.
CLEANING AND CARE § CHARCOAL FILTERS Charcoal Filters, which are attached with Hood Louver, are used for non vented, recirculated installation. The filter should be changed every 6 to 12 months depending on use. 1. Disconnect power to the microwave oven at the circuit breaker panel of by unplugging. 2. Remove three Hoover Louver Screws. 3. Push the upper tabs and pull the louver away from the unit. 4.
Please check the following before calling for service: Place one cup of water in a glass measuring cup in the oven and close the door securely. Operate the oven for one minute at HIGH 100%.
SPECIFICATIONS 33 Sine has ony 1650 W14.3. amps. {for EIGOBMSSH) 1500 W13.0 Amps: {for | El MECHANICS) an AC Power Required: Bobbie . Frequency: 2450 MHz. (Grown 2/Class By Gin itn) Cavity Dimensions: 22 02MW) x 10.1480 (H) x 148173290) Mon bust Weight: Approx. {net 81.1b, gross. 73 1b * The International Electronically Commission's standardized method for measuring output wattage. This test method is widely recognized.
WARRANTY INFORMATION Major Appliance Warranty Information Your appliance is coverlet by a one year limited warranty. For one year from your original date of purchase, Electrolyte wil repair of replace any parts of this appliance that prove to be defective in materials or workmanship when such appliance is installed, used, and maintained in accordance with the provided instructions. In addition, the magneto tube of your appliance is covered by a twa through fives year limited warranty.