user manual Cooker EIKG5546 EIKG5547
electrolux Electrolux. Thinking of you. Share more of our thinking at www.electrolux.com Contents Safety information Product description Before first use Operation Helpful hints and tips Cooking tables 2 4 5 6 12 13 Care and cleaning What to do if… Installation instructions Technical data Environment concerns Guarantee/Customer Service 16 19 21 25 26 26 Subject to change without notice Safety information These warnings are provided in the interests of your safety.
electrolux 3 • This appliance has been designed for domestic use to cook edible foodstuffs only and must not be used for any other purposes. • Take great care when heating fats and oils, as they will ignite if they become too hot. • When you are lighting any burner check that it is lit before you leave the appliance. When turning off a burner, do not leave the appliance until the flame has gone out. • Never place plastic or any other material, which may melt in or on the oven.
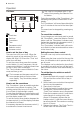
electrolux Product description Control panel 1 1 2 3 4 1 1 5 1 2 3 4 5 ted below please contact your local service force centre.
electrolux 5 1 Grill pan handle 1 Grill pan grid Before first use Rating plate • This is usually situated on the front frame of the appliance and can be seen upon opening either of the oven doors. Alternatively the rating plate may also be found on the back or top of some models (where applicable). • The appliance must be protected by a suitably rated fuse or circuit breaker. • The rating of the appliance is given on the rating plate.
electrolux Operation The timer A1 3 C B 2 D 4 5 6 7G This must be completed within 5 seconds of first pressing the Selector Control button. During the operation of the 'Countdown', the remaining time period will be shown in the display. The 'Countdown' will sound intermittently for up to 2 minutes at the end of the timed period. The sound can be stopped by pressing any button.
electrolux 7 Remember, this must be completed within 5 seconds of first pressing the Selector Control button. 6. To set the 'End Time', press the Selector Control button until the 'End Time' indicator neon flashes. Press the increase control button (+) until the required stop time is displayed. If necessary depress the decrease control (-) until the correct time interval is achieved. 7. Release the buttons. The 'Cook Time' and 'End Time' indicator neons will be illuminated.
electrolux To light the hob burners The hob ignition works by means of an electric spark system. 1. Lift up the lid. You cannot use the hob when the lid is down. 2. Push in and hold the control knob, turn to the large flame symbol (highest setting) and press the ignition button immediately. Keep the control knob depressed for up to 5 seconds, but no longer than 10 seconds. After this time release the controls. The flame should remain alight.
electrolux 9 • Some smoke from fat splashes may be evident as the grill cleans itself. • The Top oven cannot be operated when the grill is in use. • The shelf in the grill/second oven is different from the shelves in the main oven. Only use the shelf with the solid metal plate in the grill/second oven. Warning! Never cover the grill pan or grid with foil as this can lead to grill fires. Warning! The grill pan handle The grill pan is supplied with a removable handle.
electrolux • Push in and hold the control knob, turn to the large flame symbol (highest setting) and press the ignition button immediately. Keep the control knob depressed for up to 5 seconds, but no longer than 10 seconds. After this time release the controls. The flame should remain alight. If after 10 seconds the burner has not lit, stop operating the appliance and wait at least 1 min before attempting a further ignition of the burner. • Turn the control knob to the required gas mark.
electrolux 11 Things to note • If there is an electrical power failure you cannot use the main oven. • The cooling fan for the controls may operate after a time. Warning! Do not place cookware and cooking pots with rough bases e.g. cast iron on the oven door as damage to the glass may occur. The main oven shelves The shelves should be fitted with the straight rods uppermost on the frame and the forms towards the back of the oven.
electrolux Flavouring • Flavours are held in the food because there is little evaporation. Adjust flavouring at the end of the cooking time. Liquid • Use slightly less liquid as there is little evaporation during cooking. Always add milk and milk products, for example cream to- wards the end of cooking to prevent them from curdling. Reheating • Cool left over food quickly and then put it in the fridge. Do not reheat food using the slow cook setting. Reheat food in the usual way or in a microwave.
electrolux 13 • Stand dishes on a suitably sized baking tray on the shelf to prevent spillage onto the oven base and to help reduce cleaning. • The material and finish of the baking tray and dishes used affect base browning. Enamelware, dark, heavy or non- stick utensils increase base browning. Shiny aluminum or polished steel trays reflect the heat away and give less base browning.
electrolux Food Shelf position Gas mark Cooking Time (Total Hours) Small / Queen Cake 3 5 0:18 - 0:25 Sponge 3 4 0:18 - 0:20 Victoria Sandwich 3 4 0:18 - 0:25 Gingerbread 3 2 1:15 - 1:30 Meringues 3 1 2:30 - 3:00 Flapjack 3 5 0:25 - 0:30 Shortbread 3 3 0:45 - 1:05 Fruit Pies, Crumbles 3 6 0:40 - 0:50 Milk Puddings 3 3 1:30 - 2:00 Scones 3 7 0:08 - 0:12 Choux Pastry 3 6 0:30 - 0:35 Éclairs / Profiteroles 3 5 0:20 - 0:30 Flaky Pastry 3 6 0:25 - 0:40 M
electrolux 15 Food Shelf position Gas mark Cooking Time (Total Hours) Biscuits 2+4 4 0:10 - 0:20 Bread 3 8* 0:25 - 0:30 Bread rolls/buns 2 8* 0:15 - 0:20 Small / Queen Cake 2+4 5 0:18 - 0:25 Sponge 2+4 4 0:20 - 0:30 Victoria Sandwich 2+4 4 0:18 - 0:25 Madeira Cake 4 4 1:15 - 1:30 Rich Fruit Cake 4 2 2:15 - 2:30 Christmas Cake 4 2 3:00 - 4:30 Gingerbread 3 2 1:15 - 1:30 Meringues 5 1 2:30 - 3:00 Flapjack 3 5 0:25 - 0:30 Shortbread 3 3 0:45 - 1:05 Fruit
electrolux Roasting chart Meat Gas Mark Cooking time Beef/ Beef boned 5 20-35 minutes per 500g (1lb) and 20-35 minutes over Mutton/Lamb 5 25-35 minutes per 500g (1lb) and 25-35 minutes over Pork/Veal/Ham 5 30-40 minutes per 500g (1lb) Chicken 5 15-20 minutes per 500g (1lb) and 20 minutes over Turkey/Goose 5 15-20 minutes per 500g (1lb) up to 3500g (7lb) then 10 minutes per 500g (1lb) over 3500g (7lb) Duck 5 25-35 minutes per 500g (1lb) and 25-30 minutes over Pheasant 5 35-40 minut
electrolux 17 Removing and replacing the wire work runners 1. Remove all shelves and furniture from the oven. 2. Hold the wire work at the bottom, unclip from the cavity side and gently pull towards the centre of the oven. 3. Unhook the runner at the top and remove from the cavity. 4. To replace the runners, hook the wire work side runner into the cavity, slide back and press into place. Make sure that the hole in the crown is over the electrode. Check that the location pegs sit in the slots in the body.
electrolux Due to the nature of stainless steel the grill burner may tarnish through use over a period of time. This is quite normal and is not a fault on the appliance Clean the area around the grill frequently using hot soapy water. Some large joints and turkeys especially benefit by this method of cooking, allowing the joint to cook through before the outside is over browned.
electrolux 19 Warning! If the door glass panel becomes chipped or has deep scratches the glass will be weakened and must be replaced to prevent the possibility of the panel shattering. Please contact your local Service Force Centre who will be pleased to advise further. To replace the inner door glass 1. To ensure the glass is properly located the text 'This side up' should be facing towards you at the top edge of the door and facing into the cavity. 2.
electrolux Problem Possible solution Check that there is not a problem with your gas supply. You can do this by making sure the other gas appliances such as central heating or gas fires are working. Check that the main appliance fuse is working. If you have checked the above: Allow the appliance to cool for a couple of hours. The appliance should now be working normally. The grill and top oven work but the main oven does not. Check that the time of day has been set on the clock.
electrolux 21 Installation instructions Important safety requirements Where applicable Natural Gas and L.P Gas versions of this appliance are available. Check that this model is suitable for the type of supply available. This appliance must be installed and/or serviced by a competent person, in accordance with the Gas Safety (Installation and Use) Regulations Current Editions and the IEE Wiring Regulations.
electrolux Location of the appliance This appliance must not be installed in a bedsitting room of volume less than 20m3 or in a bathroom, shower room or garage. It is essential that the appliance is positioned as Fig 1. a. Shelves, wall cabinets and cooker hoods must be fitted a minimum of 750mm directly above the top of the hotplate (or greater for cooker hoods if recommended by manufacturers instructions) and 400mm above the hotplate when fitted in line with the outside of the appliance.
electrolux 23 the earth symbol ( ) or coloured green or green and yellow. The wire which is coloured blue, must be connected to the terminal which is marked with the letter N or coloured black. The wire which is coloured brown, must be connected to the terminal, which is marked with the letter L or coloured red. Ensure that the cable does not become trapped when pushing the appliance into position. If a moulded plug is fitted.
electrolux 3. Measure down 150mm from this point. This gives the position of the wall anchor point for the stability chain. 4. The stability chain anchor point on the appliance is shown in the diagram Pressure testing 1. The Rapid injector is used as a pressure test point. 2. Connect the pressure gauge to the Rapid injector. 3. Check the supply pressure by turning the Rapid burner on and one other hotplate burner full on and light the appropriate burner.
electrolux 25 5. Set the oven control to Mk 2, close the oven door and check that after about 10 minutes the flame size has reduced. 6. Turn off the control and check that the oven flames go out. To set the time of day Please refer to the Timer section. General information Instruct the user on how to use the appliance and its ignition system. Refer the user to the wording on the inside cover which gives advice on the safe operation of the appliance.
electrolux Loading info : Main oven Natural Gas L.P. Gas Heat input 1.9kW (6483 Btu/h) 1.9kW (136.5g/h) Injector Marking 099 070 Thermostat by-pass marking 75 General Ignition (H.T. Spark) 80 Spark Gap 3-4mm GAS CATERGORY COUNTRIES OF DESTINATION CAT. I2H GB, IE CAT. I3+ GB, IE Environment concerns The symbol on the product or on its packaging indicates that this product may not be treated as household waste.
electrolux 27 For address of local Service Force Centre and further information, please visit: www.serviceforce.co.uk Before calling out an engineer, please ensure you have read the details under the heading "What to do if..." When you contact the Service Force Centre you will need to give the following details: Your name, address and postcode, your telephone number, clear concise details of the fault, model and serial number of the appliance (found on the rating plate), the purchase date.
www.electrolux.com To buy accessories, consumables and spare parts at our online shop please visit: www.electrolux.co.