user manual Cooker EKD60760
Welcome to the world of Electrolux ! Thank you for choosing a first class product from Electrolux. The Electrolux ambition is to offer a wide variety of quality products that make your life more comfortable. Please take a few minutes to read this manual so that you can take full advantage of the benefits of your new machine. We promise that it will provide a superior User Experience delivering Ease-of-Mind.
Contents Safety ...................................................................................... 4 Description of product....................................................... 6 Before using for the first time .......................................... 8 Using the induction hob ...................................................12 Touchpanel..........................................................................15 Using the oven....................................................................
Safety Cooker development has progressed rapidly. You cannot always use your new cooker in the same way as your old one. For this reason, you should read the instructions carefully and familiarise yourself with your new cooker and what it can do. The cooker is intended for normal household use. Please let us know if you have views or questions about your cooker and its use. You can find our address and telephone number in the “Service” chapter. Text marked with a WARNING TRIANGLE concerns safety.
must also function properly. Never allow children to use the bladescraper. Let children help you at the cooker, but teach them that pots and pans, hobs and ovens become very hot and retain heat for some time after use. TOUCHING THEM CAN RESULT IN BURNS. THE DOOR LOCK For people with pacemakers Electrolux has examined the way in which induction hobs affect different types of pace-makers.
Description of product 1 2 Cooker 1 Induction hob 2 Control panel 3 Top oven 4 Bottom oven 3 4 Oven (top) 1 Top heat element 2 Heating element 3 Oven lighting, 40W 4 Meat probe socket 5 Bottom heat 6 oven shelf runners, removable 7 Shelf positions 1 2 3 4 7 5 6 1 Oven (bottom) 1 Top heat element 2 Heating element 3 Oven lighting, 40W 4 Meat probe socket 5 Fat filter 6 Oven lighting, 25W 7 Fan heating element 8 Bottom heat 9 Oven shelf runners, removable 10 Shelf positions 2 3 10 4 5 6 7 8 9
Before using for the first time Setting the clock When the power to the oven is connected, a clock symbol flashes until you have set the time on the clock . Set the time like this: 1 Press time. or to set the right 2 To change time already set, press On/Off . Then press until flashes. tills Follow the instructions in alternative 1. After about 5 seconds the clock stops flashing and the time is shown in the display. Now you can use the cooker.
Heat the oven emty The first time an oven is used, there may still be a slight smell. This will not affect the food in any way and is not a health-hazard. Keep children under supervision! The cooker becomes very hot. Do not forget to remove all packing material from inside the oven. The cooling fan The cooker is fitted with a cooling fan. The purpose of the fan is to keep the appliance cool. The cooling fan starts automatically when the oven is used.
Note! Make sure that the cooker anti-tip guard is fitted, see page 51 The removable slide-out shelf rails replace the ordinary oven step units that are fitted in the cooker when it is delivered. They consist of two rails that can be pulled out. The shelves, the roasting pan and the grid are laid on top of the rails. A locating pin keeps the shelf in position (see the illustration). Use of the removable rails facilitates cooking.
NOTE! Make sure that the locating pin hooks in under the baking plate edge/ roasting pan and that the baking plate/roasting pan rests on the rails, otherwise it can fall off the rails in the pulled-out position. When the baking plate/roasting pan is removed in the pulled-out position, the rails must be pushed back again so that the oven door can be closed. Use oven gloves because the rails are hot. Function lock As security to prevent unauthorised use of the hob. Engaging the function lock 1.
The door lock (top oven) The door lock makes it more difficult for children to open the door. The lock is engaged when the cooker is delivered, but can be disconnected as necessary. The door lock (bottom oven) The door lock makes it more difficult for children to open the door. The lock is engaged when the cooker is delivered, but can be disconnected as necessary. TO OPEN THE DOOR TO OPEN THE DOOR Move the lock to the right when you want to open the door.
Using the induction hob The top oven and rear heating zones share the same energy source (the same electric phase) when they are used simultaneously. The power applied to the rear heating zones will vary according to how much energy the top oven needs. The more power that is used for the oven (e.g. fast-start, over-/ underheating, gratination or maxgrill) the less power will be available for the rear heating zones.
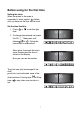
The induction zones The induction zones have settings from 0 to 9 (can be seen in the hob), where 9 provides the greatest heat. Do this when you want to use the hob: 1 Place a pan or frying-pan on the heating zone. Check that • the pan or frying-pan has a magnetic bottom. • the pan or frying-pan is not too small. 2 Turn the knob to the desired setting. Remember that the pan heats up much faster than on an ordinary hob. 3 Turn the knob to zero after use.
• HEATING PAN/FRYING PAN (DIAM. MM) ZONE (DIAM. MM) 210 145 180 120 145 100 It is naturally best for the zone and the pan bottom to be the same size. Save energy! • Use a lid and you halve energy consumption (compared with using without a lid). • Steaming and pressure cooking also save energy. Safety switch-off of the cooking zones If one of the cooking zones is not switched off after a certain time or the heating setting is not changed, the cooking zone concerned is switched off automatically.
Touch panel Cooking zone indicators Timer function Timer display Booster On/Off with power indicator Display Timer Lock Heat setting selection Stop+Go Digital display Each of the cooking zones has a display which shows: • that the hob is switched on • selection of heat retention setting • - • Automax • Booster • residual heat • that the child-proof blocking unit (function lock) has been activated • Faulty function /Over-heating • , the selected position Cookware is unsuitable or to
Touch panel functions In order to activate a function, hold one finger on the desired area until the associated control lamp lights up or goes out and the desired function is activated. Switching on the hob The hob is switched on by using the touch area “On/Off” . Press On/Off ~ 2 sek. for about 2 seconds. The digital display shows .
Selection of heat retention All four cooking zones are fitted with a heat retention setting Use area position . to set the heat retention . Choose Stop+Go The Stop+Go function switches all the connected cooking zones to heat retention setting at the same time and then back to the earlier heating setting. This function is suitable for a short interruption before continuing with cooking, for example to answer the telephone. Press position and the heat retention is shown.
The Automax function This cooker is fitted with a special automatic heating system called Automax. The function is engaged each time you wish to use it. It works like this: You select the knob setting for the heat that you consider suitable for cooking/ roasting. The heating zone starts at the highest heat setting and goes over automatically to the selected setting after a certain time. 9 8 AUTOMAX approx. minutes 7 Cooking/roasting with Automax This is how you activate the function.
Here is a little advice concerning the right heating setting and suitable heating zone. Each zone corresponds to a number in the tables (SEE ILLUSTRATION).
Roasting Pancakes Potatoes, raw Eggs ZONE SETTING 4 7 4 7 4 6 4 6 4 6-7 4 6-7 Switching off a cooking zone To switch off the heat retention setting, press at the same time area with and or zero the . Using the hob with activated locking function (To engage the function lock, see the chapter Safety, page 10). Even if the function lock is activated, the hob can be used, but the next time that the hob is switched on, the function lock is again activated. 1. Switch on the cooking zones.
Disengaging the function lock 1. Switch on the cooking zones If the function lock is activated, this is shown . ~ 2 sec. 2. Press the area “Function lock” for about 3 seconds. A signal sounds as confirmation. ~ 3 sec. 3. Press an optional heating setting . The display goes out and the function lock is disengaged. The hob is automatically switched off after a few seconds. The Timer The Timer can be used in two ways: • as Automatic switch-off.
Automatic safety switch-off The cooking zones in which you want to use automatic safety switch-off must be turned on. 1. Choose the zone for which automatic switch-off is to be set with the area Timer . Press a few times on the area Timer and the first active cooking zone is selected according to the clock and the associated control lamp flashes rapidly. For example the left-hand rear control lamp for the left-hand rear cooking zone. The Timer display shows .
In order to set the remaining cooking time, the desired cooking zone must be selected with the Timer area . The associated control lamp then flashes more rapidly. Re-setting continues by setting or in the Timer area. When the set cooking time is reached, the cooking zone is switched off automatically, an acoustic signal sounds for two minutes and the Timer display flashes . 3. Press the Timer area to turn off the signal.
The Timer is disengaged - the cooking zone remains active 1. Choose the desired cooking zone with the Timer . The associated control lamp then flashes more rapidly. 2. Set the Timer setting with Timer . Only the Timer is switched off, while the cooking zones remain active. How to use the Timer as a signal clock The hob must be connected but no cooking zones may be switched on. 1. Press the Timer area . The Timer display shows 2. Set the desired time with the Timer setting area or .
Lock/unlock the touch area (the oven touch area is also locked) At any time during cooking, the touch area, with the exception of the On/Off area, is locked to prevent a change of the settings, for example when drying the hob. 1. Press for about 1 second. The display shows during locking and later shows the setting again. ~ 1 sec. this is shown again if attempts are made to change set values when the cooking zone area is locked. 2. To remove the function lock again, press “Function lock” about one second.
Using the oven It is normal for steam and condensation to form on the oven door. This condensation is from the food being cooked and does not influence safety or oven function. The oven is fitted with removable shelf steps with three levels in the top oven and five levels in the bottom oven. Practical use The principle of hot air An annular heating element round the fan heats up then air, which is then spread through the air channels in the oven rear wall by the fan.
The oven functions For all functions, the yellow control lamp on the control panel lights up during heating and goes out when the temperature has been reached (it lights up and goes out when the thermostat switches on and off). To select an oven function.
Oven display User instructions • Switch on the oven by pressing . The top oven is pre-set. • Press on to choose what oven to use. To change oven, press the button again. • • • Choose ovenfunction by pressing or . When the selected function lights up, the oven starts to heat up. The user time shows how long the oven has been utilised. The time is shown only if none of the clock functions, the Signal clock symbol , • • Oven time or End time have been set.
Choice of oven functions 1 Start the oven with the 2 Choose oven button. . 3 Press or until the desired oven function lights up in the display. • A temperature starts to light in the display. • Unless the temperature is changed within 5 seconds, the oven starts to heat up. The oven function can be changed while the oven is in operation. Changing the oven temperature Press or temperature.
Switch off the oven Switch off the oven by pressing the button. Heat indicator Heating up When the oven function has been selected, the indicator starts to flash how much the oven has heated up. If Quick start is functioning, then a “running pillar” is seen (this functions only for the oven function top/bottom heating) Switching off When the oven functions have been switched off, the indicator lights up to show that there is residual heat in the oven.
The signal clock To programme a time. A signal sounds when the time has expired. This function has no effect on the oven. 1. Press . The clock symbol lights up. 2. Choose oven 3. Press the . button until 4. Select the desired time with the buttons. flashes. or The remaining time is shown after about 5 seconds. The signal clock lights up. A signal is heard when 90% of the time has passed. The signal sounds for one minute when the set time is reached “00.00” and flash.
Cooking time Use this function to determine how long you want the food to be in the oven. 1. Press . 2. Choose oven . 3. Press until flashes. 4. Select the oven function and temperature. 5. Select the desired time by pressing the or hours.). buttons (max. 09.59 The cooking time lights up. When the time reaches “00.00” and Cooking time flashes, a signal sounds for 2 minutes. The oven is automatically switched off.
Stop time Here you set the time that you want the oven to switch off. 1. Press . 2. Choose oven . 3. Press untils Stop time 4. Choose oven function and temperature. 5.Use the top time. and flashes. buttons to select Stop time lights up and the time is shown in the display. When the time reaches “00.00” and Stop time flashes a signal sounds for 2 minutes. The oven is switched off automatically. In order to switch of the sound and the symbol in the display, press one of the buttons.
Cooking time and Stop time Cooking time and Stop time be used simultaneously. 1. Press can . 2. Choose oven . 3. Select oven function and temperature. Press Cooking time and set the desired cooking time (for example 1 hour). 4. Press to set the desired finishing time when you want the food to be ready (for example 2.05 p.m.). Cooking time and Stop time light up in the display. The oven starts automatically after the pre-set time (for example 1.05 p.m.
Other functions You can save energy by switching off the display Press the and buttons simultaneously until the display disappears. The next time that the oven is switched on the display shows automatically. When the oven is switched off, the display disappears automatically. To get the display to show again, you must set the clock. Showing the display Press the and buttons simultaneously until the display shows again.
Using the roasting thermometer Be careful not to burn yourself on the heating coils in the top of the oven, or on the oven step units when you connect or disconnect the contact to the roasting thermometer. Use oven gloves. The roasting thermometer tolerates temperatures of between 30 and 99°C. Use only the original thermometer and make sure that no part of the thermometer comes into contact with the top heating element.
display. Press or and choose your temperature. The actual temperature and the desired temperature are shown in the information window (SEE ILLUSTRATION). The information window follows the temperature increase in the meat. 5 Choose function and temperature. When the desired temperature in the meat is reached, a signal sounds and the oven switches off. 6 To switch off the sound, press one of the buttons. The roasting thermometer is hot.
Practical advice and tips Problems Cause Remedy Bread/yeasted doughs, sponge cakes turn out flat. If the oven temperature is too low, the mixture can rise and then sink and become flat. Check the set temperature against the recommended temperature in the table or recipe. Bread/yeasted doughs have Check the rising time against that recommended in the not risen properly. If the rising time after rolling recipe. is too long, the result will be flat.
The cakes/oven dishes are If the oven temperature is too high, the cakes/oven too brown. Check that you have set the correct temperature. dishes can be browned too much before they are completely cooked. The food has been Check in the table or recipe that you have selected the positioned too high in the oven thus receiving too much correct position. top heat when using top and bottom heat, and the opposite effect if placed too low. Cakes/oven dishes are too pale. The Quick start is switched on.
Problems and remedies Never do anything to the cooker that could cause injury to people or damage the product. Below you will find suggestions as to what you can do yourself if there is a problem. If you need help - contact Service.
Problem Cause/Remedy F9 lights up in the display Pull the plug out of the wall outlet.
Cleaning and care Cleaning the ceramic hob Do not use a steam cleaner to clean the cooker! Cleaning the cooker The easiest way to clean the oven is by using a clean cloth, hot water and a little washing-up liquid directly after the oven has been used. NEVER USE SCOURING AGENTS OR OTHER ABRASIVE SUBSTANCES. Note that the anti-tip guard does not function when you pull the cooker out to clean behind it.
How to use the blade scraper: 1 Pull back the guard so that the blade is visible. 2 Make sure that the blade is clean and whole, otherwise it could damage the plate. You can buy new blades at a hardware store. 3 Hold the scraper at an angle of about 45° and scrape clean. 4 Carefully wipe off any dirt from the blade with kitchen tissue. 5 After use, press the guard forward so that it covers the blade. Store the scraper out of the reach of children.
The oven door The oven door can be removed for cleaming. When the oven door opens, the lamps light and the hot air fan stops. Removing the oven door 1 Open the oven door about onethird of the way (parking position). 2 Grasp the sides of the oven door with both hands and pull the door off the oven. 3 Lift off the door Fitting the oven door 1 Make sure that the hinge unit is in its parking position. 2 Insert the hinge unit in the slot on the door. Press down until the assembly spring clicks into position.
The oven door glass Do not use the oven door as a foot-hold. The oven door is made up of two parts with heat reflecting glass to give a lower surface temperature. The inner glass panes can be removed for cleaning. Cleaning between the glass panes Take care that you do not damage the door glass. Formation of cracks at the edges could cause it to break after being heated a few times.
Fitting the central glass panes in the door 1 Insert the central glass panes in order, diagonally from above into the glass retainer on the handle side (1). 2 Lower the central pane and push it towards the lower edge of the door until it will go no further against the lower retainer (2). Fitting the upper glass in the door 1 Insert the upper glass diagonally from above into the glass retainer on the handle side (1). 2 Lower the glass plate.
Oven step units It is possible to remove the oven step units on both the right and left side walls to make it easier to clean the side walls. Removing the oven step units: First pull out the step unit at the front from the side of the oven (1) and then hook it off at the back (2). Inserting the oven step units The rounded edges of the bars must point to the front! Re-fit the oven step unit again by first hanging it up at the back (1), insert it at the front, and then push it into position (2).
Super Clean accessories These accessories have a dirtrepellent coating and a long life if they are treated correctly NOTE! Do not place SUPER CLEAN accessories on a hot ceramic glass plate since this can damage them. The accessories tolerate a temperature of up to 250°C. Never heat them without food or dough. Wash the accessories thoroughly in hot water and washing-up liquid before using them for the first time.
Technical Data We reserve the right to make changes. This appliance meets the requirements of EC Directives 89/ 336/EEC and 73/23/EEC. EKD60760 Width (mm): 596 Height when delivered (mm): 900 Depth: 595 ENERGY EFFICIENCY CLASS Top oven A Bottom oven A ENERGY CONSUMPTION Top/bottom heating (kWh), top oven: 0.73 Top/bottom heating (kWh), bottom oven: 0,89 Hot air (kWh), bottom oven: 0.
Installation Any work required on the cooker must be carried out by a QUALIFIED EXPERT. The cooker is heavy. Edges and corners, with which you do not normally come into contact, can be sharp. USE GLOVES WHEN MOVING THE COOKER. When delivered, the cooker is adapted to a bench height of 900 mm. The cooker has a fixed plinth. Take care when positioning the cooker so that it does not block the ventilation outlets (behind the cooker and above the hood).
the cooker and functions correctly. The anti-tip guard Check that the anti-tip guard projects at least 20 mm (0.8") into the hole in the back of the cooker (B) when the cooker is pushed in (SEE FIG. 2). The anti-tip guard must be fitted to prevent the cooker from tipping over with abnormal loads. The anti-tip guard only works when the cooker has been pushed into place.
Electrical connections Base trim (optional accessory) Any work required on the cooker must be carried out by a QUALIFIED EXPERT. Any work carried out by non-qualified people can mean poorer cooker performance and result in personal injury and/or damage to property. NOTE! Take due care when fitting the base trim to the cooker. Edges with which you do not normally come into contact with can be sharp.
At the end of the appliances life The symbol on the product or on its packaging indicates that this product may not be treated as household waste. Instead it shall be handed over to the applicable collection point for the recycling of electrical and electronic equipment. By ensuring this product is disposed of correctly, you will help prevent potential negative consequences for the environment and human health, which could otherwise be caused by inappropriate waste handling of this product.
Service European guarantee This appliance is guaranteed by Electrolux, in each of the countries listed in the following page, for the period specified in the appliance guarantee or otherwise by law.
55
www.electrolux.