
User manual


A B
C
D
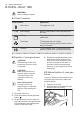
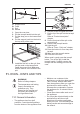
A. Support hook
B. Forks
C. Spit
D. Handle
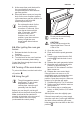
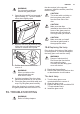
1. Open the oven door.
2. Put the turnspit handle into the spit.
3. Put the deep pan on the lowest shelf
level.
4. Put the support hook into the hole in
the top cavity of the oven.
5. Install the first fork on the spit, then
put the meat on the turnspit and
install the second fork. Make sure
that the meat is in the middle of the
spit.
6. Use the screws to tighten the forks.
7. Put the tip of the spit into the turnspit
hole.
Refer to "Product description"
chapter.
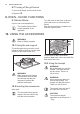
8. Put the front part of the spit on the
support hook.
9. Remove the turnspit handle.
10. Light the grill.
Refer to "Oven - Daily use" chapter.
11. Press the button for oven lamp and
turnspit.
12. Make sure that turnspit rotates.
13. Close the oven door.
When meat is ready press the turnspit
button. Turn off the grill. Install the
turnspit handle. Carefully remove the
turnspit and the roasting pan from the
oven.
11. OVEN - HINTS AND TIPS
WARNING!
Refer to Safety chapters.
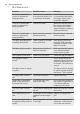
The temperature and baking
times in the tables are
guidelines only. They
depend on the recipes and
the quality and quantity of
the ingredients used.
11.1 General information
• The appliance has four shelf
positions. Count the shelf positions
from the bottom of the appliance floor.
• Moisture can condense in the
appliance or on the door glass panels.
This is normal. Always stand back
from the appliance when you open the
appliance door while cooking. To
decrease the condensation, operate
the appliance for 10 minutes before
cooking.
• Clean the moisture after each use of
the appliance.
• Do not put the objects directly on the
appliance floor and do not put
aluminium foil on the components
when you cook. This can change the
baking results and cause damage to
the enamel.
ENGLISH 15