
User manual
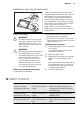


C
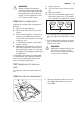
2.
Release the screw (C) which keeps
the burner in position.
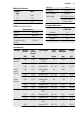
D
F
E
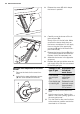
3.
Carefully move the burner off the in-
jector support (D).
Slowly move it to the left side. Make
sure that the burner bush stays on
the burner mouthpiece. Do not apply
force to the wire of the spark plug
connector (E) and to the thermocou-
ple conductor (F).
4.
Release the burner injector (D) with a
7 mm socket spanner and remove it.
Replace it with the necessary one.
5.
Assemble the burner in the opposite
sequence.
6.
Replace the gas type sticker near the
gas supply ramp with the one related
to the new gas type.
Minimum level adjustment of the oven
burner:
1.
Remove the knob for the oven func-
tions.
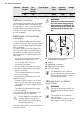
2.
Adjust the by-pass adjustment screw
(A) with a thin-bladed screwdriver.
A
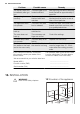
Change of the
type of gas
Adjustment of
the adjust-
ment screw
From natural
gas to liquid
gas
Fully tighten the
adjustment
screw in.
From liquid gas
to natural gas
Release the ad-
justment screw
approximately
3/4 of a turn.
3.
Attach the knob for the oven func-
tions.
4.
Light the oven burner. Refer to the
section "Gas oven cooking: Ignition of
the oven gas burner".
5.
Turn the knob for the oven functions
to the maximum position and let the
oven heat for 10 minutes.
24
www.electrolux.com