EOB5341AOX EN Oven User Manual
www.electrolux.com CONTENTS 1. SAFETY INFORMATION....................................................................................2 2. SAFETY INSTRUCTIONS..................................................................................4 3. PRODUCT DESCRIPTION................................................................................ 6 4. BEFORE FIRST USE......................................................................................... 7 5. DAILY USE.......................................
ENGLISH 3 responsible for any injuries or damages that are the result of incorrect installation or usage. Always keep the instructions in a safe and accessible location for future reference. 1.
www.electrolux.com • • • • • • • Before carrying out any maintenance, disconnect the appliance from the power supply. Ensure that the appliance is switched off before replacing the lamp to avoid the possibility of electric shock. Do not use a steam cleaner to clean the appliance. Do not use harsh abrasive cleaners or sharp metal scrapers to clean the glass door since they can scratch the surface, which may result in shattering of the glass.
ENGLISH • • • • • • • • be replaced, this must be carried out by our Authorised Service Centre. Do not let mains cables touch or come near the appliance door, especially when the door is hot. The shock protection of live and insulated parts must be fastened in such a way that it cannot be removed without tools. Connect the mains plug to the mains socket only at the end of the installation. Make sure that there is access to the mains plug after the installation.
www.electrolux.com 2.4 Care and cleaning • WARNING! Risk of injury, fire, or damage to the appliance. • • • • • • • • • Before maintenance, deactivate the appliance and disconnect the mains plug from the mains socket. Make sure the appliance is cold. There is the risk that the glass panels can break. Replace immediately the door glass panels when they are damaged. Contact the Authorised Service Centre. Be careful when you remove the door from the appliance.
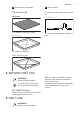
ENGLISH 11 Shelf support, removable 12 Shelf positions 3.2 Accessories To bake and roast or as a pan to collect fat. Wire shelf For cookware, cake tins, roasts. Baking tray Food Sensor To measure the temperature inside the food. For cakes and biscuits. Grill- / Roasting pan 4. BEFORE FIRST USE WARNING! Refer to Safety chapters. To set the Time of day refer to "Clock functions" chapter. 4.1 Initial Cleaning Remove all accessories and removable shelf supports from the oven. 5.
www.electrolux.com 5.1 Retractable knobs To use the appliance press the knob. The knob comes out. Oven func‐ tion 5.2 Setting a heating function 1. Turn the knob for the heating functions to select a heating function. 2. Turn the control knob to select the temperature. The lamp turns on when the oven operates. 3. To turn off the oven, turn the knob for the heating functions to the off position. 5.3 Heating functions Oven func‐ tion Application The oven is off.
ENGLISH 9 5.4 Display A B C D A. B. C. D. Function indicator Time display Function indicator Core temperature sensor indicator 5.5 Buttons Button Function Description MINUS To set the time. PLUS To set the time. 6. CLOCK FUNCTIONS 6.1 Clock functions table Clock function TIME OF DAY Application To show or change the time of day. You can change the time of day only when the appliance is off. MINUTE MINDER Use to set a countdown time.
www.electrolux.com 7. USING THE ACCESSORIES WARNING! Refer to Safety chapters. 7.1 Core temperature sensor The core temperature sensor measures temperature inside the food. When the food is at the set temperature, the oven turns off. There are two temperatures to be set: • • the oven temperature (minimum 120 °C), the food core temperature. CAUTION! Use only the core temperature sensor supplied and the original replacement parts.
ENGLISH Food category: casserole 1. Place half of the ingredients in a baking dish. 2. Insert the tip of the core temperature sensor exactly in the centre of the casserole. The core temperature sensor should be stabilized in one place during baking. Use a solid ingredient to achieve that. Use the rim of the baking dish to support the silicone handle of the core temperature sensor. The tip of the core temperature sensor should not touch the bottom of a baking dish. 11 6.
www.electrolux.com Push the baking tray / deep pan between the guide bars of the shelf support and the wire shelf on the guide bars above. Small indentation at the top increase safety. The indentations are also anti-tip devices. The high rim around the shelf prevents cookware from slipping of the shelf. 8. ADDITIONAL FUNCTIONS 8.1 Cooling fan When the oven operates, the cooling fan turns on automatically to keep the surfaces of the oven cool.
ENGLISH 8.4 Opening the door with turned on mechanical door lock 13 If you press the door lock until there is a click, you turn off the door lock. You can open the door when the mechanical door lock is turned on. 1. Push the door lock slightly. 2. Open the door by pulling it with the handle. 1 2 9. HINTS AND TIPS WARNING! Refer to Safety chapters. The temperature and baking times in the tables are guidelines only. They depend on the recipes and the quality and quantity of the ingredients used. 9.
www.electrolux.com 9.4 Tips on baking Baking results Possible cause Remedy The bottom of the cake The shelf position is incor‐ Put the cake on a lower shelf. is not browned suffi‐ rect. ciently. The cake sinks and The oven temperature is becomes soggy, lumpy too high. or streaky. The baking time is too short. The next time you bake, set a slightly lower oven temperature. Set a longer baking time. You cannot decrease baking times by setting higher temperatures.
ENGLISH 15 Cakes / pastries / breads on baking trays Food Function Tempera‐ ture (°C) Time (min) Shelf po‐ sition Plaited bread / Bread crown Top / Bottom Heat 170 - 190 30 - 40 3 Christmas stollen Top / Bottom Heat 160 - 1801) 50 - 70 2 Bread (rye bread): 1. First part of baking pro‐ cedure. 2. Second part of baking procedure. Top / Bottom Heat 1. 2301) 2. 160 180 1. 20 1 2.
www.electrolux.com Food Function Temperature (°C) Time (min) Shelf position Pastries made True Fan Cook‐ 80 - 100 with egg white / ing Meringues 120 - 150 3 Macaroons True Fan Cook‐ 100 - 120 ing 30 - 50 3 Biscuits made with yeast dough True Fan Cook‐ 150 - 160 ing 20 - 40 3 Puff pastries True Fan Cook‐ 170 - 1801) ing 20 - 30 3 Rolls True Fan Cook‐ 1601) ing 10 - 25 3 Rolls Top / Bottom Heat 190 - 2101) 10 - 25 3 1) Preheat the oven. 9.
ENGLISH 9.7 Moist Baking For best results follow suggestions listed in the table below. Food Accessories Temperature Shelf po‐ (°C) sition Time (min) Sweet rolls, 16 pieces baking tray or dripping pan 190 3 45 - 55 Pizza, frozen, 0.35 kg wire shelf 190 2 45 - 50 Swiss roll baking tray or dripping pan 180 2 45 - 55 Brownie baking tray or dripping pan 180 2 55 - 60 Sponge flan base flan base tin on wire shelf 180 2 40 - 50 Poached fish, 0.
www.electrolux.com Food Accessories Temperature Shelf po‐ (°C) sition Time (min) Poached vege‐ baking tray or dripping tables, 0.4 kg pan 180 3 45 - 55 Vegetarian omelette 190 3 40 - 50 pizza pan on wire shelf 9.8 Multilevel Baking Use the function:True Fan Cooking.
ENGLISH 19 9.
www.electrolux.com 9.11 Roasting tables Beef Food Quantity Function Tempera‐ ture (°C) Time (min) Shelf posi‐ tion Pot roast 1 - 1.5 kg Top / Bot‐ tom Heat 230 120 - 150 1 Roast beef or fillet: rare per cm of thickness Turbo Grill‐ ing 190 - 2001) 5-6 1 Roast beef or fillet: medium per cm of thickness Turbo Grill‐ ing 180 - 1901) 6-8 1 Roast beef or fillet: well done per cm of thickness Turbo Grill‐ ing 170 - 1801) 8 - 10 1 1) Preheat the oven.
ENGLISH Food Quantity (kg) Function Tempera‐ ture (°C) Time (min) Shelf posi‐ tion Saddle of lamb 1 - 1.5 Turbo Grill‐ ing 160 - 180 40 - 60 1 Quantity (kg) Function Tempera‐ ture (°C) Time (min) Shelf posi‐ tion 21 Game Food Saddle / Leg up to 1 of hare Top / Bottom 2301) Heat 30 - 40 1 Saddle of venison 1.5 - 2 Top / Bottom 210 - 220 Heat 35 - 40 1 Haunch of venison 1.5 - 2 Top / Bottom 180 - 200 Heat 60 - 90 1 1) Preheat the oven.
www.electrolux.com • • Grill only flat pieces of meat or fish. Always preheat the empty oven with the grill functions for 5 minutes. CAUTION! Always grill with the oven door closed.
ENGLISH 9.14 Defrost • • • • Remove the food packaging and put the food on a plate. Use the first shelf position from the bottom. Do not cover the food with a bowl or a plate, as this can extend the defrost time. 23 For large portions of food place an upturned empty plate on the bottom of the oven cavity. Put the food in a deep plate or dish and set it on top of the plate inside the oven. Remove shelf supports if necessary.
www.electrolux.
ENGLISH 9.
www.electrolux.
ENGLISH 27 Baking on one level. Baking in tins Food Function Temperature (°C) Time (min) Shelf posi‐ tion Fatless sponge cake True Fan Cooking 140 - 150 35 - 50 2 Fatless sponge cake Top / Bottom Heat 160 35 - 50 2 Apple pie (2 tins Ø20 cm, diagonally off set) True Fan Cooking 160 60 - 90 2 Apple pie (2 tins Ø20 cm, diagonally off set) Top / Bottom Heat 180 70 - 90 1 Baking on one level. Biscuits Use the third shelf position.
www.electrolux.com Food Function Time (min) Shelf position Beef Steak Grilling 24 - 301) 4 1) Turn halfway through. 10. CARE AND CLEANING WARNING! Refer to Safety chapters. 10.1 Notes on cleaning Clean the front of the oven with a soft cloth with warm water and a mild cleaning agent. To clean metal surfaces, use a dedicated cleaning agent. Clean the oven interior after each use. Fat accumulation or other food remains may result in a fire. The risk is higher for the grill pan. 2.
ENGLISH 29 6. Hold the door trim (B) on the top edge of the door at the two sides and push inwards to release the clip seal. 2 B 1 The heating element folds down. 3. Clean the oven ceiling. 4. Install the heating element in the opposite sequence. 7. Pull the door trim to the front to remove it. 8. Hold the door glass panels on their top edge one by one and pull them up out of the guide. Install the heating element correctly above the supports on the inner walls of the appliance. 5.
www.electrolux.com The top lamp 1. Turn the lamp glass cover to remove it. 2. Clean the glass cover. 3. Replace the lamp with a suitable 300 °C heat-resistant lamp. 4. Install the glass cover. 11. TROUBLESHOOTING WARNING! Refer to Safety chapters. 11.1 What to do if... Problem Possible cause Remedy The oven does not heat up. The oven is deactivated. Activate the oven. The oven does not heat up. The clock is not set. Set the clock. The oven does not heat up.
ENGLISH 11.2 Service data If you cannot find a solution to the problem yourself, contact your dealer or an Authorised Service Centre. 31 plate is on the front frame of the oven cavity. Do not remove the rating plate from the oven cavity. The necessary data for the service centre is on the rating plate. The rating We recommend that you write the data here: Model (MOD.) ......................................... Product number (PNC) ......................................... Serial number (S.N.) ......
www.electrolux.com When the cooking duration is longer than 30 minutes, reduce the oven temperature to minimum 3 - 10 minutes before the end of the cooking time, depending on the duration of the cooking. The residual heat inside the oven will continue to cook. Use the residual heat to warm up other dishes. Keep breaks between baking as short as possible when you prepare few dishes at one time. Cooking with fan When possible, use the cooking functions with fan to save energy.
ENGLISH 33
www.electrolux.
ENGLISH 35
867303716-C-362018 www.electrolux.