EOB5440 ................................................ .............................................
www.electrolux.com CONTENTS 1. 2. 3. 4. 5. 6. 7. 8. 9. 10. 11. 12. SAFETY INFORMATION . . . . . . . . . . . . . . . . . . . . . . . . . . . . . . . . . . . . . . . . . . . . . . . . . . . 3 SAFETY INSTRUCTIONS . . . . . . . . . . . . . . . . . . . . . . . . . . . . . . . . . . . . . . . . . . . . . . . . . . 4 PRODUCT DESCRIPTION . . . . . . . . . . . . . . . . . . . . . . . . . . . . . . . . . . . . . . . . . . . . . . . . . 6 BEFORE FIRST USE . . . . . . . . . . . . . . . . . . . . . . . . . . . . .
ENGLISH 3 1. SAFETY INFORMATION Before the installation and use of the appliance, carefully read the supplied instructions. The manufacturer is not responsible if an incorrect installation and use causes injuries and damages. Always keep the instructions with the appliance for future reference. 1.1 Children and vulnerable people safety WARNING! Risk of suffocation, injury or permanent disability.
www.electrolux.com • Before maintenance cut the power supply. • Do not use harsh abrasive cleaners or sharp metal scrapers to clean the glass door since they can scratch the surface, which may result in shattering of the glass. • To remove the shelf supports first pull the front of the shelf support and then the rear end away from the side walls. Install the shelf supports in the opposite sequence.
ENGLISH • Connect the mains plug to the mains socket only at the end of the installation. Make sure that there is access to the mains plug after the installation. • If the mains socket is loose, do not connect the mains plug. • Do not pull the mains cable to disconnect the appliance. Always pull the mains plug. • Use only correct isolation devices: line protecting cut-outs, fuses (screw type fuses removed from the holder), earth leakage trips and contactors.
www.electrolux.com • If you use an oven spray, obey the safety instructions on the packaging. • Do not clean the catalytic enamel (if applicable) with any kind of detergent. • Only use lamps with the same specifications. 2.5 Disposal WARNING! Risk of injury or suffocation. 2.4 Internal light • The type of light bulb or halogen lamp used for this appliance, is only for household appliances. Do not use it for house lighting. WARNING! Risk of electrical shock.
ENGLISH 4.2 Setting the time You must set the time before you operate the oven. When you connect the appliance to the electrical supply or after a power cut, the indicator for the Time of Day function flashes. Press the + or - button to set the correct time. 7 4.3 Preheating Preheat the empty appliance to burn off the remaining grease. 1. 2. 3. 4. Set the function and the maximum temperature. Let the appliance operate for one hour. Set the function and the maximum temperature.
www.electrolux.com 5.2 Oven functions Oven function Application Off position The appliance is off. Light To activate the oven lamp without a cooking function. Conventional Cooking To bake and roast on one oven level. The top and bottom heating elements operate at the same time. Top Heat To finish cooked dishes. Only the top heating element operates. Bottom Heat To bake cakes with crispy or crusty bottom. Only the bottom heating element operates.
ENGLISH 9 6. CLOCK FUNCTIONS 6.1 Electronic programmer 1 2 3 1 Function indicators 2 Time display 3 Function indicator 4 Button + hr min 5 Selection button 6 Button - 6 5 4 Clock function Time of day Minute Minder Duration End Application To set, change or check the time of day. To set a countdown time. This function has no effect on the operation of the oven. To set how long the appliance must operate. To set when the appliance must be deactivated.
www.electrolux.com 6.3 Cancelling the clock functions 1. Press the Selection button again and again until the necessary function indicator flashes. 2. Press and hold the button -. The clock function goes out after some seconds. 7. USING THE ACCESSORIES WARNING! Refer to the Safety chapters. 7.1 Trivet and Grill- / Roasting pan To roast larger pieces of meat or poultry on one level, put the trivet in the grill- / roasting pan so that the supports point up.
ENGLISH overheating. To prevent this, the oven has a safety thermostat which interrupts the power supply. The oven activates again 11 automatically when the temperature drops. 9. HELPFUL HINTS AND TIPS 9.1 Inner side of the door In some models, on the inner side of the door you can find: • The numbers of the shelf positions. • Information about the heating functions, recommended shelf positions and temperatures for typical dishes. The temperature and baking times in the tables are guidelines only.
www.electrolux.com 9.
ENGLISH TYPE OF DISH Conventional Cooking True Fan Cooking Cooking time Temp [min] [°C] 13 Notes Shelf position Temp [°C] Shelf position Biscuits / pastry stripes three levels - - 1, 3 and 5 140 150 35 - 45 In a baking tray Meringues one level 3 120 3 120 80 - 100 In a baking tray Meringuestwo levels - - 2 and 4 120 80 - 100 In a baking tray1) Buns 3 190 3 190 12 - 20 In a baking tray1) Eclairs - one level 3 190 3 170 25 - 35 In a baking tray Eclairs - two levels
www.electrolux.com FLANS TYPE OF DISH Conventional Cooking True Fan Cooking Cooking time Temp [min] [°C] Notes Shelf position Temp [°C] Shelf position Pasta flan 2 200 2 180 40 - 50 In a mould Vegetable flan 2 200 2 175 45 - 60 In a mould Quiches 1 180 1 180 50 - 60 In a mould1) Lasagne 2 180 190 2 180 190 25 - 40 In a mould1) Cannelloni 2 180 190 2 180 190 25 - 40 In a mould1) 1) Preheat for 10 minutes.
ENGLISH TYPE OF DISH Conventional Cooking True Fan Cooking Cooking time Temp [min] [°C] 15 Notes Shelf position Temp [°C] Shelf position Duck 2 175 2 220 120 150 Whole Goose 2 175 1 160 150 200 Whole Rabbit 2 190 2 175 60 - 80 Cut in pieces Hare 2 190 2 175 150 200 Cut in pieces Pheasant 2 190 2 175 90 - 120 Whole Cooking time Shelf po- Temp [min] sition [°C] Notes FISH TYPE OF DISH Conventional Cooking True Fan Cooking Shelf position Temp [°C] Trout / Sea
www.electrolux.com Quantity TYPE OF DISH Pieces Toast Grilling Cooking time [min] [g] Shelf position Temp [°C] 1st side 2nd side - 4 max. 2-4 2-3 4-6 9.
ENGLISH 17 Poultry TYPE OF DISH Quantity Shelf position Temperature [°C] Time [min] Poultry portions 200 - 250 g each 1 or 2 200 - 220 30 - 50 Chicken , half 400 - 500 g each 1 or 2 190 - 210 35 - 50 Chicken, poulard 1 - 1.5 kg 1 or 2 190 - 210 50 - 70 Duck 1.5 - 2 kg 1 or 2 180 - 200 80 - 100 Goose 3.5 - 5 kg 1 or 2 160 - 180 120 - 180 Turkey 2.5 - 3.
www.electrolux.com VEGETABLES TYPE OF DISH Shelf position 1 level 2 levels Temperature [°C] Time [hr] Beans 3 1/4 60 - 70 6-8 Peppers 3 1/4 60 - 70 5-6 Vegetables for soup 3 1/4 60 - 70 5-6 Mushrooms 3 1/4 50 - 60 6-8 Herbs 3 1/4 40 - 50 2-3 FRUIT TYPE OF DISH Shelf position 1 level 2 levels Temperature [°C] Time [hr] Plums 3 1/4 60 - 70 8 - 10 Apricots 3 1/4 60 - 70 8 - 10 Apple slices 3 1/4 60 - 70 6-8 Pears 3 1/4 60 - 70 6-9 10.
ENGLISH 19 Removing the shelf supports 1. Pull the front of the shelf support away from the side wall. 2. 1 Pull the rear end of the shelf support away from the side wall and remove it. 2 Installing the shelf supports Install the shelf supports in the opposite sequence. The rounded ends of the shelf supports must point to the front. 10.3 Oven ceiling You can remove the grill to clean the oven ceiling more easily. WARNING! Deactivate the appliance before you remove the grill.
www.electrolux.com Before you change the oven lamp: • Deactivate the oven. • Remove the fuses in the fuse box or deactivate the circuit breaker. Put a cloth on the bottom of the oven to prevent damage to the oven light and glass cover. Always hold the halogen lamp with a cloth to prevent grease residue from burning on the lamp. 1. 2. 3. 4. Replace the oven light bulb with an applicable 300 °C heat-resistant oven light bulb. Use the same oven lamp type. Install the glass cover. 10.
ENGLISH 21 4. Identify the hinge to the left side of the door. 5. Lift and turn the lever on the left hinge. 6. Close the oven door to the first opening position (halfway). Then pull forward and remove the door from its seat.
www.electrolux.com 7. Put the door on a soft cloth on a stable surface. 8. Release the locking system to remove the glass panels. 9. Turn the two fasteners by 90° and remove them from their seats. 90° 10. Carefully lift (step 1) and remove (step 2) the glass panels one by one. Start from the top panel. 11. Clean the glass panels with water and soap. Dry the glass panels carefully.
ENGLISH 23 Installing the door and the glass panel When the cleaning is completed, install the glass panels and the oven door. Do the above steps in the opposite sequence. Make sure that you put the glass panels back in the correct sequence. The second panel has a decorative frame. The screenprinting zone must face the inner side of the door. Make sure that after the installation the surface of the glass panel frame on the screen-printing zones is not rough when you touch it.
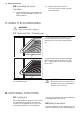
www.electrolux.com Serial number (S.N.) ......................................... 12. INSTALLATION WARNING! Refer to the Safety chapters. A 12.1 Building In 548 558 B 20 573 589 12.2 Electrical installation 594 5 590 min. 550 20 min. 560 600 min. 550 20 min. 560 Only a qualified person must do the electrical installation. The manufacturer is not responsible if you do not follow the safety precautions from the chapter "Safety information".
ENGLISH 25 Applicable types of cables for UK only Connection via Min. size Cable / flex Cable / flex type Fuse • 13 A socket outlet • 13 A spur box 2,5 mm² Three core butyl insulated 13 A min. Oven Control Circuit 2,5 mm² PVC / PVC twin and earth 15 A min. 20 A min. 13. ENVIRONMENT CONCERNS Recycle the materials with the symbol . Put the packaging in applicable and electronic appliances. Do not dispose appliances marked with the symbol containers to recycle it.
www.electrolux.
ENGLISH 27
397325611-A-352013 www.electrolux.