
User manual
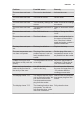

Option Description
P1 Light clean‐
ing. Duration:
1 h 30 min.
P2 Normal
cleaning. Du‐
ration: 3 h.
You can use the END function to delay
the start of the cleaning.
During the pyrolysis the oven lamp is off.
5. To change the default length of the
pyrolysis (P1 or P2), press to set
, and then press or .
6. When the oven is at the set
temperature, the door locks. The
display shows
and the bars of the
heat indicator until the door unlocks.
7. When pyrolysis is completed, the
display shows the time of day. The
oven door stays locked.
8. When the oven is cool again, the
door unlocks.
11.5 Cleaning reminder
To remind you that the pyrolysis is
necessary, PYR flashes in the display for
10 seconds after each activation and
deactivation of the oven.
The cleaning reminder
goes out:
• after the end of the
pyrolysis.
• if you press and at
the same time while PYR
flashes in the display.
11.6 Removing and installing
the door
You can remove the door and the
internal glass panels to clean it. The
number of glass panels is different for
different models.
WARNING!
The door is heavy.
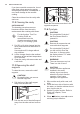
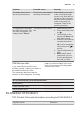
1. Open the door fully.
2. Fully press the clamping levers (A)
on the two door hinges.
A
A
3. Close the oven door to the first
opening position (approximately 70°
angle).
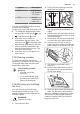
4. Hold the door with one hand on each
side and pull it away from the oven at
an upwards angle.
5. Put the door with the outer side down
on a soft cloth on a stable surface.
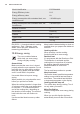
6. Hold the door trim (B) on the top
edge of the door at the two sides and
push inwards to release the clip seal.
1
2
B
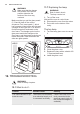
7. Pull the door trim to the front to
remove it.
8. Hold the door glass panels on their
top edge one by one and pull them
up out of the guide.
9. Clean the glass panel with water and
soap. Dry the glass panel carefully.
When the cleaning is completed, do the
above steps in the opposite sequence.
Install the smaller panel first, then the
larger and the door.
ENGLISH 33