EOP720X EN Oven User Manual
www.electrolux.com CONTENTS 1. SAFETY INFORMATION....................................................................................3 2. SAFETY INSTRUCTIONS..................................................................................4 3. PRODUCT DESCRIPTION................................................................................ 7 4. CONTROL PANEL............................................................................................. 8 5. BEFORE FIRST USE...............................
ENGLISH 1. 3 SAFETY INFORMATION Before the installation and use of the appliance, carefully read the supplied instructions. The manufacturer is not responsible for any injuries or damages that are the result of incorrect installation or usage. Always keep the instructions in a safe and accessible location for future reference. 1.
www.electrolux.com • • • • • • • • • Always use oven gloves to remove or put in accessories or ovenware. Before carrying out any maintenance, disconnect the appliance from the power supply. Ensure that the appliance is switched off before replacing the lamp to avoid the possibility of electric shock. Do not use a steam cleaner to clean the appliance.
ENGLISH 2.2 Electrical connection 2.3 Use WARNING! Risk of fire and electric shock. • • • • • • • • • • • • • • All electrical connections should be made by a qualified electrician. The appliance must be earthed. Make sure that the parameters on the rating plate are compatible with the electrical ratings of the mains power supply. Always use a correctly installed shockproof socket. Do not use multi-plug adapters and extension cables.
www.electrolux.com • • • • • Discoloration of the enamel or stainless steel has no effect on the performance of the appliance. Use a deep pan for moist cakes. Fruit juices cause stains that can be permanent. This appliance is for cooking purposes only. It must not be used for other purposes, for example room heating. Always cook with the oven door closed. If the appliance is installed behind a furniture panel (e.g. a door) make sure the door is never closed when the appliance is in operation.
ENGLISH • • Non-stick surfaces on pots, pans, trays, utensils etc., can be damaged by the high temperature Pyrolytic cleaning operation of all Pyrolytic Ovens and can be also a source for low level harmful fumes. Fumes released from all Pyrolytic Ovens / Cooking Residues as described are not harmful to humans, including infants or persons with medical conditions. • 2.7 Service • • • WARNING! Risk of injury or suffocation.
www.electrolux.com 3.2 Accessories To bake and roast or as a pan to collect fat. Wire shelf Patisserie tray ≤ 5 kg For cookware, cake tins, roasts. Baking tray For rolls, brezels and small pastries. Suitable for steam functions. The discolouration of the surface has no effect on the functions. Food Sensor For cakes and biscuits. Grill- / Roasting pan To measure the temperature inside the food. 4. CONTROL PANEL 4.
ENGLISH Sensor field / Button Function Description PLUS STEAM To turn on the True Fan Cooking PLUS function. 9 4.2 Display A H G F B E C D A. B. C. D. E. F. G. H. Timer Heat-up and residual heat indicator Water drawer (selected models only) Core temperature sensor (selected models only) Door lock (selected models only) Hours / minutes Demo mode (selected models only) Clock functions 5. BEFORE FIRST USE WARNING! Refer to Safety chapters.
www.electrolux.com Oven func‐ tion Application Oven func‐ tion To bake food on one shelf position for a more Pizza Setting intensive browning and a crispy bottom. Set the temperature 20 - 40 °C lower than for Top / Bot‐ tom Heat. To roast larger meat joints or poultry with Turbo Grilling bones on one shelf po‐ sition. Also to make gra‐ tins and to brown. To bake and roast food on one shelf position.
ENGLISH Fill the cavity embossment with water only when the oven is cold. CAUTION! Do not refill the cavity embossment with water during cooking or when the oven is hot. 2. Put food in the oven and close the oven door. 3. Set the True Fan Cooking PLUS function: . 4. Press the Plus Steam button . The Plus Steam button works only with the True Fan Cooking PLUS function. The indicator turns on. 5. Turn the knob for the temperature to select a temperature. 6.
www.electrolux.com Clock function Application MINUTE MINDER Use to set a countdown time. This function has no effect on the operation of the oven. You can set the MINUTE MINDER at any time, also if the appliance is off. 00:00 COUNT UP TIM‐ ER If you do not set any other clock function the COUNT UP TIMER automatically monitor how long the oven operates. It is on immediately when the oven starts to heat. The Count Up Timer cannot be used with the func‐ tions: DURATION, END, core temperature sensor.
ENGLISH At the set END time the signal sounds for 2 minutes. and time setting flash in the display. The oven turns off. 5. Press any button or open the oven door to stop the signal. 6. Turn the knob for the oven functions to the off position. 7.6 Setting the MINUTE MINDER Minute minder can be both set when the oven is turned on and off. 1. Press . and "00" flash in the display. 2. Press or to set the seconds and than the minutes.
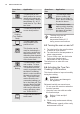
www.electrolux.com Small indentation at the top increase safety. The indentations are also anti-tip devices. The high rim around the shelf prevents cookware from slipping of the shelf. 9. ADDITIONAL FUNCTIONS 9.1 Using the Child Lock When the Child Lock is on the oven cannot be turned on accidentally. 1. Ensure the knob for the oven functions is in the off position. and at the 2. Press and hold same time for 2 seconds. The signal sounds. SAFE and on the display.
ENGLISH 9.5 Cooling fan When the oven operates, the cooling fan turns on automatically to keep the 15 surfaces of the oven cool. If you turn off the oven, the cooling fan can continue to operate until the oven cools down. 10. HINTS AND TIPS WARNING! Refer to Safety chapters. The temperature and baking times in the tables are guidelines only. They depend on the recipes and the quality and quantity of the ingredients used. 10.
www.electrolux.com Food Temperature (°C) Time (min) Pizza 200 - 210 10 - 20 Lasagna 180 - 200 35 - 50 Croissants 170 - 180 15 - 25 Food regeneration Use the second shelf position.
ENGLISH 17 10.5 Tips on baking Baking results Possible cause Remedy The bottom of the cake is not browned sufficiently. The shelf position is incor‐ rect. Put the cake on a lower shelf. The cake sinks and be‐ comes soggy, lumpy or streaky. The oven temperature is too high. The next time you bake, set a slightly lower oven temperature. The cake sinks and be‐ comes soggy, lumpy or streaky. The baking time is too short. Set a longer baking time.
www.electrolux.com Food Function Temperature (°C) Time (min) Shelf position Cheesecake Top / Bottom Heat 170 - 190 60 - 90 1 1) Preheat the oven. Cakes / pastries / breads on baking trays Food Function Tempera‐ ture (°C) Time (min) Shelf po‐ sition Plaited bread / Bread crown Top / Bottom Heat 170 - 190 30 - 40 3 Christmas stollen Top / Bottom Heat 160 - 1801) 50 - 70 2 Bread (rye bread): 1. First part of baking pro‐ cedure. 2. Second part of baking procedure.
ENGLISH 19 Biscuits Food Function Short pastry biscuits Biscuits made with sponge mixture Temperature (°C) Time (min) Shelf position True Fan Cook‐ 150 - 160 ing 10 - 20 3 True Fan Cook‐ 150 - 160 ing 15 - 20 3 Pastries made True Fan Cook‐ 80 - 100 with egg white / ing Meringues 120 - 150 3 Macaroons True Fan Cook‐ 100 - 120 ing 30 - 50 3 Biscuits made with yeast dough True Fan Cook‐ 150 - 160 ing 20 - 40 3 Puff pastries True Fan Cook‐ 170 - 1801) ing 20 - 30 3 Rolls True Fan C
www.electrolux.com Food Function Temperature (°C) Stuffed vegeta‐ True Fan Cook‐ 160 - 170 bles ing Time (min) Shelf position 30 - 60 1 1) Preheat the oven. 10.8 Moist Fan Baking For best results follow the baking times listed in the table below.
ENGLISH Biscuits / small cakes / small cakes / pastries / rolls Food Temperature (°C) Time (min) Short pastry biscuits 150 - 160 Biscuits made with sponge mixture Shelf position 2 positions 3 positions 20 - 40 1/4 1/3/5 160 - 170 25 - 40 1/4 - Biscuits made with egg white, meringues 80 - 100 130 - 170 1/4 - Macaroons 100 - 120 40 - 80 1/4 - Biscuits made with yeast dough 160 - 170 30 - 60 1/4 - Puff pastries 170 - 1801) 30 - 50 1/4 - Rolls 180 20 - 30 1/4 - 1) Prehea
www.electrolux.com Food Temperature (°C) Time (min) Shelf position Piroggen (Russian version of calzone) 180 - 2001) 15 - 25 2 1) Preheat the oven. 2) Use a deep pan. 10.11 Roasting Use heat-resistant ovenware. Roast large roasting joints directly in the tray or on the wire shelf placed above the tray. Put some water in the tray to prevent the meat juices or fat from burning. To keep meat more succulent: • roast lean meat in the roasting tin with the lid or use roasting bag.
ENGLISH Lamb Food Quantity (kg) Function Tempera‐ ture (°C) Time (min) Shelf posi‐ tion Leg of 1 - 1.5 lamb / Roast lamb Turbo Grill‐ ing 150 - 170 100 - 120 1 Saddle of lamb 1 - 1.5 Turbo Grill‐ ing 160 - 180 40 - 60 1 Quantity (kg) Function Tempera‐ ture (°C) Time (min) Shelf posi‐ tion Game Food Saddle / Leg up to 1 of hare Top / Bottom 2301) Heat 30 - 40 1 Saddle of venison 1.5 - 2 Top / Bottom 210 - 220 Heat 35 - 40 1 Haunch of venison 1.
www.electrolux.com 10.13 Grilling • • • Always grill with the maximum temperature setting. Set the shelf into the shelf position as recommended in the grilling table. Always set the pan to collect the fat into the first shelf position. • • Grill only flat pieces of meat or fish. Always preheat the empty oven with the grill functions for 5 minutes. CAUTION! Always grill with the oven door closed.
ENGLISH 10.15 Defrost • • • • Remove the food packaging and put the food on a plate. Use the first shelf position from the bottom. Do not cover the food with a bowl or a plate, as this can extend the defrost time. 25 For large portions of food place an upturned empty plate on the bottom of the oven cavity. Put the food in a deep plate or dish and set it on top of the plate inside the oven. Remove shelf supports if necessary.
www.electrolux.
ENGLISH 27 10.18 Information for test institutes Tests according to EN 60350-1:2013 and IEC 60350-1:2011. Baking on one level.
www.electrolux.com Food Function Temperature (°C) Time (min) Shelf posi‐ tion Toast Grilling max 1-3 5 Beef Steak Grilling max 24 - 301) 4 1) Turn halfway through. Fast Grilling Preheat the empty oven for 3 minutes. Grill with the maximum temperature setting. Food Time (min) Shelf position 1st side 2nd side Burgers 8 - 10 6-8 4 Toast 1-3 1-3 4 11. CARE AND CLEANING WARNING! Refer to Safety chapters. 11.
ENGLISH 1. Pull the front of the shelf support away from the side wall. 2. Pull the rear end of the shelf support away from the side wall and remove it. 1 2 Install the removed accessories in the opposite sequence. 11.4 Pyrolysis CAUTION! Do not start the Pyrolysis if the Plus Steam button is pressed in. CAUTION! Remove all accessories and removable shelf supports. 29 1. Wipe out the cavity with a wet, soft cloth. 2.
www.electrolux.com 11.6 Removing and installing the door You can remove the door and the internal glass panels to clean it. The number of glass panels is different for different models. WARNING! Be careful when you remove the door from the appliance. The door is heavy. 1. Open the door fully. 2. Fully press the clamping levers (A) on the two door hinges. A A 3. Close the oven door to the first opening position (approximately 70° angle). 4.
ENGLISH 11.7 Replacing the lamp WARNING! Risk of electric shock. The lamp can be hot. 31 2. Use a narrow, blunt object (e.g. a teaspoon) to remove the glass cover. 1. Turn off the oven. Wait until the oven is cooled down. 2. Disconnect the oven from the mains. 3. Put a cloth on the bottom of the cavity. The top lamp 1. Turn the lamp glass cover to remove it. 3. Clean the glass cover. 4. Replace the lamp with a suitable 300 °C heat-resistant lamp. 5. Install the glass cover. 6.
www.electrolux.com Problem Possible cause The oven does not heat up. The necessary settings are Make sure that the settings not set. are correct. The oven does not heat up. The automatic switch-off is Refer to "Automatic switchactivated. off". The oven does not heat up. The Child Lock is on. Refer to "Using the Child Lock". The oven does not heat up. The fuse is blown. Make sure that the fuse is the cause of the malfunc‐ tion.
ENGLISH Problem Possible cause The display shows an error There is an electrical fault. code that is not in this ta‐ ble. Remedy • • Deactivate the oven with the house fuse or the safety switch in the fuse box and activate it again. If the display shows the error code again, con‐ tact the Customer Care Department. There is no good cooking performance using the True Fan Cooking PLUS function. You did not activate the True Fan Cooking PLUS function.
www.electrolux.com We recommend that you write the data here: Model (MOD.) ......................................... Product number (PNC) ......................................... Serial number (S.N.) ......................................... 13. ENERGY EFFICIENCY 13.1 Product Fiche and information according to EU 65-66/2014 Supplier's name Electrolux Model identification EOP720X Energy Efficiency Index 81.
ENGLISH Residual heat If a programme with the Duration or End Time selection is activated and the cooking time is longer than 30 minutes, the heating elements automatically deactivate earlier in some oven functions. The fan and lamp continue to operate. Keep food warm Choose the lowest possible temperature setting to use residual heat and keep a meal warm. The residual heat indicator or temperature appears on the display. 35 Moist Fan Baking Function designed to save energy during cooking.
867325984-C-392016 www.electrolux.