user manual LCD Television 19" ETV45000X
Contents Features ............................................................... 4 Accessories ......................................................... 4 Introduction ........................................................... 5 Preparation ........................................................... 5 Safety precautions ............................................... 5 Child safety: ...................................................... 5 Power source ...................................................
VCR Mode ............................................. 36 Decoder ................................................ 36 Store ..................................................... 36 A.P.S. .......................................................... 36 A.P.S. country ............................................. 36 Teletext region ............................................. 37 Install menu in AV modes ............................ 37 Programming ......................................... 37 Colour system .....
Features Accessories • Remote controlled colour television. • Fully integrated digital TV (DVB-T). • 100 programmes from VHF, UHF bands or cable channels can be preset. M • It can tune cable channels. INFO SELECT • Controlling the TV is very easy by its menu driven system. • It has a scart socket for external devices (such as video, video games, audio set, etc.) OK ABC DEF GHI 1 2 3 JKL MNO PQR 4 5 6 STU VWX YZ 7 8 9 PP 0 -/-EXIT P+ • Stereo sound system (Nicam).
Safety precautions Introduction Thank you for choosing this product. This manual will guide you through the proper operation of your TV. Before operating the TV, please read this manual thoroughly. Please keep this manual in a safe place for future references. Preparation Please read the following recommended safety precautions carefully for your safety. Child safety: This appliance is designed to be operated by adults. Do not allow children to tamper with the controls.
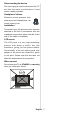
humid and damp place (avoid the bathroom, Replacement parts the sink in the kitchen, and near the washing machine). Do not expose this equipment to When replacement parts are required, make sure only genuine spare parts are rain or water, as this may be dangerous and do not place objects filled with liquids, such used.Unauthorized substitutions may result in fire, electrical shock or other hazards. as flower vases, on top of the set. Avoid from dripping or splashing.
Disconnecting the device The mains plug is used to disconnect the TV set from the mains and therefore it must remain readily operable. Headphone Volume Excessive sound pressure from earphones and headphones can cause hearing loss. Installation To prevent injury, this device must be securely attached to the wall in accordance with the installation instructions when mounted to the wall (if the option is available).
Overview of the remote control Standby Cursor up Cursor right Info 32 Direct programme 31 Double digit/ No function 30 Programme up 29 Volume up 28 1 2 3 M 4 INFO SELECT TV/Digital TV Mode OK External source Feature ABC DEF GHI 1 2 3 JKL MNO PQR Install 4 5 6 Hold/No function STU VWX YZ 7 8 9 PP 0 -/-- 27 Update/No function Index page/Electronic Programme Guide (EPG) Reveal/Switch from TV to PC EXIT 26 P+ 5 6 7 8 Expand/Image size Mix/No function 25 Teletext
LCD TV and operating buttons VOL UME VOLUME P/CH P/CH MENU TV/AV MENU TV/AV MENU - VOLUME + - P/CH + REAR VIEW English - 9 - STAND-BY TV/AV
Viewing the connections Headphone jack is used for connecting an external headphone to the system. Connect to the HEADPHONE jack to listen to the TV from headphones (optional). Power Cable PC Input is for connecting a personal computer to the TV set. Connect the PC cable between the PC INPUT on the TV and the PC output on your PC. HDMI Inputs are for connecting a device that has an HDMI socket.
Component Video Inputs (YpBPr) are used for connecting component video. You can connect the component video and audio sockets with a device that has component output. Connect the component video cables between the COMPONENT VIDEO INPUTS on the TV and the component video outputs of your device. While connecting, be sure that the letters on your TV, “Y”, “Pb”, “Pr” correspond with your device’s connectors. Use an appropriate RCA cable to connect the set to a subwoofer unit.
Power connection IMPORTANT: The TV set is designed to operate on 220-240V AC, 50 Hz. • After unpacking, allow the TV set to reach the ambient room temperature before you connect the set to the mains. • Plug the power cable to the mains socket outlet. Aerial connection • Connect the aerial or cable TV plug to the AERIAL INPUT socket located at the rear of the TV.
Connecting the LCD TV to a PC For displaying your computer’s screen image on your LCD TV, you can connect your computer to the TV set. • Power off both computer and display before making any connections. • Use 15-pin D-sub display cable to connect a PC to the LCD TV. • When done, switch to PC source. See, “Input selection” section. • Set the resolution that suits your viewing requirements.
Connecting to a DVD player If you want to connect a DVD player to your LCD TV, you can use connectors of the TV set. DVD players may have different connectors. Please refer to your DVD player’s instruction book for additional information. Power off both the TV and the device before making any connections. Note: Cables shown in the illustration are not supplied. • If your DVD player has an HDMI socket, you can connect via HDMI. When you connect to DVD player as illustrated below, switch to HDMI source.
Using other connectors You can connect a range of optional equipment to your LCD TV. Possible connections are shown below. Note that cables shown in the illustration are not supplied. • To connect external speakers, use an audio cable. Do not reverse the AUDIO LEFT and AUDIO RIGHT jacks. Turn on the LCD TV and external speaker set after all connections are made. Refer to your speaker set’s manual for further queries. • To listen to the sound from headphones, connect to the HEADPHONE jack of theTV.
Connecting other equipment via scart Most devices support SCART connection. You can connect a; DVD recorder, a VCR or a decoderto yourLCD TV by using the SCART sockets. Note that cables shown in the illustration are not supplied. • Power off both the TV and the devices before making any connections. • For more information, refer to your device’s own instruction book.
Inserting batteries in the remote control handset Operating range for the remote control IMPORTANT : The TV set is designed to operate on 220-240V AC ,50Hz. • Remove the battery cover located on the back of the handset by gently pulling backwards from the indicated part. • Point the top of the remote control toward the LCD TV's remote sensor LED while pressing a button. • Insert two AAA/R03 or equivalent type batteries inside. Place the batteries in the right directions and replace the battery cover.
Switching the TV on/off Input selection To switch the TV on Once you have connected external systems to your TV, you can switch to different input • Your TV will switch on in two steps. • Connect the power cord to 220-240V AC 50 Hz. Press stand-by button. Then the TV sources. switches itself to stand-by mode (Optional). • Press the AV button on your remote control until the desired source is highlighted.
Volume setting Basic operations You can operate your TV using both the remote control and onset buttons. Operation with the Buttons on the TV Volume setting • Press - button to decrease volume or + button to increase volume, so a volume level scale (slider) will be displayed on the screen. Press V + button to increase the volume. Press V - button to decrease the volume. A volume level scale (slider) will be displayed on the screen.
Initial settings When the TV set is operated for the first time, the IDTV turns on first. Because this is the first time the TV is used, there are no channels stored in the memory and the following message appears on the screen: Auto. Programming System Language Please ensure aerial is plugged in. Do you want to start first time installation? U.K. West Europe Check the antenna cable Yes No Start : Ok • To start installation process, select “Yes”, to cancel select “No”.
09:25 - 11:00 11:00 - 11:25 Now: 50/50 Next: Ace Lighting Signal Level: 1. BBC ONE 13:15 Current channel is highlighted. Use or buttons to change channels. Also press GREEN/RED buttons to scroll up/down the pages for the channels. • The information banner gives information on the channel selected and the • If you highlight an event; short event description, extended event description, start programmes on it.
• If you press button you can see the detailed help information easily. Press button again to exit help menu. menu and use or button to set Subtitle to Off or a language. • The starting time for EPG is the current time. If “Subtitle” is on and a language option is set, pressing the button causes the You can see the event information for the next two hours.
with just digital teletext broadcasting is the same as the aspect ratio of the picture watched previously. • When you press the (Text) button again, the digital teletext screen will be displayed. Over air download To ensure that your IDTV always has the most up-to-date information, please ensure that, IDTV menu system The IDTV menu can only be viewed when watching digital terrestrial broadcasting. Press the TV DTV button to turn IDTV on while the TV is in analogue mode. Press the M button.
Navigating the entire channel list Press Press or button for selecting the previous or next channel. You can press RED or GREEN option. If OK button is pressed while “Yes” is highlighted, the highlighted channel is button to move page up or page down. deleted. Selecting “No” cancels the deletion.
button. When the OK button is pressed, a dialogue OSD asking for the password will be displayed. CHANNEL LIST 1 BBC ONE 1. BBC ONE 2. BBC TWO 3. ITV 8 4. Channel 4 5. BBC THREE 6. Teletext 7. BBC FOUR 8. Sky Travel 9. UKHistory 10. RTL Select Function CHANNEL LIST 1 BBC ONE 1. BBC ONE 2. BBC TWO 3. ITV 8 4. Channel 4 5. BBC THREE 6. Teletext 7. BBC FOUR 8. Sky Travel 9. UKHistory 10. RTL Select Delete Function Edit Name SELECT Select Channel Lock SELECT Favourites Add/Remove...
Add new channels Your previous digital channel list will be destroyed. Are you sure you want to delete all digital channels and settings for first time installation? This tuning menu consists of two parts: • Automatic Search Yes • Manual Search No By selecting Yes and pressing the OK button, the existing channel table will be deleted.
TV DTV button. The following menu will be can select a function by highlighting the or corresponding menu line using the button. Configuration menu will look like this: displayed during the APS process: CONFIGURATION Audio Language Subtitle Favourite Mode EPG Preference Receiver Upgrade Parental Settings English Off Off Now&Next V.1.5 Auto. Programming System Automatic tuning runs at: State: Fine scanning ...
channels that were previously defined as • Both automatic upgrade methods result in standby mode either the upgraded or not. favourites in the channel list. EPG preference Digital terrestrial television channels can broadcast simultaneous Next&Now and 7- If the automatic upgrade is set to “Disabled” then this function will not work. Search for new version (Manual Upgrade) Day electronic programme.
There is only one key which is set to “0000” Main Menu initially. Enter lock key.
• The start time, end time and date are each Languages set with the numeric buttons on the remote control in 24-hour format. • The frequency mode determines how often the receiver operates this event and is set with the or button to be either Once, Daily, or Weekly. If an invalid number for the start or end times or the date is entered, “Entered time is not valid” message appears on the menu screen. English TV setup You can use this item to display the TV functions.
menu, Common Interface then pressing the Main Menu OK button. (CAM set up menu is not displayed when it is not required.) Channel List Installation • To see the viewing contract information: enter Configuration IDTV; press the M button, then highlight Common Interface and press the OK button. Timers • When no module is inserted, “No Common Interface module detected” message Language TV Setup appears on the screen.
Analogue TV menu map FEATURES SOUND Volume Balance Sound Mode AVL Effect 0 Stereo On Off Back : Menu Exit : TV PICTURE Off English Off Gray On Back : Menu Exit : TV INSTALL Picture Mode Brightness Contrast Colour Sharpness Back : Menu Sleep Timer Language Child Lock Menu Colour Favourite mode Bright Exit : TV Programming A.P.S. Txt.
Navigating the analogue TV menu system Analogue TV menu system Sound Menu For navigation SOUND M To confirm choices SELECT Volume For displaying menu options Balance Sound Mode AVL Effect 0 Back : Menu INFO Stereo On Off Exit : TV OK • Press M to display the main menu. • Press or button to select an icon. Press or OK button for more options. • Use or • Press or Volume button to highlight. When you enter the sound menu, Volume will buttons to change the settings.
will be more stereo-like. If the current sound system is stereo, switching this effect on will give a more spatial effect. Press or button to select Effect. Press / button to set Effect as On or Off. Brightness/contrast/colour/ sharpness/tint Press or button to select the desired option. Press / button to set the level. Hint: Tint (Hue) is displayed in picture menu when the TV receives an NTSC signal. Equalizer Press or button to select Equalizer.
Features menu Install menu FEATURES Sleep Timer Language Child Lock Menu Colour Favourite Mode Back : Menu Off English Off Gray On INSTALL Exit : TV Programming A.P.S. Txt. region Program Table Sleep timer Press or button to select Sleep Timer. Use / button to set the Sleep Timer. West Europe Back : Menu Exit : TV Programming and 120 minutes in steps of 10 minutes. Select Programming by pressing / button.
Standard A.P.S. Select Standard by pressing / button. Use / button to change the standard to B/G, Select A.P.S. by pressing / button. Press button to enter the A.P.S. submenu: D/K, I or L/L'. Colour system Select Colour System by pressing / button. Use / button to change the colour system to PAL, SECAM or AUTO. Search Select Search by pressing / button. Press / button to start search. The search will Auto. Programming System stop when a signal is found.
Teletext region Program table Select Txt. region by pressing / button. Using / buttons, select your teletext region. Program Table There are five options to select: West Europe, East Europe, Turk/Gre, Cyrillic and Arabic/ P01 BBC 1 P02 C 04 P03 P04 P05 P06 P07 P08 P09 P10 Hebrew. Install menu in AV modes The following screen appears in the install menu: INSTALL Programming Txt. Region West Europe Back : Menu Delete Name Exit : TV Programming menu appears on the screen: Move A.P.
Delete the following warning screen will be To delete a programme, press the RED button. Pressing the RED button again erases the displayed: selected programme from the programme list and the programmes below shift one line up. Program Is Locked! You May Unlock this Program from Program Table. APS (Auto Programming System) When you press the BLUE button for APS, Auto Programming System menu will appear on the screen.
H. (Horizontal) position PC Mode Menu System See the “Connecting the LCD TV to a PC” section for connecting a PC to the TV set. For switching to PC source, press the AV button on your remote control and select PC input. Note that PC mode menu settings are available only while the TV is in PC source. Sound menu The items in this menu are described at “Sound Menu” section explained in the “Menu System” section.
4:3 Displaying TV Information Programme Number, Programme Name, Sound Indicator and Zoom Mode information Use to view a normal picture (4:3 aspect ratio) as this is its original size. are displayed on the screen when a new programme is entered or button is pressed. Mute function Press button to disable sound. Mute indicator will be displayed in the upper side of the screen.
Teletext Note: Most TV stations use code 100 for their Teletext system transmits information such as news, sports and weather on your TV. Note index pages. Coloured Buttons that if the signal becomes insufficient, some text errors may occur or the teletext mode may (RED/GREEN/YELLOW/BLUE) be quitted. systems. When these systems are available, the pages are divided into groups or topics.
No picture Tips Screen care Clean the screen with a slightly damp, soft cloth. Do not use abrasive solvents as they may damage the coating layer of the TV screen. For your safety, unplug the mains plug when cleaning the set. When moving the TV, hold it properly from the bottom part. Image persistence Please note that ghosting may occur while displaying a persistent image. LCD TVs’ image persistence may disappear after a short time. Try turning off the TV for a while.
Appendix A: PC Input typical display modes The display has a maximum resolution of 1360 x 768 (optional), frequency range of 56-75 Hz. The following table is an illustration of some of the typical video display modes. Your TV may not support different resolutions. Supported resolution modes are listed below. If you switch your PC to an unsupported mode, a warning OSD will appear on the screen.
POWER CONSUMPTION (W) Specifications 60W TV BROADCASTING 1 W (Standby) PAL/SECAM B/G D/K K' I/I' L/L' RECEIVING CHANNELS PANEL VHF (BAND I/III) UHF (BAND U) HYPERBAND CABLE TV (S1-S20/ S21-S41) 16:10 display, 19” screen size DIMENSIONS (mm) D NUMBER OF PRESET CHANNELS 140 80 100 CHANNEL INDICATOR On Screen Display RF AERIAL INPUT 75 Ohm (unbalanced) OPERATING VOLTAGE 220 - 240V AC, 50 Hz AUDIO Nicam AUDIO OUTPUT POWER (WRMS.
Pin specifications Signal Input PC RGB Terminal (D-sub 15-pin connector) Pin 1 2 3 4 5 6 7 8 9 10 11 12 13 14 15 Input signal R G or sync on green B No connection No connection R.GND G.GND B.GND No connection GND No connection [SDA] H.sync or H/V composite sync V.sync. [V.
Electrical connection For your own safety read the following instruction carefully before attempting to connect this unit to the mains supply.
www.electrolux.com www.electrolux.co.