graphic project VISUAL DIVISION Milano 4a 96 11-96 N I 3 4 U K E 3 1 S ELECTROLUX EUROCLEAN ITALIA SPA Località Novella Terza 20070 Guardamiglio-Italy Telephon nr. +39 377 451124 Fax nr.
INDEX NOTE pag. INTRODUCTION..................................................................1 UNPACKING ......................................................................2 TECHNICAL SPECIFICATION .................................................3 MACHINE CONTROLS .........................................................4 PREPARATION FOR USE ...................................................5-9 SCRUBBING AND DRYING OPERATION ........................10-15 CHANGING BRUSHES ............................
OPTIONALS INTRODUCTION A front splash guard is also available. INTRODUCTION This manual is a guide to the efficient use of the machine and also contains practical information concerning the functioning, adjustments and user maintenance of your new scrubber/drier. Your machine has been designed and constructed to ensure maximum performarnce and ease of operation in a wide variety of applications.
UNPACKING OPTIONALS Check that you have received following parts together with the machine: Kit of cable to transform machine from mains version to battery operated version. 1- Connecting hose for squeegee Mains unit (or transformer) to change the machine from the battery operated version to the mains version. 2- Plastic bag with cables For the models W345 and W355 a kit is available to equip the machine with the membrane.
OPTIONALS TECHNICAL SPECIFICATION In addition to the normal accessories supplied with the machine the following optionals are available: Batteries: - For models 345/355 two 12 V batteries 140 amp hours. - For models 365/375 four 6V batteries 240 amp hours.
MACHINE CONTROLS 1 2 3 TROUBLE SHOOTING 4 PROBLEM Nothing works. POSSIBLE CAUSE No power. CHECK Is the battery plugged in. Is the mains lead plugged in and switched on. Is the mains socket live.
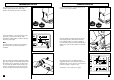
SAFETY AND FAULTS Keyswitch/accelerator sequence: This safety feature prevents the machine from moving if the machine is accidentally switched on with either forward or reverse function engaged (due to machine fault or an operator error). When this happens the leds on display panel begin flashing. PREPARATION FOR USE Partially unscrew the two middle levers on the squeegee. Push the squeegee into the locating lugs as illustrated and fully tighten the levers.
PREPARATION FOR USE MAINTENANCE The three solenoid valve bodies may be removed by turning them through 45 degrees and lifting them away to reveal the plunger and seating of each valve. These should be cleaned of scale and of any other foreign matter. For models working with batteries follow instructions below, whereas in the case of mains operated models the transformer has already been placed inside the machine and needs no further installation.
MAINTENANCE PREPARATION FOR USE BEFORE ANY MAINTENANCE IS CARRIED OUT THE BATTERY MUST BE UNPLUGGED OR THE MAINS LEAD UNPLUGGED. 345-355 Periodically unscrew the filter inside the scrubbing detergent tank, scrub whit a stiff brush under running water to remove any accumulated foreign matter. Note: for the models 345-355 it is enough to pull the filter to remove it. Press the filter to mount it.
PREPARATION FOR USE Drop the brushes (one or two depending on the model) roughly side by side in front of the machine, the actual position does not matter. Switch the machine on by turning the key in the key-switch a quarter turn clockwise. Wait momentarily until the battery condition indicator above the switch lights. Note: The mains machine will have to be plugged in, the indicator then only shows that power is available.
CHANGING BRUSHES To replace brushes carry out the following sequence of operations: The machine should be switched on but all functions switched off. PREPARATION FOR USE Lower the brush unit by pushing the pedal to the right to unlatch it. Then allow it to rise as far as it will go. Push the machine forward then back about 50mm (2”) to ensure the drive has located in the brushes. Raise the brush unit by pressing down the brush lift/lower pedal and latching in its lowest position.
SCRUBBING AND DRYING OPERATION Open the tank lid. SCRUBBING AND DRYING OPERATION Unclip the recovery tank emptying hose and remove the drain plug whilst holding the pipe at its highest extent, then lower it carefully into a gully or drain. Note: It is against Water Regulations to discharge detergents into a surface drain, only use a foul gully or drain.
SCRUBBING AND DRYING OPERATION Push the machine slowly forward, and adjust the squeegee pressure control until the lips bend over evenly as illustrated below. Then re-adjust the rake control to make the radius of the squeegee sit parallel to the floor and the lips bend evenly. SCRUBBING AND DRYING OPERATION Press the brush “on/off” push button: the indicator will light and the brush motors will start. TRAVEL DIRECTION FLOOR LEVEL The lips must be replaced when they become feather edged or torn.
SCRUBBING AND DRYING OPERATION When the machine is ready for scrubbing select the estimated amount of clean liquid required by pressing the detergent flow control on/off push button; an indicator will light which can be increased in three steps for varying the quantity of liquid delivered to the brushes. SCRUBBING AND DRYING OPERATION Press the suction on/off push button. Start the brushes rotating, move the machine slowly forward, then immediately lower the brushes to the floor by lifting the foot pedal.