................................................................ ................................................................
CONTENTS 8 Before Setting Surface Controls 26 Convection Bake 9 32 Meat Probe Burner Cap Placement 37 Setting Multi Stage 10 Installing Burner Grates 40 The Lower Oven 11 Setting Surface Controls 11 Setting Proper Burner Flame Size 41 My Favorite 12 Setting Surface Controls 43 The Sabbath Mode 13 Home Canning 45 Self Clean 48 Care and Cleaning 14 Before Setting Oven Controls 50 Cleaning Surface Burner Heads 15 Luxury Glide™ Oven Racks 51 Caring for Your Glide Racks 16 Setting Oven Cont
Important Safety Instructions Read all instructions before using this appliance. Save these instructions for future reference. This manual contains important safety symbols and instructions. Please pay attention to these symbols and follow all instructions given. Do not attempt to install or operate your appliance until you have read the safety precautions in this manual. Safety items throughout this manual are labeled with a WARNING or CAUTION statement based on the risk type.
Important Safety Instructions Tip Over Hazard • A child or adult can tip the appliance and be killed. • Verify the device is engaged with the countertops or that the device has been installed to the walls of the cabinet, the wall, or the floor as per the installation instructions • Ensure the anti-tip device is re-engaged with the countertop, the walls of the cabinet, the wall, or the floor as per the installation instructions when the appliance is moved.
Important Safety Instructions • • • Be sure to have an appropriate foam-type fire extinguisher available, visible, and easily located near the appliance. Do not attempt to operate the oven during a power failure. If the power fails, always turn off the oven. If the oven is not turned off and the power resumes, the oven will begin to operate again. Once the power resumes, reset the clock and oven function. Cold temperatures can damage the electronic control.
Important Safety Instructions • • Do not use decorative surface burner covers. If a burner is accidentally turned on, the decorative cover will become hot and possibly melt. Burns will occur if the hot covers are touched. Damage may also be done to the cooktop. Always turn knob to the full LITE position when igniting top burners. Visually check that burner has lit. Then adjust the flame so it does not extend beyond the edge of the utensil.
Important Safety Instructions GROUNDING INSTRUCTIONS: ELECTRIC MODELS WITH NO FACTORY-SUPPLIED POWER CORD GROUNDING INSTRUCTIONS: CANADIAN ELECTRIC MODELS For models factory-equipped with a power cord: Avoid fire hazard or electrical shock. Failure to follow this warning may cause serious injury, fire, or death. For personal safety, this appliance must be properly grounded.
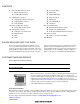
Before Setting Surface Controls BEFORE SETTING SURFACE CONTROLS Using Proper Cookware Surface burners may appear to have cooled after they have been turned off. The surface burner may still be hot and burns may occur if the surface burner is touched before it has cooled sufficiently. For best cooking results, cookware should have flat bottoms that rest level on the surface burner grate. Before using cookware, check for flatness by rotating a ruler across the bottom of the cookware (Figure 1).
Before Setting Surface Controls BURNER CAP PLACEMENT 9 On round style burners, the burner cap lip (Figure 5) should fit snug into the center of burner head and rest level. Check burner cap placement before operating the surface burners. Burner cap To prevent flare-ups and avoid creation of harmful by-products, do not use the cooktop without all burner caps properly installed to insure proper ignition and gas flame size. Turn the burner on to determine if it will light.
Before Setting Surface Controls INSTALLING BURNER GRATES For the 18 000 BTU burner: Place the burner head over the gas orifice (Figure 8). Be careful not to damage the electrode while placing the burner head over the orifice. Make sure electrode fits correctly into slot in burner head. IMPORTANT! For proper ignition, the burner ring alignment tab must align with burner base alignment tab slot. Surface burners may appear to have cooled after they have been turned off.
Setting Surface Controls 11 SETTING SURFACE CONTROLS Types of Cooktop Surface Burners The cooktop comes with a variety of burners to accommodate different sizes of cookware. The ability to heat food quicker and in larger volumes increases as the burner size increases. It is important to select cookware that is suitable for the amount and type of food being prepared SETTING PROPER BURNER FLAME SIZE Never extend the flame beyond the outer edge of the cooking utensil.
Setting Surface Controls SETTING SURFACE CONTROLS Your cooktop may be equipped with any combination of the following burners: • Simmer Burner: best used for simmering delicate sauces, etc. • Standard Burner: used for most all surface cooking needs. • Large Burner: best used when bringing large quantities of liquid to temperature and when preparing larger quantities of food. • Your cooktop is also equipped with 270° rotation flame control valves.
Setting Surface Controls Using the Griddle (Some Models) The griddle is intended for direct food cooking and can be used on both sides. Do not use pans or other cookware on the griddle. Doing so could damage the finish. Center the griddle over the simmer oval burner. Surface burners may appear to have cooled after they have been turned off. The surface burner may still be hot and burns may occur if the surface burner is touched before it has cooled sufficiently.
Before Setting Oven Controls BEFORE SETTING OVEN CONTROLS Oven Vents Types of Oven Racks The oven is vented above each door. When the oven is on, warm air passes through this vent. This venting is necessary for proper air circulation in the oven and good baking results. Do not block oven vent. Steam or moisture may appear near the oven vent. This is normal. Flat Oven Rack Flat oven racks (or the flat handle oven rack) may be used for most cooking needs and may be placed in most oven rack positions.
Before Setting Oven Controls 15 LUXURY GLIDE™ OVEN RACKS The fully extendable Luxury-Glide™ rack makes food preparation easier. This oven rack has glide tracks that allow the rack to be pulled away from the oven without rubbing the sides of the oven wall. upper rack portion Removing and Replacing the Luxury-Glide™ Oven Racks To remove the oven Glide Rack: Always use potholders or oven mitts when removing food or adjusting the oven racks. Wait until the oven in completely cooled if possible.
Setting Oven Controls SETTING OVEN CONTROLS 2 3 4 5 6 7 8 11 12 13 14 15 16 17 9 1 18 10 19 23 21 22 24 25 26 27 20 11. Perfect Turkey - Use to select the perfect turkey function, which uses the meat probe to control precisely the cooking of a perfect turkey using the convection system to brown the exterior and seal in the juices. 1. Oven Light - Use to turn the internal “theater” style oven light on and off. 2.
Setting Oven Controls 17 34 28 31 29 30 33 32 35 21. Multi Stage - Use to enter up to three subsequent functions, to program a queue of up to three cooking modes with individual cooking times and temperatures. 22. Cook Options - Use to light up the cooking options functions, such as cook time. 23. Cook Time - Use to set a cooking duration time with an auto shut off. 36 34. 0 thru 9 - Use to enter temperature and times. 35. -lo - Use to lower the temperature and times.
Setting Oven Controls Choosing and Setting an Oven Wave-Touch™ Display Modes Both the upper and lower ovens may be set to cook at the same time using different functions. For example, you may want to broil in the upper oven while using the keep warm function in the lower oven at the same time. First, select which oven you want to set or modify by pressing either UPPER OVEN or LOWER OVEN. Then, follow the instructions in this guide to set the desired cooking functions.
Setting Oven Controls 19 Setting the Clock-Time of Day Setting 12 or 24 Hour Display Mode When the appliance is powered up for the first time or when the electric supply to the appliance has been interrupted, the display will flash 12:00 (Figure 23). Before any function of the oven can be set, CANCEL off must be pressed. This will set the clock at 12:00. To set the clock for the actual time the user pref key must first be pressed to bring the oven to the clock mode.
Setting Oven Controls Changing Oven Temperature Display-Fahrenheit (°F) or Celsius (°C) The oven control can be programmed to display temperatures in °F or °C. The oven has been preset at the factory to display in °F To change the temperature display mode: 1. Press user pref key until F-C in display (Figure 26). F appears 2. Use +hi or -lo to toggle between the F or C option. 3. Press START enter to accept. 4. Press CANCEL off to exit the preferences mode.
Setting Oven Controls 21 Timers Interior Oven Lights This unit is equipped with two kitchen timers which serves as extra timers in the kitchen that will chime when the set time has run out. These timers can help timed cooking or food preparation times without interfering with any active cooking process. They do not start or stop cooking. When the time countdown reaches less than 1 minute, the display will show the time remaining in seconds.
Setting Oven Controls RAPID PREHEAT The rapid preheat feature can be set using the following oven modes: bake and convection bake. When activated, the oven will begin preheating quickly and PRE-HEATING will appear in the display. The minimum temperature shown is 170ºF (76ºC). A tone will sound to indicate the oven has finished preheating and PRE-HEATING will disappear from the display.
Setting Oven Controls 23 BAKE Bake may be set with these options: 1) rapid preheat; 2) cook time; 3) end time; and 4) meat probe, achieved through using the cook time and end time settings. To set the oven for bake at the default oven temperature of 350°F (176°C): Always use pot holders or oven mitts when working with a hot oven. When baking, the oven interior and oven racks will become hot enough to cause burns. Do not bake foods directly on the oven bottom.
Setting Oven Controls Cook Time Setting Cook Time with End Time Cook time is used when a recipe calls for a specific temperature and cook time. It allows the oven to be set to cook for a set length of time and shut off automatically.The maximum cook time is 11 hours, 59 minutes. This feature can be used with bake, convection bake, convection roast, keep warm, defrost, bread proof, and dehydrate. It can also be part of a multi stage sequence.
Setting Oven Controls 25 BROIL Broiling is a method of cooking tender cuts of meat by direct heat under the broil element of the oven. This mode is best for meats, fish, and poultry up to 1" thick. The meat probe cannot be used with this mode. Depending on cooking preferences, you can increase or decrease cooking times or move food to a different rack position. If the food you are broiling is not listed in Table 4 , follow the instructions provided in your cookbook and watch the item closely.
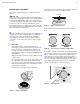
Setting Oven Controls CONVECTION BAKE Convection functions use a fan to circulate the oven's heat uniformly and continuously around the oven (Figure 32). This improved heat distribution allows for fast, even baking and browning results. It also gives better baking results when using two oven racks at the same time. Heated air flows around the food from all sides, sealing in juices and flavors. Breads and pastry brown more evenly.
Setting Oven Controls Convection Baking/Convert Tips • Fully preheat the oven before baking items like cookies, biscuits, and breads. • When using any single oven rack, use the radiant bake function and position the rack in the oven so that the food is in the center of the oven. • When baking cakes using two oven racks, place bakeware in positions 1 and 4 (Figure 34) and place pans as shown in Figure 33. Use a flat rack in position 4 and a glide rack in position 1.
Setting Oven Controls Using Convection convert with cook time When convection conversion is used with the cook time feature, CF (check food) will be displayed when 75% of the bake time is complete. The control will chime at regular intervals until CANCEL off is pressed, as a reminder to check the food. When the cook time runs out, the oven will shut off automatically and chime. To set convection convert for 30 minutes at 375°F (191°C): Always use pot holders or oven mitts when using the oven.
Setting Oven Controls 29 Convection Roast To properly arrange food for roasting: Convection roast is best for cooking tender cuts of beef, lamb, pork, and poultry. Heated air circulates around the meat from all sides, gently browning the exterior and sealing in the juices and flavors. Use this mode when cooking speed is desired. Convection roast uses the hidden bake element, the hidden convection element, the broil element, and a fan to circulate the oven’s heat evenly and continuously within the oven.
Setting Oven Controls Convection Roasting tips: • Preheating for convection roast will not be necessary for most meats and poultry. • Arrange oven racks so the food is in the center of the oven. • Since convection roast cooks faster, you can reduce cook times by 25% from the recommended time of your recipe (check the food at this time). Then if needed, increase cook time until the desired doneness is obtained.
Setting Oven Controls 31 Keep Warm 4. Keep warm is best for keeping oven baked foods warm for serving after cooking has finished. It may be set with cook time, cook time/end time, and multi stage. Keep warm uses the hidden bake element to maintain the temperature within the oven. Keep warm will run continuously or (if used with bake time) until the time runs out. Press -lo until the temperature shows 150 on the display. 5. Press START enter. 6.
Setting Oven Controls MEAT PROBE Tips for Probe Placement When cooking meat such as roasts, hams, or poultry, use the meat probe function to check the internal temperature without guesswork. For some foods, especially poultry and roasts, testing the internal temperature is the best method to ensure properly cooked meats. Your oven will automatically change from cooking to keep warm once the probe has reached the set temperature.
Setting Oven Controls 4. 33 Press UPPER OVEN to light up the available cooking modes keys. Table 7: USDA recommended minimum internal cooking temps Food Type 5. Internal Temp. Ground meat and meat mixtures Press conv roast. Beef, Pork, Veal, Lamb Turkey, Chicken 6. Enter 3 2 5 using the numeric keypad. 7. Press cook options. 8. Press probe. The default temperature of 170ºF appears in the display 9. Enter 1 8 0 using the numeric keypad to change the probe setting.
Setting Oven Controls Perfect Turkey™ 4. Press perfect turkey. The meat probe set temperature will be 180°F (82°C) by default. 5. Press START enter. Heated air circulates around the turkey from all sides, sealing in juices and flavors. Poultry cooked with this feature are crispy brown on the outside while staying moist on the inside. Perfect turkey combines a cook cycle with the convection fan. The probe is used to monitor the exact internal temperature of the turkey while cooking.
Setting Oven Controls 35 Setting Defrost Setting Dehydrate Only frozen foods that can be defrosted and served without cooking should be used with this feature.Use defrost to thaw small portions of delicate items such as cream cakes, frozen cream pies, and cheesecake at room temperature. While in the defrost mode, the convection fan will operate to circulate room temperature air around the food slowly, accelerating the natural defrosting of the food without using heat.
Setting Oven Controls Setting Bread Proof Slow Cook The bread proof feature maintains a warm environment useful for rising yeast-leavened products. Bread proof can be set with the following options: cook time or cook time with end time. The following temperature settings apply to the bread proof feature: Slow cook may be used to cook foods more slowly, at lower oven temperatures and provide cooking results much the same way as a slow cooker or crock-pot.
Setting Oven Controls For best results: • Slow cooking meats may result in the outside of the meat turning dark; this is normal. Completely thaw all frozen foods before cooking. • Arrange food in center of oven. Position multiple racks to accommodate size of cooking utensils when baking multiple food items. Add any cream or cheese sauces during the last hour of cooking. • Do not frequently open the oven door or leave the oven door open when checking food items.
Setting Oven Controls Setting Multi Stage for Three Stages 6. Press START enter. 7. Enter 6 0 minutes using the numeric keypad. 8. Press START enter. This sets the first stage of cooking and stage 2 will show in the display allowing you to program the desired next step. 60 To program a (three stage) multi stage feature for a casserole with: ------ STAGE 2 ----- 9. When all three stages of cooking are preferred, setting the multi stage feature requires a few easy steps.
Setting Oven Controls 39 11. Press START enter. 12. Enter 4 minutes using the numeric keypad. 4 13. Press START enter. ------ STAGE 3 appears in the display ----- 14. Press keep warm. 15. Press START enter. 16. Enter 1 5 minutes using the numeric keypad. 17. Press START enter. 18. Press CANCEL off to stop multi stage cooking at any time.
Setting Oven Controls THE LOWER OVEN The lower oven is ideal for cooking foods such as pizza, casseroles, baked potatoes and frozen convenience foods. Available cooking functions for this mini oven are bake, keep warm, and slow cook. The available cooking options are cook time, end time, and favorites. The following temperature settings apply to the bake feature for the lower oven: • Auto-suggest (default) setting: 350°F/176°C • Min. bake setting: 170°F / 76°C • Max.
Setting Oven Controls 41 MY FAVORITE 9. The my favorite settings allows you to save your most frequently used or most complex cooking sequences. This feature will save the cooking mode, the target temperature, and the cook time (if any). The my favorite feature stores and recalls up to three favorite recipe settings, which are easily accessible from a one touch key. This feature will only store or recall one favorite recipe at a time from each of the three my favorite keys on the control display.
Setting Oven Controls To offset the oven temperature by -30°F (-17°C): Adjusting the Oven Temperature This appliance has been factory calibrated and tested to ensure accurate baking temperatures. For the first few uses, follow all recipe times and temperature recommendations carefully. If you think the oven is cooking too hot or too cool for your recipe times, the control may be adjusted so the oven cooks hotter or cooler than the temperature displayed. 1.
Setting Oven Controls 43 THE SABBATH MODE 3. Select an oven by pressing either UPPER OVEN or LOWER OVEN to light up the available cooking modes keys. 4. Press bake. 5. Enter 3 2 5 using the numeric keypad. 6. If you desire to set the oven control for cook time or end time, select cook options. If not, skip this step and continue to step 8. 7. If entering both cook time and end time for delay bake, the oven will automatically calculate the start time.
Setting Oven Controls 12. Pressing CANCEL off will not turn off the Sabbath feature. To cancel Sabbath mode, press and hold + hi and - lo keys together for 3 seconds. SAb will disappear from the display. IMPORTANT! Remember the oven will shut off after completing a cook time or end time and therefore may only be used once during the Sabbath/Jewish holidays. The maximum cook time setting is 11 hours and 59 minutes.
Setting Oven Controls 45 • Do not use oven cleaners or oven protective coatings in or around any part of the oven interior. Residue from oven cleaners may damage the porcelain during the next selfclean cycle. • Clean any soil from the oven frame, the door liner outside the oven door gasket and the small area at the front center of the oven bottom (Figure 45). These areas heat sufficiently to burn soil on. Clean using soap and water prior to starting self clean.
Setting Oven Controls Setting Self Clean Do not leave small children unattended near the appliance. During the self clean cycle, the outside of the oven can become very hot to touch and can cause burns. Do not force the oven door open when self clean is active. This can damage the automatic door-locking system. Use caution when opening the door after self cleaning. The oven may still be very hot and can cause burns.
Setting Oven Controls To cancel self clean: 1. 47 Setting for a heavy (4 hour) self clean cycle to end at 8:00 o’clock: Press CANCEL off. Do not leave small children unattended near the appliance. During the self clean cycle, the outside of the oven can become very hot to touch and can cause burns. Use caution when opening the oven door after self cleaning. The oven may still be very hot and can cause burns.
Care and Cleaning CARE AND CLEANING Cleaning Various Parts of Your Oven Before cleaning any part of the oven, be sure all controls are turned off and the oven is cool. Remove spills and any heavy soiling as soon as possible. Regular cleaning will reduce the difficulty and time of major cleaning later. Surface Type Recommendation Control knobs Painted body parts Painted decorative trim Aluminum, plastic, or vinyl trim For general cleaning, use hot soapy water and a cloth. Dry with a clean cloth.
Care and Cleaning 49 General Care & Cleaning Cleaning the Cooktop and Surface Burners The cooktop is designed to make cleaning easier. Because the gas burners are sealed, cleanups are easy when spillovers are cleaned up immediately. Correct and consistent cleaning is essential to maintaining your porcelain enamel cooktop. If food spills and grease spatters are not removed, they may burn onto the surface of the cooktop and cause permanent discoloration. Do not use a cooktop cleaner on a hot cooktop.
Care and Cleaning CLEANING SURFACE BURNER HEADS For proper gas flow it may be necessary to clean the burner head and slots. To clean, first use a clean DAMP cloth to soak up any spills. Remove any food from between the burner slots using a small nonabrasive brush like a toothbrush and afterwards wipe up using a damp cloth. For stubborn soils located in the slots, use a small-gauge wire or needle to clean. Double ring burner cap The glass in the double ring is designed to fit loosely.
Care and Cleaning 51 CARING FOR YOUR GLIDE RACKS 4. Extend and return the glide rack several times along the tracks to distribute the lubrication. 5. Turn glide rack over. Shake graphite lubrication very well before applying. Place four drops of graphite lubrication along the tracks. Repeat on both sides of the glide rack. 6. Extend and return the glide rack several times along the tracks to distribute the lubrication. 7.
Care and Cleaning REMOVING AND REPLACING THE OVEN DOOR To remove the oven door: Oven door hinge locations To avoid possible injury when removing or replacing the oven door, follow the instructions below carefully and always hold the oven door with both hands positioned away from the door hinge area. The door is heavy. For safe, temporary storage, lay the door flat with the inside of the door facing down.
Care and Cleaning 53 Replacing the Dual Left/Right Corner Oven Lights Aluminum Foil and Oven Liners The interior oven lights are located at the rear of the oven cavity and are covered with a glass shield. The glass shield must be in place whenever the oven is in use (Figure 59). Never cover any slots, holes, or passages in the oven bottom or cover an entire oven rack with materials such as aluminum foil. Doing so blocks air flow through the oven and may cause carbon monoxide poisoning.
Before You Call BEFORE YOU CALL SOLUTIONS TO COMMON PROBLEMS Oven Baking For best baking results, heat the oven before baking cookies, breads, cakes, pies, or pastries, etc. There is no need to preheat the oven for roasting meat or baking casseroles. The baking times and temperatures needed to bake a product may vary slightly from your previously owned appliance. Baking Problems and Solutions Baking Problems Causes Corrections Cookies and biscuits burn on • the bottom.
Before You Call 55 Solutions to Common Problems Before you call for service, review the following list. It may save you time and expense. Possible solutions are provided with the problem listed: Problem Solution Poor baking results • Many factors effect baking results. Use proper oven rack position. Center food in the oven and space pans to allow air to circulate. Preheat oven to the set temperature before placing food in the oven. Bakeware may be too lightweight or warped.
Before You Call Oven control panel chimes and displays an F code error. • Oven control has detected a fault or error condition. Press STOP to clear the error code. Try bake or broil function. If the F code error repeats, turn off power to appliance, wait 5 minutes and then repower appliance. Set clock with correct time of day. Try bake or broil function again. If fault recurs, press STOP to clear. Soil not completely removed after self clean. • Self clean was interrupted.
WARRANTY Your appliance is covered by a one year limited warranty. For one year from your original date of purchase, Electrolux will repair or replace any parts of this appliance that prove to be defective in materials or workmanship when such appliance is installed, used, and maintained in accordance with the provided instructions.
www.electrolux-store.