W a s h i n g m a c h i n e User information Swissline GL EWF 1387 105 176 598-01-130306-03 g
Dear customer, Please read this User Information carefully and keep it to refer to at a later date. Pass this User Information on to any subsequent owner of the appliance. The following symbols are used in the text: 1 Safety instructions Warning: Notes that concern your personal safety. Attention: Notes that show how to avoid damage to the appliance.
Contents Operating Instructions . . . . . . . . . . . . . . . . . . . . . . . . . . . . . . . . . . . . . . . . . . . . . . . . . . . . . . . . . . . . . 4 Safety . . . . . . . . . . . . . . . . . . . . . . . . . . . . . . . . . . . . . . . . . . . . . . . . . . . . . . . . . . . . . . . . . . . . . . . . . . . . . . . 4 Description of the appliance . . . . . . . . . . . . . . . . . . . . . . . . . . . . . . . . . . . . . . . . . . . . . . . . . . . . . . . . . . . 5 Control panel . . . . . . . . . .
Operating Instructions 1 Safety Prior to using for the first time • Follow the ”Instructions for installation and connection”. • If the appliance is delivered in the winter months when there are minus temperatures: Store the washing machine at room temperature for 24 hours before using for the first time. Correct use • The washing machine is only designed for the washing of normal domestic laundry at home. • Additions or modifications to the washing machine are not permitted.
Description of the appliance Detergent dispenser drawer Control panel Rating plate (behind door) Plinth flap/ Drain pump Screw feet (height adjustable) Control panel Multi-display SPIN/RINSE HOLD button DELAY TIMER button Programme option buttons START/PAUSE button Programme progress display DOOR indicator Programme knob OVERDOSING indicator 5
Programme overview 40-60 MIX 6kg • EASY-CARES 60, 50, 40, 30 3kg • EASY IRON 40 1kg DELICATES 40, 30 3kg WOOL/SILK H (Handwash) 40, 30, COLD GENTLE RINSE RINSE HOLD • • • • • • • • • • •3) • • • • • • • • • • • • • • • • •3) • • • • • • • • • • • • • • • • • • • • 2kg • • • • 3kg • • • • • • • • • • • 500 700 6kg 1000 COTTONS/LINEN 95, 60, 40, 30 1300 • SENSITIVE 6kg STAIN RINSE + ENERGY SAVING 2) Spin speed PRE WASH
Use/Features Energy-saving programme at 60 °C for lightly to normally soiled whites/coloureds made of cotton/linen. Caresymbols1) MO JMO Programme for normally to heavily soiled whites and coloureds made of cotton/linen. Programme for whites and coloureds which are labelled for different wash temperatures. Items, which according to the care symbols are normally to be washed separately at 40 °C or at 60 °C, can be washed together in this programme.
Overview of terms The English terms used in this User Information booklet correspond to the German/French names below that are to be found at your appliance’s control panel.
Before the first wash 1. Open the detergent dispenser drawer. 2. Pour about 1 litre of water through the detergent dispenser drawer into the washing machine. This closes the water container when the next programme is started and the economy valve can function properly. 3. In order to remove any residues from the drum and water container which may have been left during manufacturing, perform the first wash cycle without any washing in the machine.
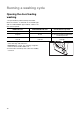
Running a washing cycle Opening the door/loading washing 1. To open the door: pull the door by the handle. When the machine is switched on, the DOOR light and the START/PAUSE light indicate whether the door can be opened: DOOR indicator START/PAUSE indicator Can the door be opened? lit green flashes red or is off yes lit green lit red yes, after the START/PAUSE button has been pressed lit red or is off flashes red or lit red no, water level and/or temperature too high 2.
Adding detergent/ additives Important: Use only detergents and additives that are suitable for use in domestic washing machines. 1For USA and Canada only! Important! Only LOW-SUDSING detergent suitable for a front-loading washing machine can be used in this machine. This machine can heat the water up to 95 degrees celsius, or 200 degrees fahrenheit, and care should be taken to ensure that the correct washing powder is used. If you have any doubt, check with your dealer or the distributor.
Washing powder/tablets for the main wash If you are using water softener and need the righthand compartment for the pre-wash detergent, add the water softener to the main wash detergent in the left-hand compartment. Softeners, wash-care products to preserve the shape of garments, starch Do not fill the compartment beyond the MAX mark. Dilute thick liquid concentrates according to the manufacturer’s instructions before putting them into the drawer. Dissolve powder starches.
Selecting the programme options If desired, press the programme option button(s). The corresponding light lights up. 3 If “Err” flashes in the multi-display, the pro- gramme option selected cannot be combined with the wash programme set. RINSE + Two additional rinse cycles are carried out for the programmes ENERGY SAVING, COTTONS/LINEN, DELICATES, EASY-CARES and EASY IRON (e. g. in cases of over-sensitive skin). QUICK WASH Shortened wash cycle for lightly soiled washing.
Setting the delay timer 3 With the DELAY TIMER button you can post- Interrupting a programme/ adding washing pone the start of a programme by 30 minutes (30') to a maximum of 23 hours (23h). 1. Select programme. 2. Continue pressing the DELAY TIMER button until the desired start delay is displayed in the multi-display, for example12h, if the start of the programme is to be delayed by 12 hours. DELAY TIMER light is lit. Interrupting a programme button again, the time delay will be cancelled.
Child safety device When the child safety device is set, the door can no longer be closed. Setting the child safety device: Use a coin to turn the knob (on the inside of the door) in a clockwise direction as far as it will go. 1 Warning! The knob must not be sunk-in after being set, otherwise the child safety device is not active. The knob must stand proud as shown in the illustration. Releasing the child safety device: Turn the knob anti-clockwise as far as it will go.
Cleaning and maintenance Important! Do not use furniture care products or aggressive cleaners to clean the appliance. Wipe control panel and body with a damp cloth. Cleaning procedure If you plan to wash mainly at low temperature, you should run a hot programme from time to time. This will reduce any deposits and clean the appliance from the inside. Detergent dispenser drawer The detergent dispenser drawer should be cleaned regularly. 1. Remove the detergent dispenser drawer by pulling it firmly. 2.
Door and rubber collar Regularly check whether deposits or foreign bodies are present in the folds of the rubber collar or on the inside of the glass door. Clean the glass in the door and the rubber collar regularly. What to do if... Remedying small malfunctions If one of the following fault codes is displayed in the multi-display during operation: – E10 (Problems with water inlet), – E20 (Problems with water drainage), – E40 (door open), please have a look at the following table.
Problem Possible cause Remedy Screw connection on the inlet hose is leaking. Tighten inlet hose. Drain hose is leaking. Replace drain hose. Drain pump cover is not closed Water is leaking out underneath properly. the washing machine. Close cover properly. Washing was caught in the door. Load washing carefully for the next wash. Emergency drain hose is leaking. Close off emergency drain hose properly. EF0 appears. END indicator flashes 15x, at the same time an acoustic signal sounds 15x.
If the wash results are not satisfactory Washing is grey and scale is being deposited in the drum • • • • Too little detergent is being used. The right detergent was not used. Special soiling was not pre-treated. Programme or temperature was not correctly set. There are grey stains on the washing. • Washing soiled with ointment, grease or oil was washed with too little detergent. • It was washed at too low a temperature.
Carrying out an emergency drain 1 Warning! Before emergency draining, switch off the washing machine and remove the mains plug from the socket. Warning! The water that comes out of the emergency drain hose may be hot. There is a risk of scalding. Let the water cool before performing an emergency drain. 1. Open the plinth flap and remove it. 2. Take out the emergency drain hose. 3. Place a shallow container underneath it.
Drain pump The drain pump is maintenance-free. It is only necessary to open the pump cover if there is a malfunction and water is no longer being pumped out, e. g. if the pump wheel is blocked. Please make sure before loading the washing that there are no foreign bodies in the pockets or caught between the washing. Paperclips, nails, etc. that may have got into the washing machine with the washing remain in the pump housing (foreign body trap that protects the pump wheel).
Disposal 2 Packaging material 2 Old appliance The packaging materials are environmentally friendly and can be recycled. The plastic components are identified by markings, e.g. >PE<, >PS<, etc. Please dispose of the packaging materials in the appropriate container at the community waste disposal facilities. W The symbol on the product or on its packaging indicates that this product may not be treated as household waste.
Technical data 5 This appliance conforms with the following EU Directives: – 73/23/EEC dated 19.02.1973 Low Voltage Directive – 89/336/EEC dated 03.05.1989 EMC Directive inclusive of Amending Directive 92/31/EEC – 93/68/EEC dated 22.07.1993 CE Marking Directive Height x Width x Depth 850 x 598 x 640 mm Depth when door is open 1017 mm Height adjustment approx. +10/-5mm Load (depending on programme) Max.
Installation and connection instructions 1 Safety information for the installation • This washing machine cannot be built-in. • Before using for the first time, check the appliance for damage sustained while it was being transported. Do not under any circumstances connect an appliance that is damaged. In the case of damage, please contact your supplier. • Before using for the first time, all parts of the transit packaging must be removed.
Removing the transit packaging Important! Before using the appliance for the first time, all parts of the transit packaging must be removed! Keep the transit packaging in a safe place, in case it is needed at a later date when the appliance is to be moved (e.g. moving house). 1. At the back of the appliance, open both hose clips and remove both hoses and mains cable. 2. Remove both hose clips from the appliance by jerking them hard. 3. Remove both plastic caps sideways.
7. Unscrew and remove two screws E using special spanner A. 8. Unscrew and remove four screws F using special spanner A. 9. Remove transit bar G. 10.Screw in the four screws F again. 11.Seal the two big holes using sealing caps B. Important! Press all sealing caps B (2 off) and C (1 off) in firmly, so that they snap into place. (Splash protection). Where to install Important! The appliance must not be used in a room where there is a danger of frost.
Making the appliance level The four feet of the appliance are pre-adjusted. Large degrees of unevenness can be compensated for by individually adjusting the height adjustable screw feet. Use the special spanner supplied to do this. Important! Do not use pieces of wood, cardboard or such like to level out unevenness in the floor, but adjust the height adjustable screw feet instead. Electrical connection Details about the voltage, type of supply and the fuses required are to be found on the rating plate.
Water inflow A 1.50 m long pressure hose is supplied with the appliance. If a longer water inlet hose is required, only original hoses are to be used. The Customer Care Department stocks hose kits of different lengths. 3 Sealing rings are either inserted in the nuts of the threaded hose fitting or are included as spare parts . Do not use any other type of sealing rings. Important! All threaded hose fittings must only be tightened by hand. 1. Connect the hose with the right-angle connector to the machine.
Water drainage The maximum permitted difference between the height of the surface on which the appliance is installed and the water outlet is 1 metre. Only original hoses may be used to extend hoses. (A maximum of 3 m laid on the floor and then 80 cm vertically). The Customer Care Department stocks outlet hoses of different lengths. Draining water into a sink outlet Secure the outlet/sink outlet joint with a hose band clip (available from your dealer).
Servicestellen Demonstration / Vente 5506 Mägenwil/Zürich Industriestr. 10 8048 Zürich Badenerstrase 587 044 405 81 11 9000 St.
Garanzia Per ogni prodotto concediamo una garanzia di 2 anni a partire dalla data di consegna o dalla sua messa in funzione (fa stato la data della fattura, del certificato di garanzia o dello scontrino d’acquisto). Nella garanzia sono comprese le spese di manodopera, di viaggio e del materiale.
Service In the event of technical faults, please first check whether you can remedy the problem yourself with the help of the operating instructions (section “What to do if…”). If you were not able to remedy the problem yourself, please contact the Customer Care Department or one of our service partners. In order to be able to assist you quickly, we require the following information: – Model description – Product number (PNC) – Serial number (S No.
105 176 598-01-130306-03 Subject to change without notice The Electrolux Group. The world´s No.1 choice. The Electrolux Group is the world´s largest producer of powered appliances for kitchen, cleaning and outdoor use. More than 55 million Electrolux Group products (such as refrigerators, cookers, washing machines, vacuum cleaners, chain saws and lawn mowers) are sold each year to a value of approx. USD 14 billion in more than 150 countries around the world.