EXM18HV1W EXM24HV1W EN SPLIT TYPE ROOM AIR CONDITIONER it Condizionatore split per ambienti es Acondicionador de aire tipo split TR SPLIT TIPI ODA KLIMASI USER MANUAL 2 MANUALE PER L’UTENTE 22 MANUAL DE INSTRUCCIONES KULLANIM KILAVUZU 42 62
Table of Contents Congratulations ....................................................................3 Safety Precautions ...............................................................4 Product´s Description ...........................................................6 Indoor Unit Display ...............................................................7 Remote Control.....................................................................7 Remote Control Description ............................................
Congratulations Congratulations and thank you for choosing Electrolux split-type air conditioner. We are sure you will find your new air conditioner a pleasure to use. Before you use the air conditioner, we recommend that you read through the entire user manual, which provides the description of the air conditioner and its functions.
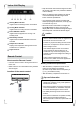
Safety precautions Inside this manual you will find many helpful hints on how to use and maintain your air conditioner properly. Just a little preventive care on your part can save you a great deal of time and money over the life of your air conditioner. You’ll find many answers to common problems in the chart of troubleshooting tips on page 20-21. If you review the chart of troubleshooting tips first, you may not need to call for service.
Safety precautions caution Select the most appropriate temperature. It can save electricity. Do not keep windows and doors open for a long time during operation. It will result in insufficient performance. Do not block the air inlet or outlet. It will result in insufficient performance and cause malfunctions. Keep combustible materials away from the units at least 1m. It may cause fire. Do not step on the top of the outdoor unit or place heavy things on it. It may cause damage or injury.
ProductDescription Description Product Airinlet inlet Air 22 IndoorUnit Unit Indoor 11 13 33 44 55 AirOutlet Outlet Air 66 77 8 8 OutdoorUnit Unit Outdoor 9 12 12 11 11 Airinlet inlet(rear) (rear) Air Mode Fan Temp Timer-Off Swing Light Turbo Timer-On Clock I feel Eco Airinlet inlet Air (side) (side) 10 10 14 14 13 AirOutlet Outlet Air 15 15 Frontpanel panel Front Remotecontrol control Remote Digitaldisplay display Digital Remotecontrol controlholder holder Remote Health
Indoor Unit Display Indoor Unit Display • Keep the remote control where its signal can reach the receiver of the indoor unit (a maximum distance of 8m is allowed). If you you keepselect the remote control in a position that •• When the timer operation, the remote hindersautomatically proper signal transmission, time control transmits a signala to thelag of up to 15 may occur. indoor unitminutes at the specified time.
Remote Control Description Turbo Button Press this button in COOL or HEAT mode to put the fan into the high speed Turbo mode and the air conditoner will work at maximum power. Press again to cancel this function. X-Fan Button In Cooling and Dehumidification mode, press the X-Fan button to active the Self-Cleaning. After the unit is turned off, the indoor fan will continue operation for 10 minutes to dry the indoor unit and prevent bacteria and mildew from growing.
Remote Control Display Indicator Transmission Indicator: Displays when the remote control transmits signals to the indoor unit. Fan Speed Display Displays the selected fan speed in the following sequence: Turbo Display Displays when Turbo function is selected. “ ” (Low), “ Auto. I Feel Display Displays when I Feel function is activated. In Auto speed, only “ ” symbol displays. Eco Display Displays when Eco function is selected.
First Use 1 Ensure the unit is plugged in and power is available. 2 Be sure the batteries are inserted correctly in the remote control (the lights on the remote control will be on). 3 Set the time by Control buttons and confirm by pressing the Clock button. 4 Point the remote control to the indoor unit and press ON/OFF button to turn the unit on. The default operating mode is AUTO.
Start 1 ON/OFF Button Press this button to turn the air conditioner on. The temperature indicator on the indoor unit display lights on. 2 Mode Button Press to select DEHUMIDIFY. 2 Mode Button Press to select FAN. 3 Fan Button Press to select the desired fan speed at: Auto, Low, Medium and High. The default fan speed is Auto. 3 Control Buttons Set the desired temperature. Normally, set between 21ºC to 28ºC. Stop 1 ON/OFF Button Stop 1 ON/OFF Button Press this button again to turn the air conditioner off.
3 Control Buttons Set the desired temperature. Normally, set between 21ºC to 28ºC. 4 Fan Button Press to select the desired fan speed at: Auto, Low, Medium and High. The defaul fan speed is Auto. tips and information No fan speed indication displays on the remote control if Auto fan speed is selected. 3 Point the remote control to the indoor unit, confirm the set time by pressing the Timer-On button. symbol will stay on the remote control’s display.
1 Press the Timer-On button. 2 Set the desired time by pressing repeatedly or holding down the Control buttons until 18:00 shows in the display of the remote control. 3 Confirm the set time by pointing the remote control to the indoor unit and pressing again the Timer-On button. 4 Press the Timer-Off button. 3 Confirm the set time by pointing the remote control to the indoor unit and pressing again the Timer-On button.
Setting the Clock Economy (Eco) Operation Press Eco button in COOL or HEAT (if applicable) mode, the air conditioner will automatically increase (in COOL mode) or decrease (in HEAT mode) 1 °C per hour over a 2 hour period. The set temperature will be steady for the next 5 hours then the unit will stop. This function permits more comfort and saves energy. This operation is recommended for bed time.
How to Use the Indoor Unit Additional Options 1 Smart Restart Function The air conditioner resumes automatically with the previous settings after a possible power failure. • When the louver moves to the desired direction, press the Swing button again and the louver will stay at where it is. • Press the Swing button again and the louver will start swing up and down automatically.
• Do not move the horizontal louver manually. Always use the Swing button. Moving the louver manually may cause malfunction during operation. If the louver malfunctions, stop the air conditioner and restart it. • Open angle of the horizontal louver should not be set too small, as cooling or heating performance may be impaired due to too restricted airflow area. • Do not operate the air conditioner with horizontal louver in closed position.
Cleaning and Maintenance Maintenance The following maintenance operations must be performed regularly.
Dust filter warning Do not touch or try to clean the cold plasma generator (if applicable). It may cause an electric shock. General maintenance Clean the Dust filter with a vacuum cleaner or water, then dry it up in cool place. If the air conditioner is not going to be used for a long period of time: • Operate in FAN only mode for 3~4 hours to allow the unit to completely dry out. Dust filter • Switch off the unit and pull out the power plug. Remove the batteries from the remote control.
• Defrosting Frost may form on the outdoor unit in heating operation when the outdoor temperature is low but humidity is high, resulting in low heating efficiency. environment that has a high relative humidity. • A white mist may generate due to moisture generated from defrosting process when the air conditioner restarts in HEAT mode operation after defrosting. 4. Low noise of the air conditioner • You may hear a low hissing sound when the compressor is running or has just stop running.
Trouble Shooting The air conditioner is not user serviceable. Incorrect repair may cause electric shock or fire. Please contact an authorised service center for professional repair. warning If one of the following situations occur, immediately stop the air conditioner, disconnect the power, and contact the authorised service center. • If error code (except H1) appears on the display of indoor unit. • Water or other liquid is splashed into the unit.
Thefollowing followingchecks checksprior priortotocontact contactmay maysave saveyou youtime timeand andmoney. money. The Malfunctions Malfunctions Theunit unitdoes does The not operate not operate Odoursare are Odours emitted emitted Cause Cause Theunit unitdoes doesnot notoperate operateififititisis The turned on immediately afterititisis turned on immediately after turned off. This is to protect the turned off. This is to protect the unit. Please wait about 3 minutes. unit. Please wait about 3 minutes.
Indice Congratulazioni ....................................................................23 Norme di sicurezza ...............................................................24 Descrizione del prodotto .......................................................26 Display unità interna .............................................................27 Telecomando.........................................................................27 Descrizione del telecomando ...............................................
Congratulazioni Complimenti e grazie per aver scelto un condizionatore split Electrolux. È un condizionatore di qualità studiato per un uso pratico e semplice. Prima di iniziare a usare il condizionatore, leggere attentamente il libretto di istruzioni, contenente la descrizione dell’apparecchiatura e delle sue funzioni. Condizioni d'uso L'apparecchiatura è destinata all'uso domestico e applicazioni simili, tra cui: • Cucine di negozi, uffici e altri ambienti di lavoro. • Fattorie.
Norme di sicurezza All’interno del manuale sono riportati molti consigli utili per il corretto utilizzo e la manutenzione del condizionatore. Con pochi accorgimenti preventivi è possibile risparmiare tempo e denaro per l’intera durata del condizionatore. Troverete molte risposte a problemi comuni nella tabella dei suggerimenti per la risoluzione dei problemi di pagina 80 - 81. Analizzando prima questa tabella, potrebbe non essere necessario richiedere l'intervento di un tecnico.
Norme di sicurezza attenzione Selezionare la temperatura più adeguata. Ciò consente di risparmiare elettricità. Non tenere finestre e porte aperte a lungo in fase di funzionamento. Le prestazioni non risulterebbero soddisfacenti. Non bloccare l'ingresso o l'uscita dell'aria. Le prestazioni non risulterebbero soddisfacenti con anomalie di funzionamento. Tenere i materiali combustibili lontani dalle unità di almeno 1 m. Potrebbe provocare incendi.
Descrizione del prodotto Product Description Entrata Air inletaria 22 Unità interna Indoor Unit 11 13 33 44 55 Uscita aria Air Outlet 66 77 88 Unità esterna Outdoor Unit 9 12 12 11 11 Entrata aria (posteriore) Air inlet (rear) Mode Fan Temp Timer-Off Swing Light Turbo Timer-On Clock I feel Eco Entrata aria Air inlet (laterale) (side) 10 10 14 14 13 Uscita aria Air Outlet 15 15 Pannello Front panelanteriore Telecomando Remote control Display digitale Digital display Support
Display unità interna Indoor Unit Display • Se si tiene il telecomando in una posizione che corretta trasmissione segnale, • impedisce If you keeplathe remote control in a del position that possono passare anche 15 minuti prima che hinders proper signal transmission, a time lagil of segnale ricevuto. up to 15 sia minutes may occur. Signal receiver Indicatore Modalità Riscaldamento Si accende quando è attivata la funzione I Feel indicator riscaldamento It lights when I Feel function is activated.
Descrizione del telecomando Tasto Turbo Premere questo tasto in modalità COOL o HEAT per mettere la ventola in modalità Turbo ad alta velocità e il condizionatore funzionerà alla potenza massima. Premere nuovamente per annullare questa funzione. Tasto della ventola X (X-Fan) In modalità Raffreddamento e Deumidificazione, premere il tasto X-Fan per attivare la pulizia automatica.
Indicatore del display del telecomando Indicatore di trasmissione: Visualizza quando il telecomando trasmette segnali verso l'unità interna. Display della velocità della ventola Visualizza la velocità della ventola selezionata nella seguente sequenza: Display Turbo Compare quando è selezionata la funzione Turbo. “ Display I Feel Si accende quando è attivata la funzione I Feel. Display Eco Compare quando è selezionata la funzione Eco.
Primo utilizzo 1 Verificare che la spina dell’unità sia inserita e che vi sia corrente. 2 Verificare che le batterie siano state inserite correttamente nel telecomando (le spie sul telecomando sono accese). 3 Impostare l'ora con i tasti di Controllo e confermare premendo il tasto Clock. 4 Puntare il telecomando verso l'unità interna e premere il tasto ON/OFF per accendere l'unità. La modalità di funzionamento predefinita è AUTO.
Inizio 1 Tasto ON/OFF Premere questo tasto per accendere il condizionatore. L'indicatore della temperatura sul display dell'unità interna si accende. 2 Tasto Modalità Premere e selezionare DEHUMIDIFY. 2 Tasto Modalità Premere e selezionare FAN. 3 Tasto FAN Premere per selezionare la velocità della ventola desiderata: Auto, Bassa, Media e Alta. La velocità predefinita della ventola è Auto. 3 Tasti di controllo Impostare la temperatura desiderata. Di norma, impostare fra 21°C e 28°C.
3 Tasti di controllo Impostare la temperatura desiderata. Di norma, impostare fra 21°C e 28°C. 4 Tasto FAN Premere per selezionare la velocità della ventola desiderata: Auto, Bassa, Media e Alta. La velocità predefinita della ventola è Auto. suggerimenti e informazioni Nessuna indicazione della velocità della ventola compare sul telecomando se la velocità della ventola è impostata su Auto. 3 Puntare il telecomando all'unità interna, confermare l'ora impostata premendo il tasto Timer-On.
1 Premere il tasto Timer-On. 2 Impostare l'ora desiderata premendo ripetutamente o tenendo premuti i tasti di controllo fino a che sul display del telecomando non compare 18:00. 3 Confermare l'ora impostata puntando il telecomando verso l'unità interna e premendo nuovamente il tasto Timer-On. 4 Premere il tasto Timer-Off. 3 Confermare l'ora impostata puntando il telecomando verso l'unità interna e premendo nuovamente il tasto Timer-On.
Impostazione dell'orologio Funzionamento Economy (Eco) Premere il tasto Eco in modalità COOL o HEAT (ove presente), il condizionatore aumenterà la temperatura (in modalità COOL) o la diminuirà (in modalità HEAT) di 1 °C all'ora per un periodo di 2 ore. La temperatura impostata rimarrà fissa per le 5 ore successive; quindi l'unità si interromperà. Questa funzione consente una maggiore comodità e consente di risparmiare energia. Il funzionamento è consigliato per quando si va a letto la sera.
Come usare l'unità interna Opzioni aggiuntive 1 Funzione di Riavvio Rapido Il condizionatore riprende automaticamente con le impostazioni precedenti dopo un possibile guasto di corrente. • Quando il deflettore si porta nella direzione desiderata, premere nuovamente il tasto Swing e il deflettore rimarrà nella posizione in cui si trova. • Premendo nuovamente il tasto Swing, il deflettore inizierà ad oscillare in alto e in basso automaticamente.
• Non spostare manualmente i deflettori orizzontali. Utilizzare sempre il tasto Swing. Uno spostamento manuale del deflettore può provocare anomalie in fase di funzionamento. Qualora i deflettori non funzionino correttamente, spegnere immediatamente e riavviare il condizionatore.
Pulizia e manutenzione Manutenzione Occorre eseguire con regolarità le seguenti operazioni di manutenzione.
Filtro antipolveri avvertenza Non toccare o cercare di pulire il generatore di plasma freddo (se disponibile). Può essere causa di scosse elettriche. Manutenzione generale Pulire il filtro antipolveri con un aspirapolvere o con acqua, poi asciugarlo in un luogo fresco.
Suggerimenti per il funzionamento Quanto segue può verificarsi durante il normale funzionamento: 1. Protezione del condizionatore. • Protezione del compressore Dopo un’interruzione il compressore deve attendere 3 minuti prima di potere essere riacceso. • Anti-congelamento Nel caso in cui l'unità stia funzionando in modalità COOL e con una temperatura ambiente bassa, si potrebbe formare del gelo sullo scambiatore di calore.
Risoluzione dei problemi Il condizionatore non può essere riparato dall'utente. Una riparazione sbagliata può essere causa di scosse elettriche o incendio. Rivolgersi a un centro di assistenza autorizzato per una riparazione di livello professionale. avvertenza Nel caso in cui si verifichi una delle seguenti situazioni, fermare subito il condizionatore, scollegare l'alimentazione e contattare il centro di assistenza autorizzato.
Invitiamo a eseguire i seguenti controlli prima di contattare qualsiasi installatore al fine di risparmiare tempo e The following checks prior to contact may save you time and money. soldi. Difetti Causa L'apparecchiatura non funziona The unit does L'apparecchiatura non funziona se The accesa unit does notdopo operate if it is viene subito essere turnedCiò on serve immediately after it is spenta. per proteggere turned off. Thiscirca is to3protect l'unità. Attendere minuti.
Índice Enhorabuena ........................................................................43 Precauciones de seguridad ..................................................44 Descripción del producto ......................................................46 Pantalla de la unidad interior ................................................47 Mando a distancia.................................................................47 Descripción del mando a distancia .......................................
Enhorabuena Le damos la enhorabuena y las gracias por elegir un acondicionador de aire de tipo split de Electrolux. Estamos seguros de que le resultará un placer usar su nuevo acondicionador de aire. Antes de utilizarlo, le recomendamos que lea atentamente todo el manual del usuario, en el que se ofrece la descripción del acondicionador de aire y sus funciones.
Precauciones de seguridad En su interior encontrará muchas sugerencias válidas sobre cómo utilizar y mantener debidamente su acondicionador de aire. Si se molesta en observar un mínimo de cuidados preventivos se ahorrará gran cantidad de tiempo y dinero a lo largo de la vida útil de su acondicionador de aire. En el cuadro de recomendaciones para la solución de problemas de las páginas 100-101 encontrará muchas respuestas a los problemas más comunes.
Precauciones de seguridad precaución Seleccione la temperatura más adecuada. Puede ahorrarle electricidad. No deje las puertas y ventanas abiertas durante mucho tiempo durante el funcionamiento. Puede tener como resultado un bajo rendimiento. No bloquee la entrada ni salida de aire. Puede tener como resultado un bajo rendimiento y provocar averías. Mantenga los materiales combustibles alejados a 1 m como mínimo de las unidades. Pueden causar incendios.
Descripción del producto Product Description Entrada de Airaire inlet 22 UnidadUnit interior Indoor 11 13 33 44 55 Unidad exterior Outdoor Unit Salida de Air Outlet aire 66 77 88 9 12 12 11 11 Entrada de aire Air inlet (rear) (trasera) Mode Fan Temp Timer-Off Swing Light Turbo Timer-On Clock I feel Eco Entrada Air inlet de aire (side) (lateral) 10 10 14 14 13 Salida de Air Outlet aire 15 15 Panelpanel frontal Front Mando control a distancia Remote Pantalla digital Digital
Pantalla de la unidad interior Indoor Unit Display Signal receiver Indicador de modo de calefacción Se enciende cuando la función de calefacción I Feel indicator está activada. It lights when I Feel function is activated. Indicador de modo de refrigeración Turbo indicator Se enciende cuando la función de refrigeración Illuminates during Turbo operation. está activada.
Descripción del mando a distancia Tecla Turbo Pulse esta tecla en el modo COOL o HEAT para que el ventilador pase al modo Turbo de alta velocidad y el acondicionador de aire funcione a la máxima potencia. Púlsela de nuevo si desea cancelar esta función. Tecla X-Fan En los modos de refrigeración y deshumidificación, pulse el botón X-Fan para activar la autolimpieza.
Indicador de la pantalla del mando a distancia Indicador de transmisión: Muestra cuándo el mando a distancia transmite señales a la unidad interior. Pantalla Fan Speed (velocidad del ventilador) Muestra la velocidad seleccionada para el ventilador en el orden siguiente: Pantalla Turbo Muestra cuándo la función Turbo está seleccionada. “ ” (Low), “ Auto. Pantalla I Feel Muestra cuando la función I Feel está activada.
Primer uso 1 Cerciórese de que el aparato está enchufado a la red y que le llega corriente. 2 Asegúrese de que las pilas se han introducido correctamente en el mando a distancia (los pilotos del mando están encendidos). 3 Ajuste la hora con las teclas de Control y confirme pulsando la tecla Clock (reloj). 4 Apunte con el mando a distancia a la unidad interior y pulse la tecla ON/OFF para encender la unidad. El modo de funcionamiento predeterminado es AUTO.
Inicio 1 Tecla ON/OFF (encendido/apagado) Pulse esta tecla para encender el acondicionador de aire. El indicador de temperatura de la pantalla de la unidad interior se enciende. 2 Tecla Mode Púlsela para seleccionar DEHUMIDIFY. 2 Tecla Mode Púlsela para seleccionar FAN (ventilador). 3 Tecla Fan Pulse para seleccionar la velocidad deseada del ventilador entre: Auto, Low (baja), Medium (media) y High (alta). La velocidad predeterminada es Auto. 3 Teclas Control Programe la temperatura que desee.
3 Teclas Control Programe la temperatura que desee. Normalmente ajustado entre 21ºC y 28ºC. 4 Tecla Fan Pulse para seleccionar la velocidad deseada del ventilador entre: Auto, Low (baja), Medium (media) y High (alta). La velocidad predeterminada es Auto. consejos e información No aparece ninguna indicación de velocidad del ventilador en el mando a distancia si se ha seleccionado la velocidad Auto.
1 Pulse la tecla Timer-On. 2 Ajuste la hora que desee pulsando repetidamente o manteniendo pulsadas las teclas Control hasta que 18:00 aparezca en la pantalla del mando a distancia. 3 Confirme la hora apuntando con el mando a distancia a la unidad interior y pulsando de nuevo la tecla Timer-On. permanece en la pantalla del mando a distancia. El indicador Timer en el panel de la pantalla de la unidad interior se enciende.
Ajuste del reloj Funcionamiento de ahorro (Eco) Pulse la tecla Eco en el modo COOL o HEAT (en su caso); el acondicionador de aire aumenta (en modo COOL) o disminuye (en modo HEAT) automáticamente 1ºC por hora en un período de 2 horas. La temperatura ajustada queda fija durante las próximas 5 horas y después la unidad se para. Esta función ofrece más comodidad y ahorra energía. Se recomienda para dormir.
Uso de la unidad interior Opciones adicionales 1 Función de rearranque inteligente El acondicionador de aire se reanuda automáticamente con los ajustes anteriores tras un eventual corte de corriente. • Cuando la lámina se mueva en la dirección deseada, pulse de nuevo la tecla Swing para que la lámina permanezca donde se encuentra. • Pulse la tecla Swing de nuevo para que la lámina empiece a oscilar hacia arriba y hacia abajo automáticamente.
• No mueva la lámina horizontal manualmente. Utilice siempre la tecla Swing. Si se mueve la lámina manualmente, puede provocar averías durante el funcionamiento. Si la lámina funciona mal, detenga el acondicionador de aire y arránquelo de nuevo. • El ángulo de abertura de la lámina horizontal no debe establecerse demasiado pequeño, dado que puede menoscabar el rendimiento de enfriamiento o calefacción debido a lo restringido de la zona para el flujo de aire.
Limpieza y mantenimiento Mantenimiento Se deben realizar periódicamente las siguientes operaciones de mantenimiento.
Filtro de polvo advertencia No toque ni intente limpiar el generador de frío de plasma (en su caso). Puede causar descargas eléctricas. Limpie el filtro de polvo con una aspiradora o agua y, seguidamente, séquelo en un lugar fresco. Filtro de polvo Mantenimiento general Si el acondicionador de aire no va a usarse durante un largo período de tiempo: • Póngalo en funcionamiento en el modo de solo ventilador (FAN) durante aproximadamente 3 ó 4 horas para que la unidad se seque completamente.
Consejos de funcionamiento Cabe la posibilidad de que durante un funcionamiento normal se produzcan los siguientes sucesos: 1. Protección del acondicionador de aire. • Protección del compresor El compresor no puede volver a arrancar antes de que transcurran 3 minutos después de pararse. • Anticongelación Si la unidad funciona en el modo COOL y a baja temperatura ambiente, puede formarse escarcha en el condensador.
Solución de problemas El acondicionador de aire no lo puede reparar el usuario. Las reparaciones incorrectas pueden causar incendios o descargas eléctricas. Póngase en contacto con un centro de servicio autorizado para obtener una reparación profesional. advertencia Si se produce alguna de las siguientes situaciones, pare inmediatamente el acondicionador de aire, desconecte la alimentación y póngase en contacto con el centro de servicio técnico.
Las antes may de ponerse entime contacto pueden ahorrarle tiempo y dinero. Thesiguientes following comprobaciones checks prior to contact save you and money. Anomalías Malfunctions Causa Cause not operate La unidad no funciona si se enciende The unit does not operate if it is inmediatamente después de turned on immediately after it is apagarse. Esto sirve para proteger la turnedEspere off. This is to protect the unidad. unos 3 minutos. Se producen olores.
İçindekiler Tebrikler ................................................................................63 Güvenlik Önlemleri ...............................................................64 Ürün Tanımı ..........................................................................66 İç Mekan Ünitesi Ekranı .......................................................67 Uzaktan Kumanda.................................................................67 Uzaktan Kumanda Açıklaması .........................................
Tebrikler Electrolux split tipi klima seçtiğiniz için tebrik ve teşekkür ederiz. Yeni klimanızı kullanmanın bir zevk olduğunu hissedeceğinizden eminiz. Klimayı kullanmadan önce, klima ve fonksiyonlarının açıklandığı kullanma kılavuzunun tümünü okumanızı öneririz. Bir elektrikli cihaz kullanırken daima mevcut olan risklerden kaçınmak için, klima doğru şekilde kurulmuş olmalıdır ve yanlış kullanımı ve tehlikeleri önlemek için güvenlik talimatlarını dikkatlice okumanız gerekmektedir.
Güvenlik önlemleri Bu kılavuz içinde, klimanızın kullanımı ve bakımı hakkında size yardımcı olabilecek yararlı ipuçları bulacaksınız. Yapacağınız küçük bir önleyici bakım, klimanızın ömrü süresince size ciddi şekilde zaman ve para tasarrufu sağlayabilir. Sayfa 20-21'deki arıza bulma ipuçları tablosunda genel sorunlara ilişkin pek çok yanıt bulacaksınız. Öncelikle sorun giderme ipuçları tablosuna göz atarsanız, servisi aramanıza gerek kalmayabilir.
Güvenlik önlemleri dikkat En uygun sıcaklığı seçin. Elektrik tasarrufu sağlayabilir. Çalışma sırasında pencere ve kapıları uzun süre açık bırakmayın. Yetersiz performansa neden olacaktır. Hava girişi ya da çıkışını tıkamayın. Yetersiz performansa ve arızalara neden olacaktır. Yanıcı maddeleri ünitelerden en az 1 metre uzakta tutun. Yangına neden olabilir. Dış ünite üstüne çıkmayın ya da üzerine ağır şeyler koymayın. Hasara ya da yaralanmaya neden olabilir. Klimayı kendiniz onarmaya çalışmayın.
Ürün Tanımı Product Description Hava girişi Air inlet 22 İç Mekan Indoor UnitÜnitesi 11 13 33 44 55 Hava Çıkışı 66 Air Outlet 77 88 Dış Ünite Outdoor Unit 9 12 12 11 11 Hava (arka) Air inletgirişi (rear) Mode Fan Temp Timer-Off Swing Light Turbo Timer-On Clock I feel Eco Hava girişi Air inlet (yan) (side) 10 10 14 14 13 Hava Air Outlet Çıkışı 15 15 Ön panel Front panel Uzaktancontrol kumanda Remote Dijital display gösterge Digital Uzaktancontrol kumanda tutucu Remote holder
İç Mekan Ünitesi Ekranı Indoor Unit Display Signal receiver Isı Modu göstergesi I Feel indicator Isıtma fonksiyonu etkinleştiğinde yanar It lights when I Feel function is activated. Soğutma Modu göstergesi Turbo indicator Soğutma fonksiyonu etkinleştiğinde yanar Illuminates during Turbo operation. Güç AÇIK/KAPALI göstergesi Eco (Economy) indicator Cihaz çalışıyorken ya da bekleme Illuminates when ECO function is in operation.
Uzaktan Kumanda Açıklaması Turbo Tuşu Fanı yüksek hızlı Turbo moduna almak için SOĞUTMA ya da ISITMA modundayken bu tuşa basın. Böylece, klima maksimum güçte çalışacaktır. Bu fonksiyonu iptal etmek için yeniden basın. X-Fan Düğmesi Soğutma ve Nem giderme modunda, Otomatik Temizlemeyi etkinleştirmek için X-Fan tuşuna basın. Ünite kapatıldıktan sonra, bakteri ve küf oluşumunu önlemek amacıyla iç mekan ünitesini kurutmak için iç mekan fanı 10 dakika çalışmayı sürdürecektir.
Uzaktan Kumanda Ekranı Göstergesi İletim Göstergesi: Uzaktan kumanda iç mekan ünitesine sinyal gönderdiğinde gösterilir. Turbo Göstergesi Turbo fonksiyonu seçildiğinde gösterilir. Hissediyorum Ekranı Hissediyorum fonksiyonu etkinleştiğinde gösterilir. Eko Ekranı Eko fonksiyonu seçildiğinde gösterilir. Sağlıklı Ekranı Healthy (Sağlıklı) tuşuna basıldığında gösterilir. Kaldırmak için Healthy (Sağlıklı) tuşuna yeniden basın.
İlk kullanım 1 Fişin takılı olduğundan ve elektrik geldiğinden emin olun. 2 Pillerin, uzaktan kumandaya doğru yerleştirildiğinden emin olun (uzaktan kumandadaki ışıklar açık olur). 3 Control (Kontrol) tuşları ile zamanı ayarlayın ve Clock (Saat) düğmesine basarak onaylayın. 4 Uzaktan kumandayı iç mekan ünitesine tutun ve üniteyi açmak için ON/OFF (AÇMA/KAPAMA) tuşuna basın. Varsayılan çalıştırma modu OTOMATİK'tir.
Başlangıç 1 ON/OFF (AÇMA/KAPAMA) Tuşu Klimayı açmak için bu tuşa basın. İç mekan ünitesinin ekranında yer alan sıcaklık göstergesi yanar. 2 Mode (Mod) Tuşu NEM ALMA modunu seçmek için basın. 2 Mode (Mod) Tuşu FAN modunu seçmek için basın. 3 Fan Tuşu İstediğiniz fan hızını seçmek için basın: Otomatik, Düşük, Orta ve Yüksek. Varsayılan fan hızı Otomatik'tir. 3 Control (Kontrol) Tuşları İstenilen sıcaklığı ayarlayın. Normalde 21ºC ile 28ºC arasına ayarlanır.
3 Control (Kontrol) Tuşları İstenilen sıcaklığı ayarlayın. Normalde 21ºC ile 28ºC arasına ayarlanır. 4 Fan Tuşu İstediğiniz fan hızını seçmek için basın: Otomatik, Düşük, Orta ve Yüksek. Varsayılan fan hızı Otomatik'tir. ipuçları ve bilgiler Otomatik fan hızı seçilirse, uzaktan kumandada hiç bir fan hızı bilgisi görüntülenmez. 3 Uzaktan kumandayı iç mekan ünitesine doğrultun, Timer-On (Zamanlayıcı ile Açma) düğmesine basarak ayarlanan zamanı onaylayın. sembolü uzaktan kumandanın ekranında kalır.
1 Timer-On (Zamanlayıcı ile Açma) tuşuna basın. 2 İstenilen zamanı ayarlamak için, uzaktan kumandanın ekranında saat 18:00 görününceye kadar Control (Kontrol) tuşlarına tekrar tekrar basın veya basılı tutun. 3 Uzaktan kumandayı iç mekan ünitesine doğrultarak ve tekrar Timer-On (Zamanlayıcı ile Açma) tuşuna basarak ayarlanan zamanı onaylayın. 4 Timer-Off (Zamanlayıcı ile Kapama) tuşuna basın.
Saatin Ayarlanması Ekonomik (Eko) Çalıştırma SOĞUTMA veya ISITMA (varsa) modunda Eco (Eko) tuşuna basın; klima otomatik olarak 2 saatlik bir periyodun üzerinde saatte 1°C yükselir (SOĞUTMA modunda) veya düşer (ISITMA modunda). Ayarlanan sıcaklık 5 saat boyunca kalır ve daha sonra ünite durur. Bu fonksiyon daha fazla konfor ve enerji tasarrufu sağlar. Bu fonksiyonun yatarken kullanılması önerilir.
İç Mekan Ünitesinin Kullanılması Ek Seçenekler 1 Akıllı Yeniden Başlatma Fonksiyonu Olası bir elektrik kesintisi sonrası klima otomatik olarak önceki ayarlarla yeniden çalışmaya başlar. • Pancur istenen yöne geldiğinde, Swing (Salınım) tuşuna tekrar basın; pancur mevcut konumunda kalacaktır. • Swing (Salınım) tuşuna tekrar basın; pancur otomatik olarak aşağı yukarı hareket etmeye başlayacaktır.
• Yatay pancuru elle hareket ettirmeyin. Daima Swing (Salınım) tuşunu kullanın. Pancurun elle hareket ettirilmesi, çalıştırma sırasında işlev bozukluğuna neden olabilir. Pancur işlev bozukluğu gösterirse, klimayı durdurun ve yeniden başlatın. • Yatay pancurun açık ağzı çok kısık olmamalıdır, çünkü fazla kısılmış hava çıkışından dolayı soğutma veya ısıtma performansı düşebilir. • Yatay pancur kapalı konumdayken klimayı çalıştırmayın.
Temizlik ve Bakım Bakım Aşağıdaki bakım işlemleri düzenli şekilde yapılmalıdır.
Toz filtresi uyarı Soğuk plazma üretecine (varsa) dokunmayın ya da temizlemeye çalışmayın. Elektrik çarpmasına neden olabilir. Genel bakım Toz Filtresini elektrikli süpürge ya da su ile temizleyin, ardından serin bir yerde kurutun. Klima uzun süre kullanılmayacaksa: • Ünitenin tamamen kuruması için sadece FAN modunda 3~4 saat çalıştırın. Toz filtresi • Üniteyi kapatın ve fişini prizden çekin. Pilleri uzaktan kumandadan çıkarın. Sağlıklı filtre • Dış ünite periyodik bakım ve temizlik gerektirir.
Çalıştırma İpuçları Normal çalıştırma sırasında aşağıdaki olaylar meydana gelebilir: 1. Klimanın koruması. • Kompresör koruması Durduktan sonra kompresör 3 dakika süreyle yeniden başlatılamaz • Donma önleyici Ünite SOĞUTMA modunda ve düşük ortam sıcaklığında çalışıyorsa, ısı eşanjörü üzerinde karlanma oluşabilir. İç mekan ısı eşanjörü sıcaklığı 0ºC altına düştüğünde, kompresör üniteyi korumak için çalışmayı durduracaktır.
Sorun Giderme Klimaya kullanıcı bakım yapamaz. Yanlış onarım elektrik çarpmasına ya da yangına neden olabilir. Profesyonel onarım için yetkili bir servis merkezine başvurun. uyarı Aşağıdakilerden biri ortaya çıkarsa, klimayı hemen durdurun, gücü kesin ve yetkili servis merkezine başvurun. • İç mekan ünitesinin ekranında hata kodu (H1 hariç) görünürse. • Üniteye su veya başka sıvılar giriyor.
Başvurudan önce aşağıdaki kontrolleri yapmak ve money. para tasarrufu sağlayabilir. The following checks prior to contact may savesize youzaman time and Arızalar Malfunctions Sebep Cause Ünite The unit does çalışmıyor not operate Kapatıldıktan sonra if it is The unit doeshemen not operate açılırsa ünite çalışmaz. turned on immediately Bunun after it is amacı korumaktır. turnedüniteyi off. This is to protect the Yaklaşık 3 dakika unit. Please wait bekleyin. about 3 minutes.
www.electrolux.