
User manual


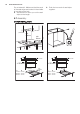
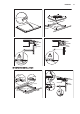
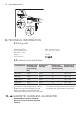
Table Of Contents
8. INSTALLATION
WARNING!
Refer to Safety chapters.
8.1 Before the installation
Before you install the hob, write down the
information bellow from the rating plate.
The rating plate is on the bottom of the
hob.
Serial number ...........................
8.2 Built-in hobs
Only use the built-in hobs after you
assemble the hob into correct built-in units
and work surfaces that align to the
standards.
During installation in combustible matter,
NIN SEV 1000 and fire protection
guidelines and regulations of the
Association of Cantonal Fire Insurance
shall be strictly adhered to.
8.3 Connection cable
• The hob is supplied with a connection
cable.
• Replace the damaged mains cable with
a special cable (type H05VV-F or
higher). Speak to your local Service
Centre.
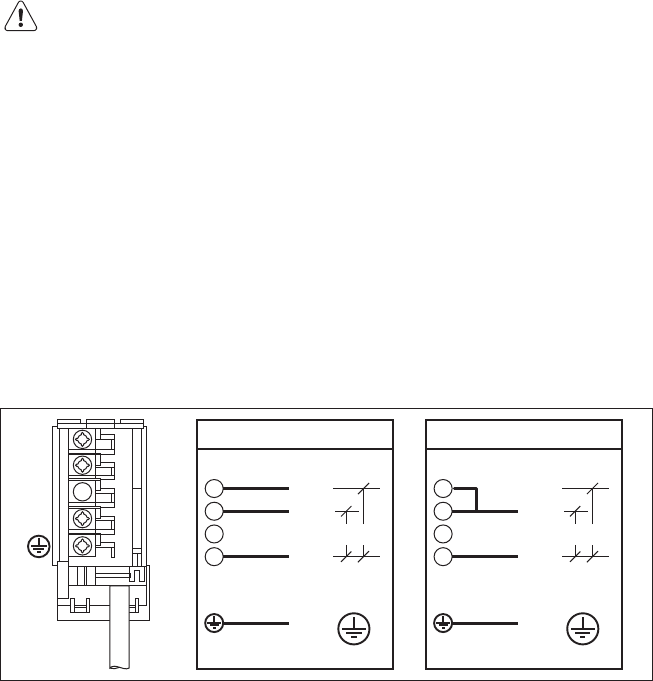
8.4 Electrical connection
Install the hob with a socket supply line. If
there is no socket supply line, the fixed
home electrical system must include an
isolating device with at least a 3 mm-
contact separation to enable a
simultaneous and all-pole cut off from the
mains (according to NIN SEV 1000).
1
2
3
N
1 L1
L2
N
PE
400V 2L-1N ~
2
3
N
220V-240V
1
L1
N
PE
220V - 240V ~
2
3
N
220V-240V
387 8794 00
8.5 Attaching the seal to the
rabbet
1. Clean the rabbets in the worktop.
2. Cut the supplied seal stripe into 4
stripes.
The stripes must have the same length as
the rabbets.
3. Cut the ends of the stripes at an angle
of 45°.
They should fit in the corners of the
rabbets accurately.
4. Attach the stripes to the rabbets.
Do not extend the stripes. Do not bond
ends of stripes one over another.
After you assemble the hob, seal the
remaining gap between glass ceramic and
the worktop with silicon. Make sure the
silicon does not get under the glass
ceramic.
8.6 Attaching the seal
1. Clean the worktop around the cut out
area.
2. Attach the supplied seal stripe to the
lower edge of the hob along the outer
edge of the glass ceramic.
ENGLISH
15